Showing posts with label baking. Show all posts
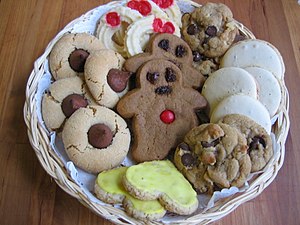
Plateful of Christmas CookiesImage via Wikipedia
REPOST

I've been seeing cookie exchanges being mentioned a lot lately. I've been hosting them on and off twenty years now and so I definitely have a set of rules that I think work out really well.  Most of the time I've done these at my workplace where you can have as many as 20 people participating. It can get a bit unruly. Sure, there are plenty of ways to host, but this is what works for me.

The Two Basic Rules

1) Your contribution must be homemade, made from scratch. Shortcutting it with brownie mixes or slice and bake cookies just won't cut it in my world.

2) Festive cookies only. Which really means... no chocolate chip, oatmeal, peanut butter, or rice krispie treats allowed. I'm not interested in a cookie that I can get any time of the year at any bake sale or coffee counter. It should be something you only make once or twice a year that is associated with the holidays or special occasions.

How It All Works

I divide people into teams of eight people. That means that each person must make a total of four dozen cookies. You can vary the team sizes, but you want to keep it manageable for the participants. You don't want to ask them to have to bake eight dozen cookies - they wouldn't want to do it!

They make individual gift plates or bags with six cookies in each. They can provide the recipe if they wish, but it is not required. Some people do have their special, family recipes, so I don't push it. I've also asked people who want to to submit their recipes to me a week in advance by email. That way I can put together a little cookie book to give everyone the day of the exchange.

On the day of the exchange, each team swaps plates/bags so that you go home with eight different kinds of cookies. Now this does mean that you have one that is your own submission. Most of the time we take our own plates and donate them for eating there, on the spot. That way people can sample cookies from other teams.

Other Methods

There are other methods of doing cookie exchanges. For instance, everyone brings their plate of cookies and you set them out buffet-like. Each person goes down the line and takes one or two of each cookie. The reason I don't like this style is that people often want to go home with their cookies to share with their families. If there is only one of Sara's Kris Kringle balls, then my spouse/child won't get to try it or there could be fights among siblings.

Cookie exchanges are a lot of fun and the rules can be altered to fit your agenda. With holidays and cookies paired together, you can't help but be in a festive mood.


Repost from 10/10/10

Monday is our annual United Way cake auction at work. Being a baker, I always contribute something. I stay away from trying to snag the best decorated cake because, as I've mentioned before, I prefer cake to frosting, quality vs looks. I might not get the recognition in the building by getting a prize, but I have the pride of knowing that my cake stands up against all the rest for being a delicious, high quality contribution.

This time around I wanted to do something different. But these days it is hard to find an unusual cake, something that people haven't had before. I wanted my typical, high quality, but without having to get ultra-gourmet with three days of baking/assembly and a zillion steps. I found what I wanted in a Hummingbird Cake.

The Hummingbird Cake became well known after it first appeared in Southern Living magazine in 1978. There are a couple of theories to its name. One says that the sweetness of the cake reminds one of the nectar the hummingbirds feed on. Another says that it comes from the humming "mmmmmms" coming from people after they take a bite.

Repost from  8/17/10

GF Note: For those unfamiliar with my blog, I do not have any dietary reason that I need to eat gluten-free. I choose to bake gluten-free within my home because I have an interest in all the other types of grains and flours that have been used by cultures for centuries. Why is America so wheat focused? I figure I can get gluten filled products everywhere else outside my home.

This is one of the most successful gluten-free baking recipes I've done yet. The banana acts as the 'glue' to hold it together well without the gluten. You will not notice any difference from regular banana bread. Definitely give this recipe a try.

Gluten-free Banana Bread

2 eggs
3 bananas, mashed
1/2 c yogurt
1/2 c butter, melted
2 t vanilla
3 c gluten-free flour blend
3/4 c brown sugar
3/4 c sugar
1 1/2 t xanthan gum
1 1/2 t baking soda
1/2 t salt
1 c chocolate chips, optional

Grease bread pans and set aside. Heat oven to 350 degrees.

In a small bowl mix together eggs, yogurt, banana, butter, and vanilla.
In a large bowl mix together all the dry ingredients.
Add the wet ingredients to the dry and mix thoroughly. Mix in chocolate chips if desired. Pour into pans and bake for 45-60 minutes, checking to make sure a tester draws out cleanly. For best results, let sit overnight for best flavor.


Bananas

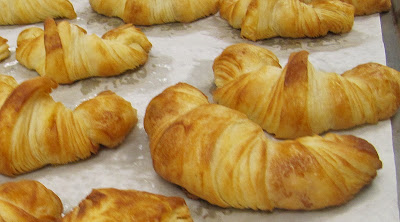
The Daring Bakers go retro this month! Thanks to one of our very talented non-blogging members, Sarah, the Daring Bakers were challenged to make Croissants using a recipe from the Queen of French Cooking, none other than Julia Child!

This challenge was very similar to the one we did for the Danish Braid back in 2008, and very time consuming. This is one thing where I prefer to say, "Been there, done that, don't need to do it again." It's just so much easier to go out and buy them!
Stay tuned for November when I host the challenge!
I have a brown thumb. My horticulturist girlfriend once gave me an arranged plant bowl swearing they were hardy plants that I would barely have to take care of. Still killed it.

That didn't stop me from wanting a vegetable garden. I had this convenient dirt patch in my backyard that was perfect for little ol me. I built up a raised garden using torn up sidewalk concrete, poured in a yard of compost, and bought a soaker hose and timer. After all, if the soaker hose is on a timer, then I won't have to worry about forgetting to water.

This is my third year. Each year it gets a little better. I seem to do well with tomatoes and basil. Last year I had good cucumbers, but not so good on zucchini. This year I have great tomatoes, zucchini, spaghetti squash, basil and Thai basil, and a jalapeno plant.

Vegan have fork lines, regular do not

It’s been years since I last made snickerdoodle cookies. A classic recipe that’s been around for over 100 years, the cookie with the strange name is really just a cinnamon sugar cookie.

Me, I’m a big chocolate chip cookie fan. They are my go-to cookie. But I recently had a nostalgic turn where I was thinking about snickerdoodles and the fact that I hadn’t made them in a really long time. I also was learning a little about vegan baking and decided that this would be a good cookie to experiment with. After all, when you are comparing like recipes, you want the simplicity of a sugar cookie.

The reason I wanted to try baking them vegan involves a certain food snobbery that I think many of us share. I’ve been into the Sugar Plum Vegan shop a couple of times over the last few months but never bought anything. How many times have you done this? Something is labeled vegan or gluten-free and you run away as if it’s some sort of diseased item. “I want REAL food!” you proclaim. “I use butter, eggs, flour, etc. Not substitutes!”

Filled Meringue Coffee Cake

The March 2011 Daring Baker’s Challenge was hosted by Ria of Ria’s Collection and Jamie of Life’s a Feast. Ria and Jamie challenged The Daring Bakers to bake a yeasted Meringue Coffee Cake, a gorgeous brioche-like dough rolled jellyroll style around a whipped meringue and various fillings, shaped into a wreath and baked. "The cake is light and fluffy, barely sweet, the meringue miraculously melts into the dough as it bakes leaving behind just a hint of sweetness and adding to the perfect moistness of the cake."

One thing that is nice about the Daring Bakers is that there is a forum where people post their finished products for others to see and get advice. By mid-month a good many of the bakers have theirs done and it is good to scroll through to see what people chose to fill their versions with. Some really follow the instructions, so go way off on their own, but all help to give you ideas of the possibilities out there. 


I decided that it was the perfect time to try my hand at a baked cheesecake. I had the wine/cheese party (above) coming up and I certainly didn't need an entire cheesecake in my frig. Although I would love every bite, I'm sure my scale would not. So here was my chance to bake one and share it for an event.

I chose a raspberry cheesecake recipe from Cooking Pleasures magazine. It was pretty easy, although I didn't have any raspberry jam. I cheated and put a bit of black currant jam on the bottom - which didn't spread well. So then I gave that up and just poured the cheese mixture on top. I paid attention to every cheesecake tip sheet out there and took it out of the oven when it was still a little jiggly. I'm proud to say it came out perfectly and was a hit.

Raspberry Cheesecake

CRUST
1 (5.3-oz.) pkg. pure butter shortbread cookies, crushed (about 1 1/4 cups)
2 tablespoons unsalted butter, melted
1/4 cup raspberry preserves, melted

CHEESECAKE
1 (10-oz.) pkg. frozen raspberries, thawed
3 (8-oz.) pkg. cream cheese, softened
1/2 cup unsalted butter, softened
1 cup sugar
2 tablespoons all-purpose flour
1/2 cup sour cream
2 teaspoons lemon juice
2 eggs

1. Heat oven to 350°F. Wrap outside of 9-inch springform pan with heavy-duty foil. Combine crushed cookies and melted butter in small bowl; press into bottom of pan. Bake 8 to 10 minutes or until slightly darker in color. Cool slightly; gently spread preserves over crust.

2. Puree thawed raspberries in food processor or blender until smooth. Strain through medium strainer, pressing with spatula to remove seeds. Reserve 1/2 cup puree. (Save remaining puree for another use.)

3. Beat cream cheese and 1/2 cup butter at medium-low speed until smooth. Beat in sugar and flour just until blended. Beat in sour cream, reserved raspberry puree and lemon juice. Beat in eggs one at a time. Pour over crust.

4. Place springform pan in large shallow pan. Add enough hot tap water to come halfway up sides of springform pan. Bake 40 to 45 minutes or until edges are puffed and top is dry to the touch. Center should move slightly when pan is tapped but should not ripple as if liquid. Remove cake from water bath; remove foil. Cool completely on wire rack. Refrigerate overnight.

5. Garnish with raspberries. Store in refrigerator.

16 servings
As we are in lemon season I thought I'd repost a couple lemon recipes.

This time around I made lemon souffles. The lemon curd in the bottom of the ramekin is essential for this version. Otherwise the souffle itself is light and boring. I will be trying another version in the future for comparison, since I wasn't too thrilled with this one.

* 3 egg whites
* 5 tablespoons castor sugar or superfine sugar
* 3 egg yolks
* 1 large lemon, zested and juiced
* 2 tablespoons confectioners' sugar for dusting

* lemon curd (see microwave lemon curd)


Preheat the oven to 350 degrees F (175 degrees C).
Spoon a tablespoon or so of lemon curd in the bottom of 4 ramekins.
In a medium glass or metal bowl, whip egg whites with an electric mixer. When they are able to hold a soft peak, sprinkle in 1 tablespoon of the sugar, and continue mixing until stiff. Whisk the remaining 4 tablespoons of sugar into the egg yolks along with the zest and juice of the remaining lemon. Fold a couple of spoonfuls of the egg whites into the yolks to lighten them up, then fold in the rest of the whites. Spoon into the ramekins over the lemon curd, and run a finger around the inside of each rim.
Place the ramekins onto a baking sheet, and place in the preheated oven. Bake for 15 to 17 minutes, until puffed and golden brown. Let cool for about 5 minutes before serving.


The 2010 November Daring Bakers’ challenge was hosted by Simona of briciole. She chose to challenge Daring Bakers’ to make pasta frolla for a crostata. She used her own experience as a source, as well as information from Pellegrino Artusi’s Science in the Kitchen and the Art of Eating Well.

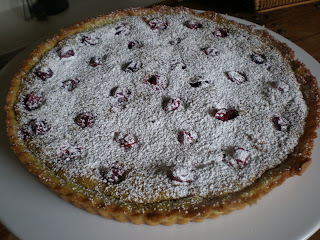
We were given the options of how we filled the crust. I decided to go with a pistachio frangipane and cranberries. The green and red are perfect for the holiday season. The only change I would make would be to add a lot more cranberries or fruit. This would be really good with apricots or tart apples as well.

I first got interested in frangipane because there is often a pistachio frangipane tart with raspberries served at the Tower Cafe. Frangipane can be made with other nuts as well, like almonds or hazelnuts.

Crust (Pasta Frolla)

Ingredients:
  • 1/2 c. minus 1 tablespoon [105 ml, 100 g, 3 ½ oz] superfine sugar (see Note) or a scant 3/4 cup [180ml, 90g, 3 oz] of powdered sugar
  • 1 and 3/4 cup [420 ml, 235 g, 8 1/4 oz.] unbleached all-purpose flour
  • a pinch of salt
  • 1 stick [8 tablespoons / 4 oz. / 115 g] cold unsalted butter, cut into small pieces
  • grated zest of half a lemon
  • 1 large egg and 1 large egg yolk, lightly beaten in a small bowl
Note: Superfine sugar is often also referred to as ultrafine, baker’s sugar or caster sugar. It’s available in most supermarkets. If you cannot find “superfine” sugar, you can make your own by putting some regular granulated sugar in a food processor or blender and letting it run until the sugar is finely ground.

  1. Put sugar, flour, salt, and lemon zest in the food processor and pulse a few times to mix.
  2. Add butter and pulse a few times, until the mixture has the consistency of coarse meal.
  3. Empty food processor's bowl onto your work surface.
  4. Make a well in the center of the mounded flour and butter mixture and pour the beaten eggs into it (reserve about a teaspoon of the egg mixture for glazing purposes later on – place in the refrigerator, covered, until ready to use).
  5. Add the lemon zest to your flour/butter/egg mixture.
  6. Use a fork to incorporate the liquid into the solid ingredients, and then use your fingertips.
  7. Knead lightly just until the dough comes together into a ball.
  8. Shape the dough into a flat disk and wrap in plastic wrap. Place the dough in the refrigerator and chill for at least two hours. You can refrigerate the dough overnight.


Pistachio Frangipane (double the recipe for this size tart)


1/2 cup plus 2 tablespoons shelled natural unsalted pistachios (about 3 ounces)
1/4 cup plus 1 tablespoon sugar
2 teaspoons grated orange peel
1/8 teaspoon baking powder
3 tablespoons unsalted butter, room temperature
1 large egg

Process 1/2 cup pistachios, 1/4 cup sugar, orange peel, and baking powder in processor until nuts are finely ground, scraping down sides occasionally. Add butter and egg; process until blended.


Assembly

  1. Heat the oven to 350ºF. 
  2. Take the pasta frolla out of the fridge, unwrap it and cut away ¼ of the dough. Reserve this dough to make a lattice top for the crostata if you like. Refrigerate this dough while you work on the tart base. (I just made a small jam tart for myself.)
  3. To help roll the crostata dough, keep the dough on top of the plastic wrap that you had it wrapped in. This can help rolling the dough and can also help when transferring the dough to your pan. You can also use parchment paper for this. However, you can also roll the dough directly on a work surface if you prefer.
  4. Lightly dust the top of the dough and your work surface (if you’re rolling directly on a work surface) with flour. Keep some flour handy to dust the dough as you go along.
  5. If the dough is very firm, start by pressing the dough with the rolling pin from the middle to each end, moving the rolling pin by a pin's width each time; turn the dough 180 degrees and repeat; when it softens, start rolling.
  6. Roll the dough into a circle about 1/8th inch (3 mm) thick.
  7. If you used the plastic wrap or parchment paper as rolling surface, flip dough over the pan, centering it, and delicately press it all around so the corners are well covered. Peel away the plastic wrap.
  8. Trim the excess dough hanging over the edges of the pan. Press the remaining dough around the border into the sides of the pan making sure the border is an even thickness all the way around.
  9. Prick the bottom of the dough with a fork in several places. 
  10. Place in the refrigerator for 30 minutes to rechill.
  11. After it has chilled, remove the crust and fill it with the frangipane. Top it with fruit of choice. Pistachio works well with tart fruits like apricots, tart apples, and cranberries.
  12. Bake in the oven for 40 minutes. You want to be able to pull a toothpick out clean.
  13. When done, remove the tart from the oven and let cool. If you have used a tart pan with a removable bottom, then release the tart base from the fluted tart ring. Make sure the tart is completely cool before slicing and serving. Top with a bit of whipped cream or creme fraiche.


Pistachio

I don't need to bake gluten-free, I choose to. To see why, read my blog post: Baking Gluten-fee Even Though I Don't Have To.


The October 2010 Daring Bakers challenge was hosted by Lori of Butter Me Up. Lori chose to challenge DBers to make doughnuts. She used several sources for her recipes including Alton Brown, Nancy Silverton, Kate Neumann and Epicurious.

I decided against any of her recipes because I was having a hankering for apple cider doughnuts like those up at Apple Hill. I went with a friend on Saturday to get my apple cider and some apples as well as to enjoy the ones sold at Rainbow Orchards.

Unfortunately mine are not as good as theirs. Maybe because I chose to go gluten-free. It could also have been due to old baking powder. I need to buy a fresh can and this recipe does call for two teaspoons of it. My doughnuts tasted fine. They were just really dense and definitely should be eaten fresh from the fryer. Like any good doughnuts, they lose their appeal the longer they sit out. I had toyed with the idea of using a recipe that did require yeast, but since Rainbow's don't have yeast I figured I would give the first attempt a go with just a regular cake recipe. Look in the future for me to try a yeast version - probably with pumpkin.

This was the first time I had made doughnuts and they weren't difficult at all. I guess I've always shied away from them because of the deep frying. I don't have a deep fryer and so just had to use a pot and guess at keeping my temperature correct.


Apple Cider Doughnuts

Original recipe altered from Food Network. If you make them normal, follow the black instructions. Gluten-free alterations are in red. 

2 apples
2 1/2 cups apple cider
3 1/2 cups all-purpose flour, plus more for dusting (or gluten-free blend + 2 t xanthan gum)
4 teaspoons baking powder
1/4 teaspoon baking soda
3 1/2 teaspoons ground cinnamon
1 teaspoon salt
1/4 teaspoon freshly grated nutmeg
1 2/3 cups granulated sugar
3 tablespoons vegetable shortening
1 large egg plus 1 egg yolk
1/4 cup buttermilk
1 teaspoon vanilla extract
1/4 cup confectioners' sugar
Vegetable oil, for frying

Core and coarsely chop the apples (do not peel). Combine with 1 1/2 cups cider in a medium saucepan over medium heat; cover and cook until softened, about 8 minutes. Uncover and continue cooking until the apples are tender and the cider is almost completely reduced, about 5 minutes. Puree with an immersion blender or in a food processor until smooth. Measure the sauce; you should have 1 cup. (Boil to reduce further, if necessary.) Let cool slightly.

Whisk the flour (or GF flour mixture), baking powder, baking soda, 1 1/2 teaspoons cinnamon, salt and nutmeg in a medium bowl.

Beat 2/3 cup granulated sugar and the shortening in another bowl with a mixer on medium speed until sandy. Beat in the egg and yolk, then gradually mix in the applesauce, scraping the bowl. Beat in half of the flour mixture, then the buttermilk and vanilla, and then the remaining flour mixture. Mix to make a sticky dough; do not overmix.

Scrape the dough onto a lightly floured sheet of parchment paper and pat into a 7-by-11-inch rectangle, about 1/2 inch thick. Cover with plastic wrap and refrigerate for at least 2 hours or overnight.

Meanwhile, make the glaze: Simmer the remaining 1 cup cider in a small saucepan over medium heat until reduced to 1/4 cup. Whisk in the confectioners' sugar until smooth and glossy, then set aside. Mix the remaining 1 cup granulated sugar and 2 teaspoons cinnamon in a shallow bowl; set aside for the topping.


Heat 2 inches of vegetable oil in a large heavy-bottomed pot over medium-high heat until a deep-fry thermometer registers 350 degrees. Line a baking sheet with paper towels. Cut the chilled dough into 12 rounds, using a floured 2 1/2- or 3-inch biscuit cutter, then cut out the middles with a 1-inch cutter (or use a doughnut cutter). Slip 2 or 3 doughnuts at a time into the hot oil and fry until golden brown, 1 to 2 minutes per side, adjusting the heat as needed. Transfer to the paper towels to drain.

Dip one side of each doughnut into the cider glaze, letting the excess drip off; dip just the glazed side in the cinnamon-sugar or roll all over in cinnamon-sugar, if desired. Serve warm.


Repost from archive

Update 10/08: Attention diabetics! I made this recently with stevia! For those that don't know, stevia is a natural plant product that is molecularly structured so that it doesn't enter the bloodstream and mess with your blood sugar levels. I substituted 1/4 cup of stevia for the 1/3 cup of sugar. Also, because this is flourless, you don't get the blood sugar change from the carby flour either!

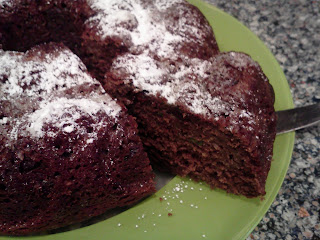
Today I tried a new recipe and it was a hit. Chestnut Chocolate Truffle Cake - flourless. I was especially thrilled because my best friend's sister is a 5 star pastry chef and she declared it delicious. The recipe, below, is European and in metric. But I've supplied the American equivalents next to it.


Another important aspect is the chestnut piece. You'll see that it is labor intensive with roasting and boiling fresh chestnuts. But my Romanian coworker saved the day. She told me of a European market that sold the chestnut puree in a jar (Marconi and Fair Oaks Blvd.)! Now I can make this cake any time!

The texture of this cake is really light and smooth. And with the chestnut puree, it is a very easy recipe.


Chestnut and chocolate truffle cake

250g (1 c) dark chocolate, in chunks
250g (1 c) unsalted butter, cubed
250g (1 c) peeled, cooked chestnuts
250ml (1 c) whole milk
4 eggs, separated
125g (1/3 c) sugar
Preheat the oven to 170°c/Gas Mark 3 (340 F) and grease and line a 23cm (9 inch)-diameter springform cake tin. (I used a cake pan)

Melt the chocolate and butter together in a pan over a very gentle heat. In another pan, heat the chestnuts with the milk until just boiling, then mash thoroughly with a potato masher (or process to a rough purée in a machine). This is where I substituted the puree, so I didn't use milk at all.

Put the egg yolks in a bowl and mix with the caster sugar. Stir in the chocolate mixture and the chestnut purée until you have a smooth, blended batter. Whisk the egg whites until stiff and fold them carefully into the batter.

Transfer the mixture to the greased, lined tin and bake for about 25–30 minutes until it is just set but still has a slight wobble.

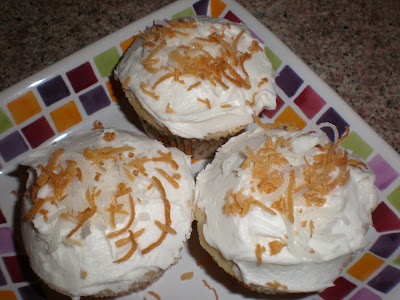
I've been wanting to make coconut cupcakes for a while now, but had been disappointed in all the recipes I saw. Pretty much all were cake mix doctoring of taking a white cake mix and throwing in some coconut milk. I wanted a cake from scratch. So I decided to just fiddle with Dorie Greenspan's Perfect Party Cake. I didn't adjust it much. I just substituted the coconut milk where the buttermilk should have gone.

Coconut Cake Batter

2 1/4 c cake flour
1 T baking powder
1/2 t salt
1 1/4 c coconut milk
4 large egg whites
1 1/2 c sugar
1 stick unsalted butter, room temperature
1/2 t vanilla

Heat oven to 350 degrees.
Sift together the flour, baking powder, and salt into a bowl.
Whisk together the egg whites and coconut milk in a medium bowl.
In a large bowl beat together the butter and the sugar until they are light and fluffy, about 3 minutes. Beat in the vanilla and 1/3 of the flour mixture at medium speed. Beat in half of the egg/milk mixture, then another 1/3 of the flour mixture. After those are mixed in, add the last of the egg/milk mixture and, finally, the last of the flour. Beat for another two minutes to mix and aerate the batter thoroughly.

I made cupcakes this time. But if you want to make a cake, be sure to butter your cake pans and cut a parchment liner for the bottom of the cake pan. Bake until the tester comes out clean.

Coconut Frosting

1 stick of unsalted butter, room temp
3-4 c powdered sugar
1/3 c coconut milk
1/2 t vanilla

Beat butter until light and fluffy. Add half of the powdered sugar and blend well. Beat in coconut milk and then add additional sugar until desired consistency is reached. Add vanilla and mix well.

I toasted some coconut flakes to sprinkle on top.


Coconut Milk

The 2009 October Daring Bakers’ challenge was brought to us by Ami S. of Baking Without Fear. She chose macarons from Claudia Fleming’s The Last Course: The Desserts of Gramercy Tavern as the challenge recipe.

Aren't food trends interesting? Remember when yogurt shops were big in the early 90's? Then they all died out. Now they are back in vogue and sprouting up everywhere. The other thing that sprouted but I think is now on the decline is cupcake shops. What's the next 'big thing'? Some would argue that is the macaron.

Macarons are just becoming known and familiar in the United States. They are small pastry cookies made of a sandwich of almond meringue sides with a pastry cream, ganache, or other filling in the middle. They are light, sweet, and decadent. Usually they are small which can probably be attributed to the French preferring to show restraint on their portions. But, because they can run very sweet, it can also be likened to a chocolate truffle - to be savored and enjoyed.

I began my DB Challenge by doing some local research. In Sacramento there are two places that are known for selling macarons. One is Le Petit Paris cafe on 19th Street. They sell about about eight flavors of macarons that they receive from a baker in San Francisco. In the pictures theirs are the smaller macarons. From there I sampled the lavendar/apricot and pistachio macarons.


The larger macarons are made locally at Ginger Elizabeth Chocolates. I sampled the almond and passion fruit macarons there. I was able to ask Ginger for some tips about making them. She said to make sure to leave my egg whites out on the counter overnight and she suggested taking my almond flour/powdered sugar mixture and letting it dry in my oven overnight as well. One of the key things about macarons is to get out as much moisture as possible, so drying out the dry ingredients even more helps. Some even leave the egg whites out for a couple of days so that they lose some moisture as well. Out of the four macarons I sampled I liked the passion fruit flavored one the best.

Before we get to my finished product I wanted to point out what 'feet' are on a macaron. Macarons have feet and why it is called that I have no idea. Anyway, the feet is the little bit of separation or lip you see on the edge of each macaron - the side next to the filling. Here are a couple more illustrations of other people's because, unfortunately, mine did not have feet!


So now to my experience. My first batch flopped! This especially sucks because almond flour is not cheap and hard to find. The Co-op has it for $10.59 a bag! It takes half a bag for the recipe below. Some of the problems with batch one was that when I piped them out, they were too runny and spread out and melted together. The few that were successful in keeping shape and baking, stuck to the parchment paper so that when I peeled them off, all the innards were left on the paper. This after I had done all the tips that Ginger had given of leaving out all the ingredients and drying them out.


That had been on Sunday and now it was the work week. My intent was to leave the egg whites out a couple of days and bake the next attempt mid-week. But Monday was Columbus Day and for the locals who know, there was the big controversy over whether we State workers should show up for work or boycott. I went to work only to find that all my bosses didn't! So with that, I worked half day and went home to bake. This time I had not dried out the dry ingredients but decided to just go for it anyway. Above is the piped batter before I put it in the oven.


The second batch went much better but I was still worried as I tried to peel off the paper. It looked like I would have the same problem again, so I did one of the suggested fixes. I put the sheets back in the oven for the macarons to dry out even further. And this time I didn't put them on any sheet because I wanted the underneath of the paper to get as much dry air as possible. This worked out well.


The filling is chocolate buttercream left over from the Sans Rival I had made over the weekend. It worked great with the macarons.

I enjoyed the finished product a lot and will make macarons again. In the future I look forward to trying different flavor combinations. I kept it simple this time since I had that left over buttercream. Hopefully next time I will get feet!


Macarons

Confectioners’ (Icing) sugar: 2 ¼ cups (225 g, 8 oz.)
Almond flour: 2 cups (190 g, 6.7 oz.)
Granulated sugar: 2 tablespoons (25 g , .88 oz.)
Egg whites: 5 (Have at room temperature)

1. Preheat the oven to 200°F (93°C). Combine the confectioners’ sugar and almond flour in a medium bowl. If grinding your own nuts, combine nuts and a cup of confectioners’ sugar in the bowl of a food processor and grind until nuts are very fine and powdery.
2. Beat the egg whites in the clean dry bowl of a stand mixer until they hold soft peaks. Slowly add the granulated sugar and beat until the mixture holds stiff peaks.
3. Sift a third of the almond flour mixture into the meringue and fold gently to combine. If you are planning on adding zest or other flavorings to the batter, now is the time. Sift in the remaining almond flour in two batches. Be gentle! Don’t overfold, but fully incorporate your ingredients.
4. Spoon the mixture into a pastry bag fitted with a plain half-inch tip (Ateco #806). You can also use a Ziploc bag with a corner cut off. It’s easiest to fill your bag if you stand it up in a tall glass and fold the top down before spooning in the batter.
5. Pipe one-inch-sized (2.5 cm) mounds of batter onto baking sheets lined with nonstick liners (or parchment paper).
6. Bake the macaroon for 5 minutes. Remove the pan from the oven and raise the temperature to 375°F (190°C). Once the oven is up to temperature, put the pans back in the oven and bake for an additional 7 to 8 minutes, or lightly colored.
7. Cool on a rack before filling.

Yield: 2-3 dozen.
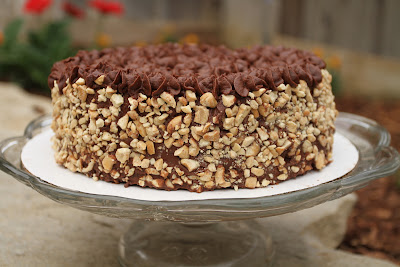
This week is our annual United Way Cake Auction at work. Some people go all out and do fancy decorated cakes. I'm more in it for the quality of the cake. This year I decided to tweak the traditional Sans Rival (post from last year) to make a chocolate version.

I wanted a buttercream that didn't have eggs in it so that I wouldn't have to do the stovetop cooked buttercream. I found the recipe at Joy the Baker's site (up this year for a Foodbuzz Blog Award for Best Baking Site). It uses Ovaltine and it made a bunch! (Recipe below)

My problem this year was a near disaster with my meringue layers. Here was layer #2, which would not separate from the parchment paper. It sent me into a mild panic. But what do you do with failed layers? Eat them, of course!

Luckily I was still able to pull off four layers and was able to cover the mishaps with frosting and nuts.

The Best Chocolate Buttercream Frosting

adapted from Delilah Bakery

1 1/2 cup (3 sticks) unsalted butter, softened

1 cup cocoa powder

3/4 teaspoon salt

4 cups powdered sugar

2 teaspoons vanilla

1/4 cup milk

1 cup heavy cream

2/3 cup Ovaltine

Cream together butter, cocoa powder and salt. Butter mixture will be very thick. Turn off the mixer, scrape down the sides of the bowl and add powdered sugar. Turn mixer on low and mix in powdered sugar while adding milk and vanilla extract. As the sugar incorporates, raise the speed of the mixer to beat the frosting. Beat until smooth. In a 2 cup measuring glass, stir together heavy cream and Ovaltine. Turn mixer speed to medium and pour cream mixture into frosting in a slow, steady stream, until you’ve reached your desired consistency. You may not need the full amount of Ovaltine and cream.

I think that anyone who has been given or used starters can relate to this: starters, if you're not careful, can multiply like fertile, wild rabbits. Starters such as yogurt, sourdough, or, in my case, Amish friendship bread.

Starters have some live culture in them where you have to care and tend for them, feeding them every few days so they grow. I was given Amish friendship bread starter from a coworker. It had started long ago with some yeast and grew and multiplied, was split and shared so that I had no idea how many generations down my starter was. Directions tell you to mix the goopy mixture every day. On day five, you feed it some fresh milk, flour, and sugar. Mix every day for another four days. Then on day ten you feed it again and then divide it into four. Give three away and restart the process with your kept fourth.

Problem is, after you've given all your friends starter, what are you supposed to do with your extras on day ten? One solution is to just freeze the bags until you need one to bake with. Or, if you just need to slow down the process, you can refrigerate them and it will slow the process down by about half.

What can you make with Amish starter? Everything from cookies, to breads, cakes, biscuits, waffles, brownies and more. A great site for all the variations you can make is found here. I made a chocolate bread when I first got the starter. It was OK, but nothing exciting. Then I saw a recipe for cinnamon rolls. I've been on the hunt for a good cinnamon roll recipe. Considering that cinnamon rolls start with a yeasty bread dough, I figured the starter was perfect for this.


I actually doubled the recipe which made three square pans of rolls. Here I've already rolled up the dough and about to slice.


I put extra butter and cinnamon sugar over the top before baking.


Here are two of my pans. The rolls can be frozen unbaked for up to a month. You just take them out to thaw the night before. Or you can refrigerate if you want to bake them the next day.


So how did they come out? First of all, I was really surprised by just how much they expanded. You see up in the earlier pictures how loosely I put the rolls into the pan - there was a lot of space left. They came out of the oven tight against each other.

Texturewise, the rolls were really tender and moist. I would have preferred a bit more chewiness of bread dough, but this was still an excellent dough. Everyone at work loved them. I'd say it is a very successful outcome using Amish starter for cinnamon rolls.

The August 2009 Daring Bakers' challenge was hosted by Angela of A Spoonful of Sugar and Lorraine of Not Quite Nigella. They chose the spectacular Dobos Torte based on a recipe from Rick Rodgers' cookbook Kaffeehaus: Exquisite Desserts from the Classic Caffés of Vienna, Budapest, and Prague.

It was invented in 1885 by József C. Dobos, a Hungarian baker, and it rapidly became famous throughout Europe for both its extraordinary taste and its keeping properties. The recipe was a secret until Dobos retired in 1906 and gave the recipe to the Budapest Confectioners' and Gingerbread Makers' Chamber of Industry, providing that every member of the chamber can use it freely.

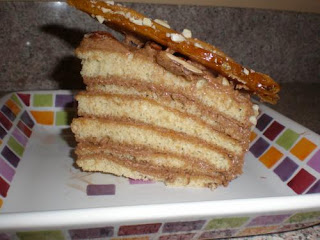
This was a great cake! I really like the sponge layers for this cake. My issue came with how to make them even so that you would have a beautiful flat, even cake like the professionals do versus the higher in the middle and sloping sides. Yes, I've taken cake decorating classes and know about carving a straight line across the top of a cake - but that's with thick layered cakes. You can't do that with a bunch of thin layers. A pro cake baker (Audax Artiflax) latered shared her technique so that she had lots of thin, even layers as you see here:


So now I am compelled to make the recipe again and try her technique to see if I can get a more professional looking cake.


The part of the challenge I didn't like was the caramel wedges at the top of the cake. They seemed so unnecessary and were thick and hard for eating. Jim said it seemed like they really belonged to a different dessert entirely.

So my verdict? Awesome cake, just forget about the top caramel layer unless you are trying to really impress someone with it as a decorating element.


Sponge cake layers
6 large eggs, separated, at room temperature
1 1/3 cups (162g) confectioner's (icing) sugar, divided
1 teaspoon (5ml) vanilla extract
1 cup plus 2 tablespoons (112g) sifted cake flour (SUBSTITUTE 95g plain flour + 17g cornflour (cornstarch) sifted together)
pinch of salt

Chocolate Buttercream
4 large eggs, at room temperature
1 cup (200g) caster (ultrafine or superfine white) sugar
4oz (110g) bakers chocolate or your favourite dark chocolate, finely chopped
2 sticks plus 2 tablespoons (250g) unsalted butter, at room temperature.

Caramel topping
1 cup (200g) caster (superfine or ultrafine white) sugar
12 tablespoons (180 ml) water
8 teaspoons (40 ml) lemon juice
1 tablespoon neutral oil (e.g. grapeseed, rice bran, sunflower)

Directions for the sponge layers:

1.Position the racks in the top and centre thirds of the oven and heat to 400F.
2.Cut six pieces of parchment paper to fit the baking sheets. Using the bottom of a 9" (23cm) springform tin as a template and a dark pencil or a pen, trace a circle on each of the papers, and turn them over (the circle should be visible from the other side, so that the graphite or ink doesn't touch the cake batter.)
3.Beat the egg yolks, 2/3 cup (81g) of the confectioner's (icing) sugar, and the vanilla in a medium bowl with a mixer on high speed until the mixture is thick, pale yellow and forms a thick ribbon when the beaters are lifted a few inches above the batter, about 3 minutes.

Directions for the chocolate buttercream:

NB. This can be prepared in advance and kept chilled until required.

1.Prepare a double-boiler: quarter-fill a large saucepan with water and bring it to a boil.
2.Meanwhile, whisk the eggs with the sugar until pale and thickened, about five minutes. You can use a balloon whisk or electric hand mixer for this.
3.Fit bowl over the boiling water in the saucepan (water should not touch bowl) and lower the heat to a brisk simmer. Cook the egg mixture, whisking constantly, for 2-3 minutes until you see it starting to thicken a bit. Whisk in the finely chopped chocolate and cook, stirring, for a further 2-3 minutes.
4.Scrape the chocolate mixture into a medium bowl and leave to cool to room temperature. It should be quite thick and sticky in consistency.
5.When cool, beat in the soft butter, a small piece (about 2 tablespoons/30g) at a time. An electric hand mixer is great here, but it is possible to beat the butter in with a spatula if it is soft enough. You should end up with a thick, velvety chocolate buttercream. Chill while you make the caramel topping.

Directions for the caramel topping:

1.Choose the best-looking cake layer for the caramel top. To make the caramel topping: Line a jellyroll pan with parchment paper and butter the paper. Place the reserved cake layer on the paper. Score the cake into 12 equal wedges. Lightly oil a thin, sharp knife and an offset metal spatula.
2.Stir the sugar, water and lemon juice in a small saucepan. Bring to a boil over a medium heat, stirring often to dissolve the sugar. Once dissolved into a smooth syrup, turn the heat up to high and boil without stirring, swirling the pan by the handle occasionally and washing down any sugar crystals on the sides of the pan with a wet brush until the syrup has turned into an amber-coloured caramel.
3.The top layer is perhaps the hardest part of the whole cake so make sure you have a oiled, hot offset spatula ready. I also find it helps if the cake layer hasn't just been taken out of the refrigerator. I made mine ahead of time and the cake layer was cold and the toffee set very, very quickly—too quickly for me to spread it. Immediately pour all of the hot caramel over the cake layer. You will have some leftover most probably but more is better than less and you can always make nice toffee pattern using the extra to decorate. Using the offset spatula, quickly spread the caramel evenly to the edge of the cake layer. Let cool until beginning to set, about 30 seconds. Using the tip of the hot oiled knife (keep re-oiling this with a pastry brush between cutting), cut through the scored marks to divide the caramel layer into 12 equal wedges. Cool another minute or so, then use the edge of the knife to completely cut and separate the wedges using one firm slice movement (rather than rocking back and forth which may produce toffee strands). Cool completely.

Assembling the Dobos

1.Divide the buttercream into six equal parts.
2.Place a dab of chocolate buttercream on the middle of a 7 1/2” cardboard round and top with one cake layer. Spread the layer with one part of the chocolate icing. Repeat with 4 more cake layers. Spread the remaining icing on the sides of the cake.
3.Optional: press the finely chopped hazelnuts onto the sides of the cake.
4.Propping a hazelnut under each wedge so that it sits at an angle, arrange the wedges on top of the cake in a spoke pattern. If you have any leftover buttercream, you can pipe rosettes under each hazelnut or a large rosette in the centre of the cake. Refrigerate the cake under a cake dome until the icing is set, about 2 hours. Let slices come to room temperature for the best possible flavour.