Showing posts with label dessert. Show all posts

This recipe comes from Allrecipes.com. I needed a dessert for a work potluck and I had just bought a lot of mochi rice flour. It's also the holidays. Combo all that together and I found a pumpkin mochi recipe.

Mochi has become more common and known about here on the west coast. It's found a lot in the new Japanese, tart style yogurt shops that are the latest trend. But Mochi happens to be centuries old to Asians. Basically it is glutonous rice flour that is shaped and used in different applications and called by different names depending on the culture. Mochi is a Japanese term. It is often shaped into little cakes and can be stuffed with red bean paste or other fillings. It's also become quite popular filled with ice cream. Think of Bon Bons with mochi around the ice cream instead of chocolate. The texture is a bit chewy. In the yogurt shops the mochi usually comes cubed like croutons.

For those unfamiliar with it and who stumble upon it at a potluck, they'll be confused about this boring looking item. Mochi can be very tasty and rich and the chewiness can be an acquired taste. Some might pass by it out of ignorance, but for those that try it, you'll find converts.

Pumpkin Mochi

* 2 1/2 cups mochiko (glutinous rice flour)
* 2 teaspoons baking powder
* 2 cups white sugar
* 4 eggs
* 1 (29 ounce) can pumpkin puree
* 1 (14 ounce) can sweetened condensed milk
* 1 cup butter, melted
* 2 teaspoons vanilla extract

1. Preheat oven to 350 degrees F (175 degrees C). Lightly grease a 9x13 inch baking dish.
2. Sift together the mochiko, baking powder, and sugar in a large bowl. Mix together the eggs, pumpkin puree, condensed milk, butter, and vanilla extract in a separate bowl. Stir the egg mixture into the mochiko mixture. Pour into the prepared dish.
3. Bake in preheated oven for 1 hour. Allow to cool before serving.


Mochi
Repost from 10/10/10

Monday is our annual United Way cake auction at work. Being a baker, I always contribute something. I stay away from trying to snag the best decorated cake because, as I've mentioned before, I prefer cake to frosting, quality vs looks. I might not get the recognition in the building by getting a prize, but I have the pride of knowing that my cake stands up against all the rest for being a delicious, high quality contribution.

This time around I wanted to do something different. But these days it is hard to find an unusual cake, something that people haven't had before. I wanted my typical, high quality, but without having to get ultra-gourmet with three days of baking/assembly and a zillion steps. I found what I wanted in a Hummingbird Cake.

The Hummingbird Cake became well known after it first appeared in Southern Living magazine in 1978. There are a couple of theories to its name. One says that the sweetness of the cake reminds one of the nectar the hummingbirds feed on. Another says that it comes from the humming "mmmmmms" coming from people after they take a bite.

strawberry coconut cream pie, peanut butter tart, smores, dessert disco fries
The Foodspotting Eatup gauntlet was thrown in Sacramento recently. The July Eatup was held at The Eatery in West Sacramento and the lucky Foodspotters who attended had no idea they were about to be treated so well! Chef Jess Milbourn had decided to test new menu items and served five well received dishes.


Harissa Bacon Caramel Corn
Peanut Butter Habanero Wings
Beer Battered Housemade Chicken Sausage Bites
Slow Smoked BBQ Pork Shoulder
Smoked Bacon and Vegetable Raviolis


I was disappointed today because I missed the Filipino Festival. I just had too many other commitments to make it down there. In honor of the day I decided to make some lumpia - dessert lumpia.

Lumpia is the Filipino version of an eggroll. I prefer lumpia because they contain a mixture of meat and vegetables, whereas eggrolls generally only contain vegetables. My mother's lumpia had pork, shrimp, and veggies like cabbage and onion. I've had some versions that have mixed frozen vegetables (corn, peas, lima beans). I didn't care for that version.

When I was at Honolulu's food truck event, Eat the Street, I had a dessert lumpia from the Flipt Out truck. It made so much sense! Just put fruit in the middle!


As I mentioned in the bread pudding post, I"m not a fan of rice pudding but I like tapioca. Go figure. 

Kheer is an Indian rice pudding that is flavored with cardamon and often has pistachios, raisins, and coconut in it. It's wonderful stuff. 

I decided to make a tapioca version instead. You can use the Minute Tapioca sold at the grocery, but I suggest having some fun with larger pearl tapioca found in the Asian markets. There are many different sizes, the largest usually found in the Asian boba drinks. I used a rather small pearl.


Kheer-style Tapioca

1 can of coconut milk
1 cup of water
1/4 cup Minute Tapioca or small pearl tapioca
4 Tablepoons sugar
1/2 teaspoon rose water (optional)
1/4 cup raisins
1/4 cup pistachios, chopped 
toasted coconut for garnish

Shake the can of coconut milk well and then open and pour the contents into a medium saucepan. Add water and tapioca and let sit for about 10 minutes. Stir in sugar. Turn heat to medium and stir occasionally to keep tapioca from clumping. Cook for about 10 minutes until the pudding has thickened and the tapioca is cooked. Remove from heat and add rose water, pistachios, and raisins. Serve hot or cold with a bit of toasted coconut for garnish.


I had my six month teeth cleaning last week and arrived home to find something my dental hygienist would not have wanted me to eat right after - a gift bag of treats! I got a lovely bag of samples left for me from About a Bite, an online order bakery. I couldn't resist tasting these treats as I soon discovered I liked them enough to suggest them to anyone who needs to send goodies to someone long distance. Mother's Day and Father's Day are here and maybe your mom or dad is in another state or in the service. About a Bite treats would be a welcome delivery.

About a Bite is based in Gold River where owner Jennifer Kaye makes them in a commercial kitchen. She does not have a storefront. Jennifer always wanted to try bites of several desserts when she was out dining and decided to take that concept and turn it into a business. All of her offerings are bite sized morsels. That's great for those who have portion control - I don't. But I still loved that these were bite sized offerings.

The line-up includes three categories, Bites, Bars, and Between 2 Cookies, with different flavors in each category.


The bars are simple enough - bar cookies cut into bite sized portions. I was sent the Chocolate Caramel Oat Bar and the Toffee Bar. Both were great, but I really liked the oat bar with the chewiness of the oatmeal.


The bites are fun little takes on truffles or chocolates. Small baked bits covered in chocolate. Jennifer sent me the Salted Caramel and the Mocha Crunch. The mocha was lightly noticeable, not too strong. I did make a suggestion that she get a crunchier, larger crystal salt for the Salted Caramel since the granular salt was lost on amongst the cookie crunch and the chewy caramel.


Finally she has Between 2 Cookies which are tiny cookie sandwiches. I received the LLLemon, Ginger Molasses, and the Fleur de Sel Chocolate Chip. If you like ginger, you'll love the Ginger Molasses. I found it a bit too strong for my tastebuds. My favorite was the LLLemon because it was full of lemon flavor, chewy, and I loved the large sugar crystals it was rolled in to give a crunchy contrast to the chewy cookies. Each of these cookies is about the diameter of a silver dollar.

I definitely have a sweet tooth and love to bake, but there is a reason I could never open a bakery or bake professionally for others - I don't have the patience for detail! I'm often eating something before it's even cooled. Jennifer apparently has a lot of patience and attention to detail because each of the packages I received was perfect in size, cut, appearance. The  packages themselves were nicely put together with ribbons and label cards. I was impressed.

When a blogger receives free samples they are not required to write about them. Many bloggers refuse to participate in such exchanges. I only write about products that I really do like. About a Bite impressed me and, because they are local, I wanted to share them with you in case you are looking for something nice, sweet, and that will make an excellent item shipped anywhere to your loved one(s).

An early Happy Mother's Day to all the moms.


Disclosure: Free samples were received of all of the items mentioned.

See the paper bag in the picture below versus the size of the tree? BFF's kumquat tree is enormous! I remember back when it was a about eight feet high and now look. Her boys would use them for ammo in their sling shots. Her sister would occasionally use them in recipes or to make centerpieces. I've used them to make kumquat chicken and citrus marmalade.

When you have access to an entire tree of kumquats (or any fruit for that matter) you try as many recipes as you can to make use of them. For some time I had been wanting to use kumquats in a pie, I just wasn't sure how. Then I decided that if I made my vanilla ginger candied kumquats, I could use them as a garnish and element to the pie and use the syrup to get the kumquat flavoring into the pie filling.

For the passion fruit flavoring I've used the puree concentrate sold by Perfect Puree. It can be found at the larger Whole Foods stores in Roseville and Folsom. The smaller Arden store doesn't have it. The concentrate is $10 a container, but it will last you through several recipes. If you like the flavor of passion fruit, I highly recommend it.


Candied Kumquat Passion Fruit Chiffon Pie

Crust 
1 cup graham cracker crumbs
1/2 cup ground almonds (or other nut)
2 tablespoons sugar
5 tablespoons unsalted butter, melted

Filling
1/4 cup water
1 envelope unflavored gelatin
1/3 cup passion fruit puree
1 cup syrup from candied kumquats*
4 large egg yolks
1 cup candied kumquats, drained*
1 1/4 cups chilled whipping cream

For crust:
Preheat oven to 350°F. Mix graham cracker crumbs, sugar, and ground almonds in medium bowl. Add melted butter and stir until mixture is evenly moistened. Transfer crumb mixture to pie plate. Press crumbs firmly and evenly onto bottom and up sides to top of dish. Bake until crust is firm and slightly darker in color, about 8 minutes. Cool crust completely. 

For filling:
Pour enough cold water into medium bowl to come halfway up sides; add 2 cups ice cubes and set aside.
Pour 1/4 cup water into small bowl; sprinkle gelatin over. Let stand until gelatin softens, about 15 minutes.
Whisk 3/4 cup sugar, kumquat syrup, passion fruit puree, egg yolks, and salt in heavy medium saucepan to blend. Whisk constantly over medium heat until mixture is just thick enough to coat the back of a spoon and thermometer inserted into mixture registers 160°F, about 6 minutes (do not boil). Add gelatin mixture; whisk until gelatin dissolves and mixture is smooth, about 1 minute. Place saucepan in bowl with ice water until filling is cool to touch, whisking occasionally, about 8 minutes. Transfer filling to large bowl.
Using electric mixer, beat whipping cream in another medium bowl until peaks form. Fold 1/4 of whipped cream into fruit filling until incorporated. Fold in remaining whipped cream in 3 additions.

Take a third of the candied kumquats and spread across the bottom of crust. Transfer half of whipped filling to cover the kumquats creating a bottom layer. Take another third of candied kumquats and scatter over the first layer. Top with the rest of the whipped topping. Use last of the candied kumquats to decorate the top of the pie.  Refrigerate pie until filling is set, about 4 hours.

 *If you do not have freshly made candied kumquats, use canned ones or substitute another canned fruit in its own syrup, such as peaches.


Recently I was blog hopping and came across this dessert. I had never heard of semolina pudding before and the combination of blood orange and ginger intrigued me. In fact, I highly recommend you read the blog I got it from because she goes into how she got this combo of flavors together and has tried it in different recipes. It's blood orange season right now, so I figured I should do it before they were gone. I also happened to have a small amount of extra semolina lying around.

One thing you'll see in Linda's blog is a much nicer picture/presentation. I had poured my pudding into my PC prep bowls and could not flip one out so that it kept its shape. So I left the other three in the bowls and put the sauce on top.


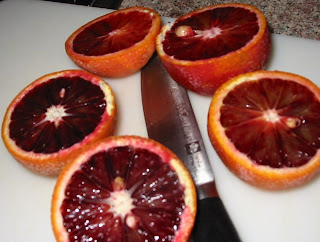
The oranges I got were very red and delicious. They were also very small. I had gone to the farmers' market on Sunday and found only one person who was selling at $3/lb! And his oranges turned out awful. Later in the day we had gone up to Ikeda's in Auburn and they had them for 69 cents/lb. I got a bag of these small beauties and they were so much better. I had hoped, though, to get a couple that weren't absolutely red. I really love the look of blood orange sections when they have a kind of bleed from light orange through to the dark red 'kernels' (is that the right word?).

The pudding itself was a new texture experience. Semolina flour is a grainier than baking flour, so the pudding had the slight grainy texture. But it was not unpleasant. The pudding itself had a very subtle flavoring of the orange/ginger. I definitely enjoyed it better with the tart sauce with each spoonful.

I later researched semolina pudding on the internet and saw many other flavor variations. I think I will be trying some of them in the future.


Blood Orange/Ginger Semolina Pudding

400 ml (1 ⅔ cup) milk
100 ml (3 ⅓ fl oz) whipping cream
1 tbs grated fresh ginger
1 tbs (blood) orange zest
50 g (1 ¾ oz) semolina
40 g (1 ⅓ oz) sugar + extra
6 cut out blood orange segments

Heat the milk, cream, ginger and orange zest until nearly boiling. Turn off the heat and let it steep for 15 minutes. Strain the milk and cream mixture and fill it up with milk until you have 500 ml in total.
Mix the semolina and sugar. Add the mixture to the hot milk whilst stirring. Bring to a boil and allow to cook. Cook and stir for 3-5 minutes. Rinse a non-stick muffin pan with cold water and pour the mixture in 6 of the cups. Sprinkle with sugar to prevent the forming of a crust. Allow to cool to room temperature. Chill in the fridge for a few hours.
Unmold each pudding by turning the pan upside down and massaging it in a circular motion. Let the pudding slide onto your hand and place it on a slighty wet soup plate. Correct the position if necessary. Place an orange segment on top. Pour blood orange sauce around it.

Blood orange sauce

225 ml (1 cup) blood orange juice
25 ml (1 tbs + 2 ts) lemon juice
1 tbs ginger syrup
5-10 g (¼ oz) potato starch

Bring the blood orange juice, lemon juice and ginger syrup to a boil. Mix the potato starch with a little bit of water until lump free.
Add the potato starch water mix to the juice whilst stirring. Allow to cook for 1 minute. Allow the sauce to cool down completely, stirring occasionally.


Blood Orange
 
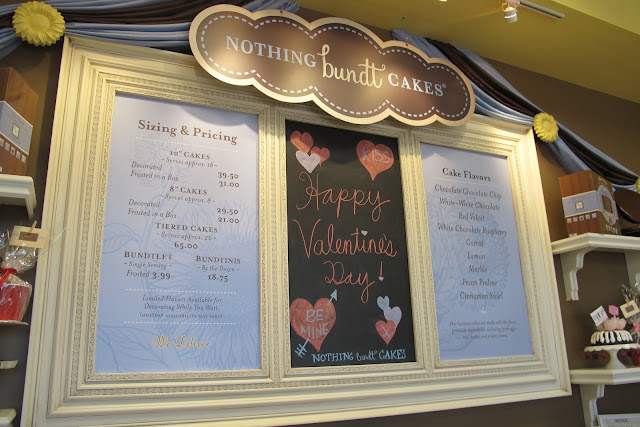
In my opinion, bundt cakes and pizzas have something in common. They originated in another country, but Americans have made them all their own. No one does pizza in more variations and better than Americans (yes, Italian style is good in its own right),  and no one has created an entire world of bundt cakes like we have. Americans love bundt cakes because they are easy, decorative, and delicious. It's no wonder that a new successful franchise, Nothing Bundt Cakes, has been opening stores nationwide while other businesses are closing.


I first came across Nothing Bundt Cakes last May when I was at my reunion in Dallas. I was staying with a childhood friend and noticed a gift certificate they had on their counter. Later I came across the actual storefront when I was driving around their suburb. I quickly looked up the website and found that it was offering franchise opportunities. I almost even participated in one of their recruiting conference calls.

Someone else who was busy looking at the Nothing Bundt Cakes opportunity was Cameron Diviak. Diviak and his partner, Greg Leuterio, were in banking and looking for something new to go into. They visited the closest stores to us, in the Bay area and Reno, and then met with the Nothing Bundt Cakes founders at corporate headquarters in Las Vegas. Everything they heard and learned was encouraging and in December they opened their first store in Roseville with hopes to open another in Folsom soon.


As we approach the New Year we end yet another holiday season. For readers of this blog, you probably noticed I didn't have much in the way of holiday postings. Just been in Oregon busy with dad's heart surgery. We brought him home yesterday.

With the new year only a week away it means that eggnog will soon be disappearing from the dairy case at the grocers. Yet there is still time if you need to put together an item for that a party you are going to. This is as simple as can be with only three ingredients. I came across it in the Food Network's magazine and just had to try it. It took about two hours to make, which is longer than regular flan recipes, but the texture is so smooth and light and worth the long bake time.


Eggnog Flan
  • 2/3 cup sugar
  • 4 cups eggnog
  • 5 large eggs

Preheat the oven to 325 degrees F. Stir the sugar and 2 tablespoons water in a medium skillet. Bring to a boil over medium-high heat and cook, swirling the pan but not stirring, until deep amber, 5 to 7 minutes. Pour the caramel into a shallow 10-inch-round cake pan, tilting the pan so the caramel evenly coats the bottom.

Bring a kettle of water to a boil. Whisk the eggnog and eggs in a large bowl until smooth, being careful not to beat in too much air. Pour the eggnog mixture over the caramel in the pan, then place in a large roasting pan. Fill the roasting pan with enough boiling water to come halfway up the side of the cake pan.

Loosely cover the roasting pan with foil and bake 1 hour. Remove the foil and continue baking until the custard is set but still quivers, 40 minutes to 1 hour.

Remove the flan from the roasting pan and let cool to room temperature, then cover and refrigerate until cold and set, about 2 hours. To serve, run a thin knife around the edge of the flan, place an inverted flat plate over the pan and flip to unmold.

Jana of Cherry Tea Cakes was our July Daring Bakers’ host and she challenges us to make Fresh Frasiers inspired by recipes written by Elisabeth M. Prueitt and Chad Robertson in the beautiful cookbook Tartine.


After reading through the recipe and then making it, I realized this is what we know here is Sacramento as a fruit basket cake. The only real difference is that the frasier is supposed to be done so that the outside edge of the cake is decorative based on the placing of the fruit. Oh, and it's almost mandatory that it have strawberries.

I have a brown thumb. My horticulturist girlfriend once gave me an arranged plant bowl swearing they were hardy plants that I would barely have to take care of. Still killed it.

That didn't stop me from wanting a vegetable garden. I had this convenient dirt patch in my backyard that was perfect for little ol me. I built up a raised garden using torn up sidewalk concrete, poured in a yard of compost, and bought a soaker hose and timer. After all, if the soaker hose is on a timer, then I won't have to worry about forgetting to water.

This is my third year. Each year it gets a little better. I seem to do well with tomatoes and basil. Last year I had good cucumbers, but not so good on zucchini. This year I have great tomatoes, zucchini, spaghetti squash, basil and Thai basil, and a jalapeno plant.


Erica of Erica’s Edibles was our host for the Daring Baker’s June challenge. Erica challenged us to be truly DARING by making homemade phyllo dough and then to use that homemade dough to make Baklava.

That's right. She wanted us to make phyllo dough from scratch!  Phyllo dough, that thinner-than-paper dough used to make flaky pastries. In order for me to do this, I had to go over to Sacatomato Ann's house to use her Kitchenaid. The dough required considerable kneading with a dough hook (versus about half an hour doing it by hand). I then took it home and spent over an hour rolling out the paper thin sheets.

The May 2011 Daring Bakers’ challenge was hosted by Emma of CookCraftGrow and Jenny of Purple House Dirt. They chose to challenge everyone to make a Chocolate Marquise. The inspiration for this recipe comes from a dessert they prepared at a restaurant in Seattle.


Each month when they announce the challenges there can be a bit of time of feeling overwhelmed. This was one of those recipes. It had a lot of components and at first glance seemed complicated. Luckily others are always out there to do the recipe first and give their suggestions to the rest of us. I soon learned that it wasn't so difficult, just time consuming.

I started by making the chocolate base and the spiced nuts on Friday night. I only had a few pecans lying around, so I didn't make a big batch of nuts. The biggest problem there was that I didn't think the final product was spiced enough. Note for next time. I then tackled the chocolate base and was going to stop for the night but then realized the chocolate marquise needed to freeze overnight.  So I quickly whipped that together and poured it into a square pan to freeze.

On Saturday I just needed to whip up the meringue and make the caramel. I piped the meringue onto tin foil and then put it under the broiler to brown. Then it was just a matter of plating it all together.

In the end, a rather easy recipe after all. And good! Definitely a keeper to pull out for a special occasion to impress all your friends.


The recipes that were initially supplied made huge batches. I chose the quarter recipes, which was still enough to serve a dinner party of 6-8 easily. 

Chocolate Marquise

Servings: 6 2"x2" (5cmx5cm) cubes

3 large egg yolks at room temperature
1 large egg
2 tablespoons + 2 teaspoons (40 ml) (40 grams/ 1½ oz) sugar
1 tablespoon + 1 teaspoon (2/3 fluid oz/ 20 ml.) water
Chocolate Base, barely warm (recipe follows)
½ cup (4 fluid oz./ 120 ml.) heavy cream
½ cup Dutch process cocoa powder (for rolling) (Note: We used extra brut, like Hershey's Special Dark. Make sure it's a Dutch processed cocoa, not a natural cocoa powder.)
Torched meringue (recipe follows)
Spiced almonds (recipe follows)
Cacao nibs (optional)
In the bowl of a stand mixer, combine the egg yolks and whole eggs. Whip on high speed until very thick and pale, about 10 - 15 minutes.
When the eggs are getting close to finishing, make a sugar syrup by combining the sugar and water in a small saucepan. Bring the syrup to a boil and then cook to softball stage (235F/115C). If you have a cake tester with a metal loop for a handle, the right stage for the syrup is reached when you can blow a bubble through the loop (as seen in the following pictures). 
With the mixer running on low speed, drizzle the sugar syrup into the fluffy eggs, trying to hit that magic spot between the mixing bowl and the whisk.
When all of the syrup has been added (do it fairly quickly), turn the mixer back on high and whip until the bowl is cool to the touch. This will take at least 10 minutes.
 In a separate mixing bowl, whip the heavy cream to soft peaks. Set aside.
When the egg mixture has cooled, add the chocolate base to the egg mixture and whisk to combine. Try to get it as consistent as possible without losing all of the air you've whipped into the eggs. We used the stand mixer for this, and it took about 1 minute.
Fold 1/3 of the reserved whipped cream into the chocolate mixture to loosen it, and then fold in the remaining whipped cream.
Pour into the prepared pans and cover with plastic wrap (directly touching the mixture so it doesn't allow in any air).
Freeze until very firm, at least 2 - 4 hours (preferably 6 – 8 hours).
When you're ready to plate, remove the marquise from the freezer at least 15 minutes before serving. While it's still hard, remove it from the pan by pulling on the parchment 'handles' or by flipping it over onto another piece of parchment.
Cut it into cubes and roll the cubes in cocoa powder. These will start to melt almost immediately, so don't do this step until all of your other plating components (meringue, caramel, spiced nuts, cocoa nibs) are ready. The cubes need to sit in the fridge to slowly thaw so plating components can be done during that time. They don’t need to be ready before the cubes are rolled in the cocoa powder.

Chocolate Base 

Servings: n/a - this is an ingredient for the chocolate marquise, not meant to be used separately

3 oz (85 grams/ 6 tablespoons) bittersweet chocolate (about 70% cocoa)
1/3 cup + 2 teaspoons (90 ml/3 fluid oz.) heavy cream
1/8 teaspoon salt
1/16 teaspoon cayenne
1 tablespoon (15 ml/ 1/2 fluid oz.) tequila
1 tablespoon (15 ml/ 1/2 fluid oz.) light corn syrup
1/4 teaspoon vanilla
1 tablespoon/(less than 1/4 ounce) cocoa powder (we used extra brut, like Hershey's Special Dark, but any Dutch-processed cocoa would be fine. Do not substitute natural cocoa powder.)
dash freshly ground black pepper
1/4 oz unsalted butter (1/2 tablespoon/8 grams), softened
  1. Place the chocolate in a small mixing bowl.
  2. In a double-boiler, warm the cream until it is hot to the touch (but is not boiling). Remove from the heat and pour over the chocolate.
  3. Allow it to sit for a minute or two before stirring. Stir until the chocolate is melted completely and is smooth throughout.
  4. Add the remaining ingredients and stir to combine.
  5. Set aside until cooled to room temperature. Do not refrigerate, as the base needs to be soft when added to the marquise mixture. If you make it the day before, you may need to warm it slightly. Whisk it until it is smooth again before using it in the marquise recipe.

Torched Meringue

Servings: Makes about 1 cup of meringue.
3 large egg whites
1/2 cup less 1 tablespoon (105 ml) (3½ oz or 100 gms) sugar
Splash of apple cider vinegar
1/8 teaspoon vanilla
Combine the egg whites, sugar and vinegar in the bowl of a stand mixer. Using your (clean, washed) hand, reach in the bowl and stir the three together, making sure the sugar is moistened evenly by the egg whites and they make a homogeneous liquid.
Over a saucepan of simmering water, warm the egg white mixture. Use one hand to stir the mixture continuously, feeling for grains of sugar in the egg whites. As the liquid heats up, the sugar will slowly dissolve and the egg whites will thicken. This step is complete when you don't feel any more sugar crystals in the liquid and it is uniformly warm, nearly hot.
 Remove the mixing bowl from the saucepan and return it to the stand mixer with the whisk attachment. Whisk until you reach soft peaks. In the last 10 seconds of mixing, add the vanilla to the meringue and mix thoroughly.
 When you're ready to plate the dessert, spoon the meringue onto a plate (or use a piping bag) and use a blowtorch to broil.


Caramel
Servings: Makes about 1/4 cup of caramel
1/4 cup (60 ml/2 fluid oz) (2 oz/55 gm) sugar
2 tablespoons (1 fluid oz./ 30 ml.) water
1/4 cup (2 fluid oz./ 60 ml.) heavy cream
1/4 teaspoon salt
In a heavy-bottomed saucepan, combine the sugar and water on medium-high heat. Boil until the water completely evaporates and the sugar caramelizes to a dark mahogany color.
Working quickly, add the cream to the darkened caramel. It will bubble and pop vigorously, so add only as much cream as you can without overflowing the pot.
 Return the pot to the stove on low heat and whisk gently to break up any hardened sugar. Add any remaining cream and continue stirring. Gradually, the hard sugar will dissolve and the caramel sauce will continue to darken. When the caramel has darkened to the point you want it, remove it from the heat. Add the salt and tequila and stir to combine. Set aside until ready to serve.


Spiced Nuts Directions:
  1. Preheat the oven to 350F. Line a sheet pan with parchment paper or foil.
  2. In a small bowl, combine the sugar, cinnamon, cayenne, and salt.
  3. In a larger mixing bowl whisk the egg white until it's frothy and thick.
  4. Add the spice mix to the egg white and whisk to combine completely.
  5. Add the nuts to the egg white mixture and toss with a spoon.
  6. Spoon the coated nuts onto the parchment paper-lined baking sheet.
  7. Bake the nuts for 30 minutes, or until they turn light brown. Allow the nuts to cool completely and they will get very crunchy. Set aside until ready to serve.

Plating

Plate with the torched meringue and drizzled caramel sauce, and toss spiced almonds and cocoa nibs around for garnish. You want to handle the cubes as little as possible because they get messy quickly and are difficult to move. However, you want to wait to serve them until they've softened completely. The soft pillows of chocolate are what make this dessert so unusual and when combined with the other elements, you'll get creamy and crunchy textures with cool, spicy, salty, bitter, and sweet sensations on your palate. 

I am blessed that I have two ‘adopted’ families here in Sacramento that I can rely on for the holidays. With my dad in Oregon and my brother in Washington, I have to fend for myself during most holidays. Some people like the freedom to have the days all to themselves. Some people get depressed if they are left all by themselves.  As a foodie, I tend to prefer to go to a family gathering for the feast. Often I choose between my BFF’s extended family, which I’m pretty much an honorary member of now, or to my ex-husband’s family. As my sister-in-law once said, “You divorced my brother, not us.”

It’s always interesting to see the family traditions every family has. In this case it’s my BFF’s husband’s. His family has been in Sacramento for many decades. I’m not sure when they first arrived, but this particular story goes back to the 30’s, so they arrived before that.  If you ever go to Tres Hermanas to eat on K Street, that property still belongs to them. When BFF started dating him, he lived in the upstairs unit. Turns out the family used to run a bakery long ago where the restaurant now is.


I decided that it was the perfect time to try my hand at a baked cheesecake. I had the wine/cheese party (above) coming up and I certainly didn't need an entire cheesecake in my frig. Although I would love every bite, I'm sure my scale would not. So here was my chance to bake one and share it for an event.

I chose a raspberry cheesecake recipe from Cooking Pleasures magazine. It was pretty easy, although I didn't have any raspberry jam. I cheated and put a bit of black currant jam on the bottom - which didn't spread well. So then I gave that up and just poured the cheese mixture on top. I paid attention to every cheesecake tip sheet out there and took it out of the oven when it was still a little jiggly. I'm proud to say it came out perfectly and was a hit.

Raspberry Cheesecake

CRUST
1 (5.3-oz.) pkg. pure butter shortbread cookies, crushed (about 1 1/4 cups)
2 tablespoons unsalted butter, melted
1/4 cup raspberry preserves, melted

CHEESECAKE
1 (10-oz.) pkg. frozen raspberries, thawed
3 (8-oz.) pkg. cream cheese, softened
1/2 cup unsalted butter, softened
1 cup sugar
2 tablespoons all-purpose flour
1/2 cup sour cream
2 teaspoons lemon juice
2 eggs

1. Heat oven to 350°F. Wrap outside of 9-inch springform pan with heavy-duty foil. Combine crushed cookies and melted butter in small bowl; press into bottom of pan. Bake 8 to 10 minutes or until slightly darker in color. Cool slightly; gently spread preserves over crust.

2. Puree thawed raspberries in food processor or blender until smooth. Strain through medium strainer, pressing with spatula to remove seeds. Reserve 1/2 cup puree. (Save remaining puree for another use.)

3. Beat cream cheese and 1/2 cup butter at medium-low speed until smooth. Beat in sugar and flour just until blended. Beat in sour cream, reserved raspberry puree and lemon juice. Beat in eggs one at a time. Pour over crust.

4. Place springform pan in large shallow pan. Add enough hot tap water to come halfway up sides of springform pan. Bake 40 to 45 minutes or until edges are puffed and top is dry to the touch. Center should move slightly when pan is tapped but should not ripple as if liquid. Remove cake from water bath; remove foil. Cool completely on wire rack. Refrigerate overnight.

5. Garnish with raspberries. Store in refrigerator.

16 servings
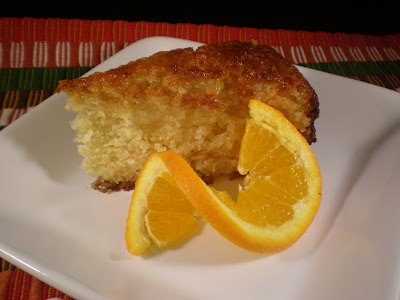
Orange Blossom Cake

As we approach spring I am already in anticipation of the fragrant air in my backyard. You see, I have an enormous grapefruit tree and very large lemon tree. I’d say that they have both been there for a good 30+ years. Every spring I get about a month’s worth of lovely, bright perfume from the millions of blossoms covering the trees.
I’m sure there must be some uses for these fragrant blossoms commercially, but you never hear about them. Even a Google search didn’t reveal much. Orange blossoms, on the other hand, are definitely used to make orange blossom water, an ingredient used in Middle Eastern cooking. It has been used increasingly in Western cooking, primarily in desserts.  I use rose water often, but had never used orange blossom water before.
When we were at the Fancy Food Show in January I stopped at the Nielsen Massey booth. They are best known for their vanilla, but I noticed that they had rose and orange blossom waters. The orange blossom water is made from Seville bitter orange from Spain and the Middle East. It complements vanilla, almond, and, of course, citrus flavors.
I searched the internet and found this recipe from a BBC site. It reminds me of my Rustic Lemon Cake, except this one is not gluten free. This recipe does use metric measurements


ORANGE BLOSSOM CAKE
ADAPTED FROM BBCGOODFOOD.COM

FOR THE CAKE
  • 200g self-raising flour , sifted
  • 100g ground almonds
  • 150g caster sugar
  • 1 tsp baking powder
  • 2 large eggs , beaten with a fork
  • 250g Greek yogurt
  • 150ml sunflower oil
  • 1 zested lemon

FOR THE ORANGE SYRUP

  • 150ml water
  • 175g caster sugar
  • 1 orange , juiced and 2 strips of zest
  • ½ juiced lemon
  • 5 crushed cardamom pods
  • 1 tbsp orange flower water
  • icing sugar and crème fraîche or Greek yogurt, to serve 
  1. To make the syrup, put the water, sugar, rind, citrus juices and cardamom into a saucepan. Heat gently, stirring to help the sugar dissolve. Bring to the boil and simmer for 7 minutes. It will thicken and become syrupy as it cools. Cool then strain and add the orange flower water.
  2. Heat the oven to 180C/fan 160C/gas 4. Butter or oil a 20cm spring-form tin. Put all the dry ingredients for the cake in a bowl with a good pinch of salt and make a well in the center. Put all the rest of the ingredients in the well and stir with a wooden spoon, gradually incorporating the wet ingredients. Spoon into the tin and bake for half an hour. A skewer pushed into the middle of the cake should come out clean, if not give it a little longer.
  3. Leave for 10 minutes to cool in the tin, then turn onto a plate. Pierce all over with a skewer and, while the cake is still warm, slowly pour over the syrup. Leave to soak in. Dust with icing sugar just before serving - the sugar just disappears into the syrupy top otherwise - and serve with crème fraîche or yogurt.
Daring Bakers: Coconut Cream Panna Cotta

  
The February 2011 Daring Bakers’ challenge was hosted by Mallory from A Sofa in the Kitchen. She chose to challenge everyone to make Panna Cotta from a Giada De Laurentiis recipe and Nestle Florentine Cookies. This post focuses on the panna cotta. My other post focuses on the florentines.

I had already made my first panna cotta last year (see here) and so that part of this month's challenge was not new for me. But because I have to host a Mai Pham, Vietnamese style dinner next month, I chose to make a coconut cream panna cotta to see if it would work. It turned out fabulous, much better than I expected.  What took it over the top was because I used a blackberry honey that I bought last summer at the farmers market. Giada's recipe uses mostly honey to sweeten the panna cotta, versus the recipe I used last year that used only sugar. Both recipes are good in their own rights. 

One of my criteria for a good panna cotta is that it has a beautiful jiggle to it. This recipe did. For an example, see the video at the bottom of my Grange review here

This recipe is the Giada one adapted to use coconut cream. You will find coconut cream in Asian markets. It is much thicker than coconut milk, having the high fat content that you want for panna cotta.

Coconut Cream Panna Cotta 

1 cup whole milk
1 tablespoon (one packet) unflavored powdered gelatin
1 cup  whipping cream
2 cups coconut cream
1/3 cup honey
1 tablespoon granulated sugar
pinch of salt
  1. Pour the milk into a bowl or pot and sprinkle gelatin evenly and thinly over the milk (make sure the bowl/pot is cold by placing the bowl/pot in the refrigerator for a few minutes before you start making the Panna Cotta). Let stand for 5 minutes to soften the gelatin.
  2. Pour the milk into the saucepan/pot and place over medium heat on the stove. Heat this mixture until it is hot, but not boiling, about five minutes. (I whisk it a few times at this stage).
  3. Next, add the cream, honey, sugar, and pinch of salt. Making sure the mixture doesn't boil, continue to heat and stir occasionally until the sugar and honey have dissolved 5-7 minutes.
  4. Remove from heat, allow it to sit for a few minutes to cool slightly. Then pour into the glass or ramekin.
  5. Refrigerate at least 6 hours or overnight. Serve from ramekins or turn out on plates, To turn out, run a knife around the edge of the panna cotta. Place a hot rag around the ramekin for a few seconds and then flip the ramekin onto a plate to release the panna cotta. Add garnishes and serve.