Showing posts with label chicken. Show all posts

So maybe your doctor has told you you need to change your diet. Or maybe you are just trying to cut back on red meat. This doesn't mean you have to give up sausage - those lovely, encased ground meats and spices that burst with flavor. There is an alternative using chicken - the Al Fresco All Natural line of sausages and meatballs.

They are named Al Fresco All Natural  for a reason...  

·         70% less fat and 30% less sodium than pork sausage
·         60% less fat and 40% less sodium than beef and pork meatballs
·         Gluten-free
·         Made with lean, skinless chicken meat and only the freshest herbs & spices
·         Absolutely no artificial ingredients
·         High in protein and low in carbohydrates


Giveaway at end of post.


Rating: 2/5

Coming up with a recipe each week for Crockpot Wednesday has proven to be more of a challenge than I anticipated. First is the fact that a good blogger should test a recipe at least twice before posting. I rarely have the opportunity to do that and therefore appreciate feedback if something did or did not work out for you. Secondly, I'm single and so I end up with a lot of food for little ol' me! Between those reasons I try to pick recipes that will have high success and will be something I'm willing to eat for days. Most of the meals get packaged up and frozen for me to take to work.  I still get sick of them, though, even with rotating through them.

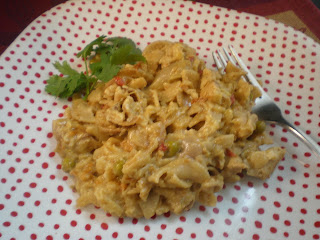
This week I wanted something simple and I wanted to try to incorporate a Gardein product as I am still eating vegetarian this May. I chose a cheesy chicken artichoke pasta. Thing is, sometimes you wonder about these so-called slow cooker recipe. Is it something that should be done in a crockpot? Or is it something that is better to be done on the stovetop?

In this case, I'd say the latter, especially if the chicken and the noodles are already cooked.  If you use raw chicken breasts, then yes, it does well for the crockpot. But if you use fake chicken (Gardein) or cooked rotisserie chicken leftovers, you might as well just do it on the stove.

So I leave you with this recipe with those little caveats. I will admit that I goofed and put the pasta in to cook the whole day when I was supposed to put it at THE END, thus the rather gloppy mess. It still tasted good. After all, it all ends up in the same place, right?

Note:  I'll be busy with a reunion over Memorial Day weekend. So the next two Crockpot Wednesdays are a bit up in the air. They might be reposts or links to other sites.


Chick'n & Artichoke Cheesy Pasta
adapted from about.com
  • 1 1/2 lbs boneless chicken breast, cubed or 3 pieces of Gardein Chick'n Scallopini, cubed
  • 4 oz roasted red peppers, chopped
  • 1/2 cup fresh or frozen peas
  • 1 can (15oz) artichoke hearts, quartered
  • 8 oz process American cheese
  • 2 teaspoons Worcestershire sauce
  • 1 can fat free cream of mushroom soup
  • 2 cups shredded cheddar cheese
  • 4 cups hot cooked pasta ( 8 to 10 oz)
  • salt & pepper to taste

Combine chicken, peppers, peas, artichokes, Havarti cheese, Worcestershire sauce, and soup in the crockpot. Cover and cook on low for 6 to 8 hours. About 15 minutes before serving, add cheddar cheese and hot cooked pasta. Taste and add salt and pepper as needed.
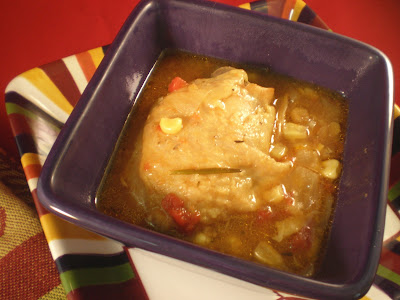
Brunswick Stew
Rating: 5/5

This week I am featuring a recipe from my friend, Ann, over at Sacatomato. Ann has a cookbook out called Hands-off Cooking. Now if you are following these crockpot posts then you are probably looking for easy recipes that require the least amount of effort possible. Ann's cookbook is perfect for you. Although they are not all done in a crockpot, many of them could be. But only two in the book specifically say they are for the crockpot. 

I've made quite a few of the recipes and there are definitely some I come back to time and again. One of them is the Lentil Soup with Greens and Sausage. I like to use a hot Italian sausage and kale in mine. That makes it zesty and full of nutrients. One that really surprised me was the Pork Chili with Sweet Potatoes. Not tomato based and made with a bit of maple syrup, this chili will make you realize that you can really think 'out of the box' to use ingredients not normally associated with chili.

Chicken Tetrazzini

Rating: 4/5

I was reading through some online crockpot recipes recently and stumbled on one where people were writing in the comments, "Why does this recipe call for cooked chicken? The point of using a crockpot is to throw everything in and let the crockpot do the cooking." 

Actually, not so. In fact, the very best braised short ribs or stews always call for searing the meat on the stove first before adding to the crockpot. This important step contributes to depth of flavor for the final dish. But in the case of the above chicken comment, I think the recipe writer was just wanting to use leftover chicken. That's the case with this recipe.


I've made this shortcut chicken tetrazzini recipe since I was a child. It was our after Thanksgiving turkey leftovers recipe. I often just get a rotisserie chicken from the store and use that. The point is, this recipe calls for cooked chicken.

This recipe also calls for a little bit of watching and stirring. So I would not make it expecting to leave it cooking while you are at work. Rather maybe make it on the weekend when you don't want to bother doing a lot of cooking, but you can stir it up a couple of times while it cooks.


Chicken Tetrazzini

1 cup chopped chicken
1 cup shredded cheddar cheese
1 can of cream of chicken or mushroom soup
water
1/2 package of spaghetti noodles
1/3 cup chopped onion

Spray the crockpot with cooking spray. Take the spaghetti noodles and break them into thirds and layer them in the crockpot.

In a medium bowl, mix together the soup with one and a half cans of water (rinsing the can).  Mix in the shredded cheese, onion, and chicken. Pour over the noodles in the crockpot. Cook on low for 4 hours. During the cooking time stir the mixture a couple of times. This will help the cheese to melt into the soup mixture.
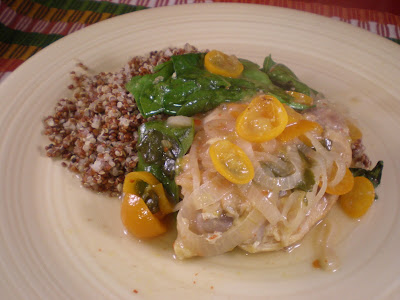
Kumquat Chicken

Rating: 4/5

My BFF has an enormous kumquat tree in her backyard. It is so big that we never get it all picked. I've made marmalade with them and I like to put them into my morning smoothies as well. After all, kumquats have the highest concentration of Vitamin C of any citrus.

Unlike other citrus, kumquats are actually eaten whole. The rind is the sweeter part and the flesh is tart/sour. Therefore, kumquats are prized in China for this flavor contrast. You just need to be careful of the seeds. In fact, the seeds are the most time consuming part about using kumquats since you are slicing and seeding a lot of little kumquats for a recipe.

The original recipe on which this one is based is from Epicurious.com and calls for frying the chicken and then sauteing the rest. I wanted to see if it would work in a crockpot and it did! I like more sauce and so I've upped the amount of kumquats needed to a cup, which is probably about 20 sliced kumquats. I also upped the red pepper flakes because I like some kick, so some people may want to reduce that.


Kumquat Chicken
adapted from Epicurious.com version

•1 cup sliced and seeded kumquats
•1 large shallot, sliced
•3 boneless/skinless chicken breast halves or 4 skinless thighs
•2 tablespoons sugar
•1/3 cup water
•3 tablespoons white-wine vinegar
•1/4 teaspoon dried hot red pepper flakes
•4 cups packed spinach leaves (from about 1 bunch)

Layer shallots and kumquats in the bottom of the crockpot. Place chicken on top. Mix together sugar, water, white wine vinegar, and pepper flakes. Pour over chicken.
Cook on high for 4 hours or low for 6 hours.
Just before serving, gently remove chicken and toss spinach into crockpot. Stir so that the hot liquid will wilt the spinach. Serve chicken, spinach and sauce over rice or quinoa.

Notes:  If you add the spinach too early before serving it will get ugly.
Cooking times may vary depending on your crockpot.
Filipino Chicken Adobo Rice
Rating: 4/5

I've mentioned before that I'm have Filipino but am pretty ignorant about Filipino food. My mom never learned to cook much Filipino food and so the only things I can even remember her making are lumpia, pancit, and adobo.

Filipino food is definitely its own thing. Being situated in southeast Asia and made up of over 7,000 islands, it has often been the stomping ground of invaders. Thus the influences over the centuries include Chinese, Japanese, Spaniards, Americans, and others. All of these influences mish-mash together to create unique dishes  - the true example of fusion cooking.

One notable flavor trait of Filipino cooking is their mix of salt/sour. Adobo is a perfect example. Adobo is considered the national dish of the Philippines. It is usually made with either pork or chicken. I prefer the chicken, and it's important that you use chicken thighs, not breasts. The breasts will be too dry.

The primary ingredients for the marinade are vinegar, soy sauce, garlic, and pepper. The normal method calls for marinating, then simmering the meat in it to cook, remove the meat and boil down the sauce to make it even more potent, and fry the meat to give it a bit of crispiness. Then serve it all over rice.

I'm changing it up a bit in this version. After removing the chicken we toss in rice to cook in the sauce and then at the end throw in the chicken, now shredded. Your finished product is a nice, potent chicken and rice dish. No more fighting over the adobo sauce. I suppose you could throw the rice in from the start, but part of the beauty of adobo is the slow cooking of the meat in the marinade. The meat really takes on the flavor of the sauce.

Note: Cooking times can vary depending on slow cookers.

Chicken Adobo Rice
1 lb. chicken thighs
1/3  c vinegar
2 T soy sauce
3 cloves of garlic, minced
1 small bay leaf
¼ t pepper
½ c water
3/4 c rice

Remove the skins and trim any fat from the chicken thighs. Place in slow cooker.
Mix together remaining ingredients except  for the rice and pour into cooker. Cook on low for 6 hours. (Mine was on while I was at work, so over 8 hrs.)

Remove the chicken breasts and set aside. Add rice to the sauce in the cooker. Cook on high for 1 hour or until rice is cooked. Remove chicken from the bone and shred. Toss with cooked rice mixture. Serve.


Chicken Thigh
Today is my final post from our Canning party last weekend. We are focusing on Ryan's recipes - red beans and rice and his beer can chicken.

I met Ryan about eight months ago at a Sacramento Tweetup. (That's a networking mixer for people who use Twitter.) Although he is a Northern California native, he's only turned into a true Sacramento area resident last year. He currently works at Voyage Home Loans and has a blog here. One of his prior locations was when he was working for DHL in New Orleans. While there he learned that true red beans and rice has to be made with pickled pork.

Now I like red beans and rice, but my only experience with it has been at Popeye's Fried Chicken and from the prepackaged seasoning packets you get at the grocery store. So this news about pickled pork was new to me and I just had to try it. After months of pestering, we finally got him to make a batch for us. Since my kitchen was occupied with canning and it was hot outside, I decided we would need to BBQ our meat and decided his other recipe, beer can chicken, was the perfect solution.


It turns out that pickled pork needs to pickle for three days to two weeks. Ryan got a batch started at the beginning of June so that we had a really pickled batch for the RB&R. It was already chunked out for the pickling, and here he is just giving it a final trim and cut before adding it to the pot of beans and seasonings.


His girlfriend, Lisa, mixes the beans. We cooked them on a separate burner since the stove was occupied with canning.


The spices are applied to the chickens and then they were 'violated' with beer cans stuck inside their cavities. Each beer can is half full otherwise it would boil over.


Our chickens were big and so we did take them off the grill a little too early and they were a bit underdone. The joke was that he was fixing us chicken sashimi. As you can see, it looks a little uncomfortable with a beer can up your rear.


The beans are ready. The rice is cooked separately and dished out and then you ladle the beans on top. Extra hot sauce was provided on the side in case you wanted to make it even hotter.


My plate of chicken and the red beans and rice. So good! Thank you, Ryan, for sharing!

And here are the recipes:

Ryan’s Rad Red Beans and Rice
(alliteration always is acceptable!)

* 2 tablespoons vegetable oil
* 3 stalks celery, chopped
* 1 medium onion, chopped
* 2 medium green bell peppers, chopped
* 2 teaspoons salt (Kosher if you have it)
* 1 teaspoon ground black pepper
* 1 teaspoon cayenne pepper
* 5 cloves garlic, minced fine
* 1 lb pickled pork, cut into 1-inch pieces
* 1 1/2 teaspoon dried thyme
* 3 bay leaves
* 2-3 teaspoon hot sauce
* 2 quarts water
* 1 pound red kidney beans, rinsed (also look for non-beany material)

For rice:

* Some type of long-grain rice (I prefer brown)

Place the vegetable oil in a 7-quart pot oven and set heat to medium-high. Add the bell pepper, onion, celery, salt and pepper to the pot. Cook and stir often, until the onions and celery are somewhat translucent and the bell peppers are fork tender, (usually about 7 or 8 minutes). Add the garlic and cook for 2 minutes, stirring constantly to avoid burning.

Add the pork, thyme, bay leaves, hot sauce, cayenne pepper, water and beans to the pot. Turn up the heat to high. Cook while stirring frequently until it comes to a boil.

Decrease the heat to maintain a simmer, cover and cook for 1 1/2 hours. Stir the mixture every 30 minutes.

Uncover and increase the heat slightly to maintain a steady simmer. Continue to cook for another 30 to 60 minutes, or until the beans are tender and you like the thickness. You can make it creamier in texture by mashing up some of the beans with a fork. You can also use a masher, but that squishes too many of the beans.

Prepare rice during the last 30 minutes of cooking however you prefer to prepare rice. I like to use a cooker, but however you like is fine.

Pickled Pork:

* 2 cups water
* 1 cup apple cider vinegar
* 1/4 cup salt (preferably Kosher)
* 8 cloves garlic, peeled and crushed
* 2 tablespoons yellow mustard seed
* 3 tablespoons hot sauce (less if you’re not into spicy)
* 3 tablespoons sugar
* 1 tablespoon celery seed
* 1 bay leaf
* 1 teaspoon whole black peppercorns
* 8 -10 ounces ice
* 1 1/2 – 2 pounds fresh boneless pork butt, cut into 2-inch cubes

Put all of the ingredients (except the ice and pork) in a 2-quart saucepan, set over high heat and bring to a boil. Saucepan should be stainless. Reduce the heat and simmer for 3-4 minutes. Remove saucepan from heat, add stir in the ice. Put the pork and the cooled pickling liquid into a 1-gallon ziplock bag. Squish out as much air as possible; seal the bag and place in the refrigerator for minimum of 3 days. Jostle the bag around, carefully, once a day. You can pickle for up to 2 weeks. Remove from the brine and use the pork, or freeze in the bag.

Ryan’s Spicy Beer Can Chicken:

1 Whole Roaster Chicken (about 4#)
1-2 TBS of Vegetable Oil (Enough to cover the chicken)
2 TBS Salt
1 tsp Black Pepper
½ tsp White Pepper
1 tsp Paprika
¼ tsp garlic powder
½ tsp chipotle powder
¼ tsp cayenne pepper
½ tsp rosemary (minced if fresh, ¼ tsp if dry, but also minced)
1 can of beer (my preference is a high quality pale ale, poured from a bottle into a can, but any can of beer will do)

Clean the chicken and remove neck and giblets if necessary. Rinse the chicken inside and out and pat dry gently, but thoroughly with paper towels.

Mix the spices together completely.

Rub the chicken with the oil (lightly) inside and out, then rub the whole chicken inside and outside liberally with the spice rub.

Open the can of beer and take a couple of gulps to decrease the volume of liquid by about half. If refilling a can with a bottle of beer, only fill half way.

Put the can on a solid surface. Take the chicken, 1 leg in each hand, and place the cavity of the bird over the can of beer. The can should be physically inside the cavity of the bird.

Place the can and chicken on the center of the grill grates balancing the chicken on its 2 legs. It should be like a tripod on the grill.

Cook the bird over medium high, INDIRECT heat. This means that there should be no coals or lit burner (if on propane) directly underneath the bird. Cook for 1 hour and 15 mins with the grill cover on. If you have a thermometer the breast temperature should be 165 F and 180 F in the thigh area. You can also check if the thigh to see if the juices run clear when you pierce it with a sharp knife.

Remove from the grill and let rest for at least 10 minutes. Carve and enjoy.


These days it is not often that I try new recipes. It's the same ol story. I'm single, lazy, and poor. But I really want to try more recipes from my Mideast cookbook and so I tried this one because I had all the ingredients.

It turns out that this is one of those recipes that gets better the next day. On the day I cooked it I thought, "it's good, but could use more spice". Then I parceled it into single servings and froze them for work lunches. Today I had one and it was SOOOO much better. I also think that this recipe could easily be done in a crockpot and done as a stew by just throwing in the rice or, in my case, quinoa.

PALAVER CHICKEN

* 1 1/2 lbs boneless skinless chicken breasts
* 2 garlic cloves, crushed
* 2 tablespoons butter
* 2 tablespoons vegetable oil
* 1 onion, finely chopped
* 4 tomatoes, chopped (I used a can of diced tomatoes)
* 2 tablespoons peanut butter
* 2 1/2 cups chicken stock
* 1 teaspoon dried thyme
* 8 ounces frozen chopped spinach, thawed and squeezed dry
* 1 chili pepper, seeded and chopped (I used a medium jalapeno)
* salt
* pepper

Cut chicken into thin slices, place in a bowl and stir in garlic and a little salt and pepper.

Melt the butter in a large frying pan and fry the chicken over medium heat, turning once or twice to brown evenly. Transfer to a plate using a slotted spoon and set aside.

Heat the oil in a large pan and fry the onion and tomatoes over high heat for 5 minutes, till soft.

Reduce the heat, add the peanut butter and half of the stock and blend together well.

Cook for 4-5 minutes, stirring all the time to prevent the peanut butter burning, then add the remaining stock, thyme, spinach, chili and seasonings.

Stir in the chicken slices and cook over medium heat for 10-15 minutes till chicken is cooked through.

Pour the chicken mixture into a warmed serving dish and serve with boiled yams, quinoa, or rice.


Peanut Butter


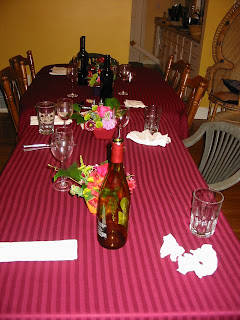
As in, forgot to take the pictures. Sigh. So my friends suggested taking a picture of the table and proclaiming a good time was had by all.

I am part of a foodie group that enjoys dining and socializing. There are five couples and myself in the group. Each month one household prepares a formal dinner for the rest of the group. I was the last in the line to host this past weekend. I had planned to take pictures of everything, but as usual, forgot.

My menu was:
- shrimp wonton appetizers
- fresh green salad with grapefruit dressing
- kumquat chicken over wilted spinach
- wild rice and quinoa pilaf
- semolina pudding with strawberry balsamic pepper sauce and black currant sauce

My intentions were good because I took a picture of the kumquat preparation. LOL


Anyway.....

The shrimp wontons are actually a Pampered Chef recipe that I really like. Of course, you need a mini-muffin pan to make them.

Shrimp Wontons

24 square wonton wrappers
1 T. butter or margarine melted
8 oz. shelled deveined and cooked medium shrimp
2 green onions, finely chopped
1/3 C. grated carrot
4 oz. cream cheese, softened
1 garlic clove, pressed
1/2 t. Worcestershire sauce
1 C. (4 oz) shredded mozzarella cheese

Preheat oven to 350 degrees. Lightly spray mini-muffin pan with non-stick cooking spray. With pastry brush, brush one side of each wonton wrapper with melted butter. Press wonton buttered side up into muffin cup. Bake 8 minutes or until edges turn light golden brown. Remove pan from oven. Finely chop shrimp. Combine cream cheese, garlic and Worcestershire sauce in bowl, blend well. Stir in chopped shrimp, green onions, carrot and mozzarella cheese. Using small scoop fill each wonton cup with rounded scoop of cream cheese mixture. Top with reserved shrimp. Bake 5 minutes or until wontons are golden brown and filling is bubbly around edges.

Yield 24 appetizers.


My goal for the meal had been to make things using seasonal items that people might not have had before. For the salad, I used the grapefruits from my tree to make the grapefruit dressing.

Grapefruit Dressing

1 teaspoon olive oil
1/2 cup chopped shallots
2 cups fresh grapefruit juice (about 3 grapefruits)
2 tablespoons chopped fresh cilantro
2 teaspoons sugar
1/4 teaspoon freshly ground black pepper
2 tablespoons olive oil

Instructions:
1. Pour oil in a frying pan over medium heat. Sauté shallots 5 minutes. Pour in grapefruit juice and let boil over medium-high heat; cook until liquid is reduced to 1 cup, about 6 minutes. Take mixture off of heat and let cool.
2. Using a food processor or blender, puree juice mixture with cilantro, sugar, and pepper until smooth. With motor running, slowly drizzle in olive oil and blend until fully combined.


Kumquats are not too common in the grocery store and can be pretty expensive. Luckily, my best friend has a large kumquat tree in her backyard. So I was able to go over and pick a bunch. The recipe is from the Food Network. It calls for sauteing the chicken breasts. But I was serving nine people. I decided to make the sauce on its own and take the chicken breasts and cook them on my stoneware bar pan in the oven. One great thing about stoneware - it keeps meats nice and moist. The recipe also calls for wilting the spinach in the sauce. I had a lot of spinach (could have had more) and so I used a trick I read somewhere. I put the washed, wet spinach in a bowl, sealed it with wrap, and microwaved it for 2-3 minutes first. This reduces the size down by about half, making it easier to fit into the pan for the final wilting in the sauce. Lastly, since I was greatly increasing the recipe for nine people, I ended up guesstimating the amounts of the sauce ingredients. Luckily there was plenty of sauce. This sauce is also nice because it has a nice hint of heat with the red pepper flakes.

Kumquat chicken over wilted spinach


3 kumquats
1 large shallot
2 boneless chicken breast halves with skin
1 tablespoon butter
2 tablespoons sugar
1/3 cup water
3 tablespoons white-wine vinegar
1/8-teaspoon dried hot red pepper flakes
1 tablespoon chopped fresh parsley leaves
4 cups packed spinach leaves (about 1 bunch)

Separately cut kumquats and shallot crosswise into thin slices, discarding any kumquat seeds. Season chicken with salt and pepper. In a skillet heat butter over moderately high heat until foam subsides and saute chicken, skin sides down, until skin is golden and crisp, about 5 minutes. Turn chicken over and cook over moderate heat until just cooked through, about 5 minutes more. Transfer chicken to a plate and keep warm, covered.

Add shallot to fat remaining in skillet and cook, stirring frequently, 1 minute. Sprinkle sugar over shallot and cook, undisturbed, until sugar is melted and golden. Immediately stir in kumquats, water, vinegar, and red pepper flakes and simmer, stirring, until sugar is dissolved. Stir in parsley and salt to taste and, if sauce is too liquid, simmer until thickened to desired consistency, about 1 minute.

Transfer two thirds sauce to a small bowl and to remainder add spinach and salt to taste, turning with tongs until just wilted.

Divide spinach between 2 plates and top with chicken. Spoon sauce over chicken.

For the pilaf, I just made a big batch of quinoa and threw in a package of pre-cooked wild rice, green onions, and craisins. I kept it warm and ready in the crockpot.


Lastly was dessert. I had tried semolina pudding in an earlier post. This time I wanted to use strawberries since they are now in season. Then I had a huge bag of frozen black currants from my dad's bushes in Oregon. So I made a sauce from those as well. It was quite a difference between the sweet strawberry sauce and the tart currant sauce.


Balsamic Strawberry Pepper Sauce

2 cups strawberries (about 1 pint), trimmed and quartered
1 1/2 cups sugar
3 tablespoons balsamic vinegar
3 tablespoons water
1 teaspoon cracked black pepper
Preparation
In a small heavy saucepan bring all ingredients to a boil, stirring, and skim surface. Simmer mixture, stirring and skimming foam occasionally, 15 minutes, or until thickened and translucent. Remove pan from heat and cool preserves completely. Preserves keep, covered and chilled, 1 month. (I pureed the sauce.)


Finally I decorated the table with these beautiful flowers.


All in all, the meal was a success. Considering my usual track record of not having enough food, I did pretty well except for a little low on the spinach. Everyone seemed to enjoy the meal.