Wild Ginger on Urbanspoon

Wild Ginger has been a star Seattle restaurant since the late 90's. My first experience had been when my brother got married. We went to the original location with our extended family for the rehearsal dinner. The next time I went back the restaurant had moved to a larger location with much more upscale design. This time I am at the brand new second location in Bellevue, WA.

My father remembered the rehearsal dinner and requested that we go there for dinner. So it definitely made an impression if he's remembering a meal from ten years ago.

This new location opened in September '09. It looks very similar in design to the downtown Seattle location, including being two-story. There is a large satay bar downstairs and a small private bar area. I thought it was odd that the bar was downstairs, so far from the entrance and tucked away in the back. Bar business is usually so important for sales, so why is it so hidden?

While I was in the restroom I was fascinated by the Dyson Airblade hand dryers in the bathroom. It was the most effective air dryer I've ever used. People generally reach for the paper towels because they hate to wait for the old dryers - rubbing your hands together for 30 seconds to dry. The Airblade 'scrapes' the air down off your hands like the high powered dryers in car washes. Start putting these dryers in restrooms and people will start using them over paper if they are conservation conscious.

But we were here for the food. I apologize for the poor quality pictures taken with my Blackberry.


We started with crab cakes for my nephew, a scallop satay skewer for myself, and dad ordered the Green Papaya Salad - Shredded green papaya tossed with peanuts, fish sauce and herbs in a lemongrass dressing. None of us had had green papaya before and we found this to be crunchy and refreshing. I liked the lemongrass and mint that stood out in the flavoring. The salad was huge and we ended taking half of it home.


We were all sharing our choices family style. I chose the Tuna Manada - Seared ahi tuna cubes in a coconut milk sauce infused with lemongrass. This was the most disappointing of all our dishes. It was on the bland side and seemed to me like they forgot an ingredient to give the extra punch it needed. Even salt would have brought out the flavors in a better way. It was just dull.


Dad's choice was the overall favorite. He chose the Salt and Pepper Prawns - fried prawns tossed in salt, green onions, and red pepper. Now I often eat this dish when we go to work lunches at Sacramento Chinese restaurants. This was the best version of the dish I've ever had. They were generous with the pepper and the prawns were perfectly fried, crispy, without any grease. I noticed that they used red pepper flakes for their pepper while in Sacramento we've always had it done with chopped, fresh jalapenos. Both ways are good, but this won out for the intensity of the pepper.


Paul's favorite is the Hanoi Tuna - Sashimi-grade ahi tuna marinated with shallots, garlic, and turmeric, seared rare and served with almonds, dill and scallion oil. He particularly likes the almond paste that you see underneath the tuna. I enjoyed it as well - but second best to the prawns.

We also had the Chinese green beans and I got their raspberry ginger ale to drink. The menu has two prices for the items - small and large. We got the large sizes of all our entrees and were glad we did. Even if you were eating the dish to yourself, you will probably want the larger portion. Service was attentive and friendly.

I'll probably continue to stop by Wild Ginger each time I visit the Seattle area.
Tandoori Kitchen on Urbanspoon

We stopped in for a quick lunch at Tandoori Kitchen, just down the street from my brother's place. They had a buffet lunch for $8.99, which is pretty reasonable since the entrees were around $10.99 each. But we didn't want to eat too much since we had big dinner plans.

When I look now on Urbanspoon.com I see a mix of reviews. Some really are bad and others like the place. My overall response to the negative reviews I see is - it's a Pakistani restaurant, not Indian. This explains some of the dishes not being the same preparation as by Indians. It also could explain some of the service issues. After all, Pakistanis are Muslim. That's no excuse for how to treat customers in the U.S., but sometimes it does show an intolerance, impatience, and ignorance by Americans as well. I also always look on the dates of the reviews. Some of them are over two years old. I really take issue with Urbanspoon not having expiration dates on reviews that are posted. Things change, including ownership or chefs, so that old reviews are not pertinent today.

Anyway, we had good service and enjoyed the food. I was particularly excited to have a Pakistani samosa. Indians do them veggie and Pakistanis put in meat. I like the meat version and the one they served here was excellent. I was a very happy camper. The only negative on the samosa was the amount of grease. It did just drip it all over. But hey, sometimes grease is good. Bonus - he didn't charge us for the samosas. I had said how much I enjoyed them and he comp'd them for us.

My dad and I split an order of Chicken Tikka. I was wanting some sauce with it, but it came out as very tender, moist, chicken chunks that were nicely spiced. Although sauceless, I still enjoyed it.

I also tasted a meat dish Paul got from the buffet and enjoyed it too. So I would eat here again and Paul certainly will become a regular. And if you are reading the mixed reviews, I would suggest you try them yourself. After all, the reviews are about 50/50 and so how can you really know which side you will come on?
Mediterranean Kitchen on Urbanspoon

Growing up in Saudi Arabia our favorite street food was schwarmas. Back in the 70's they would sell from street carts and the lamb would be rotating on giant rotisseries. They would take Arab bread and put in it shredded lettuce, tomato, the sliced meat, a garlicy tzatziki like sauce, and mint leaves. All ARAMCONS grew up with this schwarma memory.

Sad to say, it is VERY difficult to find schwarmas like this any more - even in Arabia. My dad went back to visit last March and he said he couldn't find a lamb one anywhere, they were all being done with chicken. Here in the U.S. it is equally difficult. If you do find schwarma places, they usually use beef. Many will offer lamb as a kebab version. Basically they are cubing and kebabing the lamb instead of shaving it off a rotisserie like we grew up with.


I'm visiting my brother up in the Seattle area and for Christmas Eve we have gone to Mediterranean Kitchen in Kirkland. Apparently there is a full blown restaurant in Bellevue and this is an offshoot diner style. My brother's one warning - they use a lot of garlic.

OK. So my bro is a garlic wimp. My dad and I thought it was great. The best thing, this truly was the closest schwarma to our childhood memories. My only complaint, it could use a more generous serving of meat in the sandwich. (See any in the pic?) I really did feel like I was eating the sandwich of my past. Kudos.

My brother LOVES their baklava as well. It was pretty tasty. The nuts had been ground to a paste for the filling layer. The pastry was nice and flaky without being overly soaked in honey syrup.


Something that attracted my eye on the menu was the Mediterranean fries - french fries covered in feta cheese, garlic, and sumac - and ketchup. I love garlic fries and I like feta too, so it seemed like a good combo to me. It wasn't bad, but not something I would order again. I think in this case I would have liked more garlic and less feta. But it was nice that the feta was nice and melty.

My brother says that if you go to the actual mother restaurant you will smell the garlic as soon as you open the door. Not so bad for me. The more, the better. I'd be happy to have a Med Kitchen in Sacramento to get the lamb schwarmas and I know my fellow schoolmates would be thrilled as well.

The December 2009 Daring Bakers’ challenge was brought to you by Anna of Very Small Anna and Y of Lemonpi. They chose to challenge Daring Bakers’ everywhere to bake and assemble a gingerbread house from scratch. They chose recipes from Good Housekeeping and from The Great Scandinavian Baking Book as the challenge recipes.

I chose the Scandinavian recipe because it only called for things that I already had on hand. The Good Housekeeping would be more of the American traditional gingerbread in that it requires molasses.


I had never made a gingerbread house before, let alone from scratch. So many people just get the kits. The challenge said to make the house and decorate it as you please, just that all items must be edible. It also required the use of a template. I found mine off the internet somewhere (can't find the site again). I rolled my dough pretty darn thick so that my pieces were a good 1/4 inch thick.


The assembly required using simple syrup to be the glue. Simple syrup meant just melting sugar. Unfortunately I went a little too far and ended up getting very caramelized dark syrup. You can see a long drip on my finished house. This also ended up tinging my royal icing that came in contact with it. So after a day my icicles were looking like dirty snow icicles. Oh, well.


The real cost comes from all the decorating elements. I ended up using only candy on mine. I suggest going to the bulk bins at Winco as being the cheapest. I ended up at Sweet Factory for their bulk bins and large assortment. They are pricier though.

Here are some other things you can use:
-pretzel sticks
-Necco wafers
-almond slivers
-After 8 mints
-Triskits
-coconut flakes

All in all I was pretty happy with how it turned out. I wouldn't mind trying a more complex one next year or maybe doing a Halloween one. I ended up taking mine to work and donating it for auction to raise funds for our food drive.

This is probably my last cooking post for 2009. I'm off to Seattle and will probably do a review or two of restaurants up there. I'm hoping that maybe I can hit some of their famous gourmet food trucks as well. So for now, have a happy and safe holiday and Season's Eatings to you all.

Scandinavian dough
1 cup butter, room temperature [226g]
1 cup brown sugar, well packed [220g]
2 tablespoons cinnamon
4 teaspoons ground ginger
3 teaspoons ground cloves
2 teaspoons baking soda
½ cup boiling water
5 cups all-purpose flour [875g]

1. In a large bowl, cream the butter and sugar until blended. Add the cinnamon, ginger and cloves. Mix the baking soda with the boiling water and add to the dough along with the flour. Mix to make a stiff dough. If necessary add more water, a tablespoon at a time. Chill 2 hours or overnight.

2. Cut patterns for the house, making patterns for the roof, front walls, gabled walls, chimney and door out of cardboard.

3. Roll the dough out on a large, ungreased baking sheet and place the patterns on the dough. Mark off the various pieces with a knife, but leave the pieces in place.

4. [I rolled out the dough on a floured bench, roughly 1/8 inch thick (which allows for fact that the dough puffs a little when baked), cut required shapes and transferred these to the baking sheet. Any scraps I saved and rerolled at the end.]

5. Preheat the oven to 375'F (190'C). Bake for 12 to 15 minutes until the cookie dough feels firm. After baking, again place the pattern on top of the gingerbread and trim the shapes, cutting the edges with a straight-edged knife. Leave to cool on the baking sheet.

Royal Icing:

1 large egg white
3 cups (330g) powdered sugar
1 teaspoon white vinegar
1 teaspoon almond extract

Beat all ingredients until smooth, adding the powdered sugar gradually to get the desired consistency. Pipe on pieces and allow to dry before assembling. If you aren't using it all at once you can keep it in a small bowl, loosely covered with a damp towel for a few hours until ready to use. You may have to beat it slightly to get it an even consistency if the top sets up a bit. Piped on the house, this will set up hard over time.

Simple Syrup:
2 cups (400g) sugar

Place in a small saucepan and heat until just boiling and the sugar dissolves. Dredge or brush the edges of the pieces to glue them together. If the syrup crystallizes, remake it.

It's no secret that I have a sweet tooth. This is problematic when one is single and has a craving for something sweet. Often I have the desire to bake a cake or pie. But then I would have an entire cake on my hands. Not a good idea.

On a recent Rachael Ray show there was a woman promoting her new cookbook - 101 Recipes for Microwave Mug Cakes. Turns out she had found a recipe for making a single serving cake in a coffee mug. She expanded on the idea by creating her own recipes to create a cookbook's worth.

I had my own craving and remembered that show. A quick search turned up a Wikihow page with three recipes - including the one I made.

Basically you grease a large coffee mug. Mix all the ingredients together in the mug and then microwave for three minutes. I made the chocolate cake with a handful of chocolate chips thrown in for good measure. It was pretty plain, so it could use a chocolate glaze. The easiest solution, though, is a dollop of whip cream.

We make microwave cakes all the time for Pampered Chef. I'm not sure why I had never thought about it before. I also have the Small Batch Baking Cookbook. Why not take those recipes and microwave them in a mug? I'm now curious to play around myself. But then again, do I really need to give in to my sweet tooth so easily?


Chocolate Mug Cake

4 Tbsp. cake flour
(other kinds of flour will work as well, but the cake will be heavier)
4 Tbsp. granulated sugar
2 Tbsp. cocoa
1 egg
3 Tbsp. milk (any kind)
3 Tbsp. oil (any kind but peanut)
splash in a little vanilla

Spray a large coffee mug with cooking spray. Mix together dry ingredients in the mug. Add the wet ingredients and mix well. Microwave on high for three minutes. Be careful! The mug will be hot. Remove it from the microwave with a potholder. Turn the cake out on a plate and wait for it to cool before eating.


Masullos on Urbanspoon

12/9/09 Update - Original Post follows


My roomie took me tonite for a birthday dinner. We had the Mustapha which has prosciutto, mozarella, and topped with arugula. I've had it before and really like it because I love the saltiness of prosciutto. We also had the Elisa with mozarella, Toscano salame, onion, fennel, romano and oregano. It was also good, but I still preferred the Mustapha.
Robert, the owner, came out to talk to us tonite. We talked about the divide between people who prefer Hot Italian and those who like Masullo's. He said he didn't mind the comparisons because it sort of drove business for people to try both - so they both win. This time it was a Wednesday night and business was moderate but constant.


The menu changes seasonally and this month they had gingerbread on the dessert menu. It was served with spiced apples and a little whipped cream. We received a nice sized wedge and found it was nicely spiced and served warm.

I fall into the Masullo's camp and am so glad it is only a quarter mile from my house.

Original Post


Masullo Pizza would be missed if you didn't know it was there or had the address. So far they have no signage and they are in a small strip building next to a smog check and auto repair. So I better give you the address: 2711 Riverside Blvd.


The restaurant itself is very spartan. The tables are made from wood from one old neighborhood oak tree. But simplicity often works and is a nice change of pace.


This is the small Margherita pizza. What is wrong with this picture?

Perhaps I'm spoiled or something. But I'm used to Margherita pizzas having more basil. There are only three leaves on here! But then I was researching on the internet and see that my understanding of a Margherita might be incorrect. In fact, Wikipedia gives an explanation and pictures of Margheritas that look just like this one.

The Masullo pizzas are done Neopolitan style.

"the genuine Neapolitan pizza dough consists of Italian wheat flour, natural Neapolitan yeast or brewer’s yeast, salt and water. The dough must be kneaded by hand or with a low-speed mixer. After the rising process, the dough must be formed by hand without the help of a rolling pin or other mechanical device, and may be no more than 3 mm (¹⁄₈ in) thick. The pizza must be baked for 60–90 seconds in a 485 °C (905 °F) stone oven with an oak-wood fire.[2] When cooked, it should be crispy, tender and fragrant."

I had called in my order to go and was surprised when they said it would be done in 5-10 minutes. I guess that's because of the thin crust and the high temperature oven. Sure enough, I was there in 10 minutes and it was coming out of the oven.

My Margherita seemed to fit the criteria. It had a nice thin bread crust. I'm still disappointed, though, in the amount of basil and cheese and I was unimpressed with the sauce - very plain. But I'm willing to try again. I look forward to trying the Jacqueline of potato, fontina, oregano and Niman Ranch bacon and the Mustapha of mozzarella, granna, prosciutto and arugula. Stay tuned for an updated review.

11/17/08 Update:

We went on a Friday night and the place was PACKED! It's a small place, so it doesn't take much. Every place at the communal large tables were taken as well. Luckily the people waiting were all for one large group, so the two of us were able to be seated in about five minutes.

This was my first time eating in - I had always just picked up "to go" orders. The tables are set with chilled bottles of water that are just refilled later with tap water and rechilled. We each ordered a salad. I had the mixed greens which came with nice, salty slices of prosciutto and a balsamic vinegrette. My friend had the frisee salad with blue cheese and pine nuts. Both came with two small triangles of pizza crust that was nicely salted.

This time we ordered the Lupe, which is a new pizza combo. It had broccoli rabe, bacon, anchovies, and cheese. I've never had anchovies on pizza before but did like that super saltiness that they gave to offset the bitterness of the rabe. A great pizza that we both liked.

BTW, I had previously ordered the Josephine with the thinly sliced potato. Didn't really care for that one. Also, I observed the American, which is basically a pepperoni pizza. Be aware that, like the Margherita, the toppings are sparse. So expect only about 5-6 pepperonis and not covered like you would find at other pizza places.

I originally planned to make Scotch eggs during the summer. In Britain they are considered the equivalent of our fried chicken - perfect picnic fare. They are also good to take on hikes because they are small and high in protein. But it was one of those things that I never got around to until now. I was going through the freezer and found the Italian sausage I had bought for the project. Thawed it out, cooked some eggs, and finally got down to it.


Scotch eggs are traditionally made with a breakfast type sausage or get ground pork and season it yourself. You encase a hard boiled egg with the sausage, roll in bread crumbs, and deep fry it.


I used turkey Italian sausage and rolled them in the panko crumbs I got as swag at the Foodbuzz Festival. Quick and easy.


Easy Scotch eggs

1 lb of sausage of your choice
6 hard boiled eggs, peeled
bread crumbs

Encase the hard boiled eggs in sausage. Roll in bread crumbs. Deep fry in oil until sausage is cooked, about three minutes per egg. Drain on paper towels. Serve hot or cold.

The November 2009 Daring Bakers Challenge was chosen and hosted by Lisa Michele of Parsley, Sage, Desserts and Line Drives. She chose the Italian Pastry, Cannolo (Cannoli is plural), using the cookbooks Lidia’s Italian-American Kitchen by Lidia Matticchio Bastianich and The Sopranos Family Cookbook by Allen Rucker; recipes by Michelle Scicolone, as ingredient/direction guides. She added her own modifications/changes, so the recipe is not 100% verbatim from either book.

Cannoli were another dessert that I had very little experience with. A true cannolo has a filling of primarily ricotta, and that just never sounded as good to me as good ol whipped cream in a cream puff. But I had had one really good cannolo at an Italian restaurant in San Francisco. So I had enough of a naive curiosity to want to participate in this challenge.

My pre-cooking research took me to Sampino's where I had heard they had good cannolis. I wasn't too impressed, but at least I had a glimpse and a taste. Next I headed to the restaurant supply store in search of cannoli forms. I was floored to find them trying to sell a set of six for $60!!! $10 each for a metal tube? No way! Luckily I was able to borrow forms from Dennis of The Hidden Kitchen. Further preparation included the purchase of a pasta rolling machine with the thought that this would ease the work of rolling out the dough. Lastly, I made a batch of homemade ricotta.

The making of the dough was pretty easy. But, unfortunately, I found that the pasta machine was not so useful after all. The dough was pretty elastic and so I found that I had better success rolling it out with a pin, cutting out a circle, then rolling the circle out again right before wrapping it around the form. Then it was into the hot oil to fry.


Later I learned that some were more creative than I in making forms.
Moja kuchnia w Irlandii
made forms out of disposable aluminum pans. I'll remember this for the future so I don't have to buy or borrow.


I was pretty proud of my first attempt. I made 16 tubes and had two that failed and came undone in the oil to end up as discs. The leftover dough I cut into tiny bits and also fried up as scraps. The tubes were made on Sunday and stored until Thanksgiving Thursday. To perk them up I heated them in a 350 oven for a few minutes. I then dipped the ends in chocolate and chopped pistachio. Final assembly was done after Thanksgiving dinner. I had already made the filling and transported it in pastry bags so that I just had to quickly pipe it into the tubes.

You see the final product in the topmost picture. Pretty successful. I was very happy with the outcome of this challenge and can see myself making some more in the future. Below are the recipes for the shells and the pumpkin filling.


CANNOLI SHELLS
2 cups (250 grams/8.82 ounces) all-purpose flour
2 tablespoons(28 grams/1 ounce) sugar
1 teaspoon (5 grams/0.06 ounces) unsweetened baking cocoa powder
1/2 teaspoon (1.15 grams/0.04 ounces) ground cinnamon
1/2 teaspoon (approx. 3 grams/0.11 ounces) salt
3 tablespoons (42 grams/1.5 ounces) vegetable or olive oil
1 teaspoon (5 grams/0.18 ounces) white wine vinegar
Approximately 1/2 cup (approx. 59 grams/approx. 4 fluid ounces/approx. 125 ml) sweet Marsala or any white or red wine you have on hand
1 large egg, separated (you will need the egg white but not the yolk)
Vegetable or any neutral oil for frying – about 2 quarts (8 cups/approx. 2 litres)
1/2 cup (approx. 62 grams/2 ounces) toasted, chopped pistachio nuts, mini chocolate chips/grated chocolate and/or candied or plain zests, fruits etc.. for garnish
Confectioners' sugar

1. In the bowl of an electric stand mixer or food processor, combine the flour, sugar, cocoa, cinnamon, and salt. Stir in the oil, vinegar, and enough of the wine to make a soft dough. Turn the dough out onto a lightly floured surface and knead until smooth and well blended, about 2 minutes. Shape the dough into a ball. Cover with plastic wrap and let rest in the fridge from 2 hours to overnight.

2 Cut the dough into two pieces. Keep the remaining dough covered while you work. Lightly flour a large cutting or pastry board and roll the dough until super thin, about 1/16 to 1/8” thick (An area of about 13 inches by 18 inches should give you that). Cut out 3 to 5-inch circles (3-inch – small/medium; 4-inch – medium/large; 5-inch;- large. Your choice). Roll the cut out circle into an oval, rolling it larger and thinner if it’s shrunk a little.

3 Oil the outside of the cannoli tubes (You only have to do this once, as the oil from the deep fry will keep them well, uhh, oiled..lol). Roll a dough oval from the long side (If square, position like a diamond, and place tube/form on the corner closest to you, then roll) around each tube/form and dab a little egg white on the dough where the edges overlap. (Avoid getting egg white on the tube, or the pastry will stick to it.) Press well to seal. Set aside to let the egg white seal dry a little.

4. In a deep heavy saucepan, pour enough oil to reach a depth of 3 inches, or if using an electric deep-fryer, follow the manufacturer's directions. Heat the oil to 375°F (190 °C) on a deep fry thermometer, or until a small piece of the dough or bread cube placed in the oil sizzles and browns in 1 minute. Have ready a tray or sheet pan lined with paper towels or paper bags.

5. Carefully lower a few of the cannoli tubes into the hot oil. Do not crowd the pan. Fry the shells until golden, about 2 minutes, turning them so that they brown evenly.

8. Lift a cannoli tube with a wire skimmer or large slotted spoon, out of the oil. Using tongs, grasp the cannoli tube at one end. Very carefully remove the cannoli tube with the open sides straight up and down so that the oil flows back into the pan. Place the tube on paper towels or bags to drain. Repeat with the remaining tubes. While they are still hot, grasp the tubes with a potholder and pull the cannoli shells off the tubes with a pair of tongs, or with your hand protected by an oven mitt or towel. Let the shells cool completely on the paper towels. Place shells on cooling rack until ready to fill.

9. Repeat making and frying the shells with the remaining dough. If you are reusing the cannoli tubes, let them cool before wrapping them in the dough.


PUMPKIN FILLING

1/2 cup (123 grams/4.34 ounces) ricotta cheese, drained
1/2 cup (113 grams/4.04 ounces) mascarpone cheese
1/2 cup (122.5 grams/4.32 ounces) canned pumpkin, drained like ricotta
3/4 cup (75 grams/2.65 ounces) confectioner’s sugar, sifted
1/2 to 1 teaspoon (approx. 1.7 grams/approx. 0.06 ounces) pumpkin pie spice (taste)
1/2 teaspoon (approx. 2 grams/approx. 0.08 ounces) pure vanilla extract
6-8 cannoli shells

1. In a bowl with electric mixer, beat ricotta and mascarpone until smooth and creamy. Beat in confectioner’s sugar, pumpkin, pumpkin pie spice, vanilla and blend until smooth. Transfer to another bowl, cover and chill until it firms up a bit. (The filling can be made up to 24 hours prior to filling the shells. Just cover and keep refrigerated).
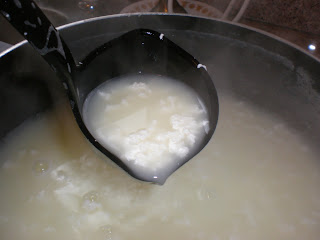
Who knew making ricotta cheese was so easy?! All you need is milk and, in this recipe, buttermilk. The recipe I used is from 101 Cookbooks. I chose it because I didn't want to get all complicated with adding lemon or vinegar like some recipes call for. This just called for a gallon of whole milk and a quart of buttermilk.


You heat the milks until they reach 175 degrees. That is when the curds form so that you can separate them from the liquid whey.


I scooped them into a cheesecloth that I had folded in layers over a colander.


Then I hung the whole thing up so that as much liquid as possible would drain away. And here is the final product...


For me, Brussels sprouts are a tradition food. We only had them at Thanksgiving and Christmas dinners and were a favorite of my father. They held special occasion status because we lived overseas and only got them as frozen.


Now I can go down the street to the weekly market under the freeway and buy them super fresh - still on the stalk. And, it turns out, that you can keep them like a bouquet of flowers or fresh herbs. Cut off the end and set it in a vase of water. It will continue to live until you are ready to use them.

When I was growing up we boiled them. Now I know that there are much better ways to prepare them. Best of all - roast 'em.


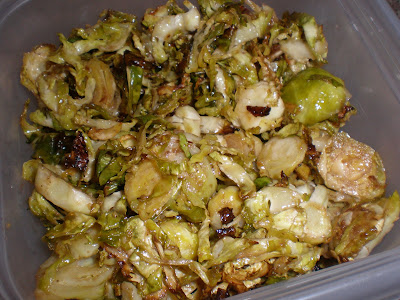
The first thing to do prep-wise is to clean the sprouts. Take off the dark outer leaves to get to the more tender leaves underneath. Then you can halve or quarter them or do what I did below, slice them to create shred.


Roasted Brussels Sprouts Salad

Preheat oven to 350 degrees. Toss prepared sprouts in a couple of tablespoons of olive oil. Do not use too much. A little goes a long way. Season with salt and pepper. Add 1-2 crushed cloves of garlic. Toss to coat the sprouts. Spread on a baking sheet. Roast in the oven for 30-40 minutes. Remove from oven. Drizzle with balsamic vinegar to taste. Serve hot or cold.
There are the Twitter lovers and then there are the less techy who don't understand the use/benefits of Twitter. I've been learning the benefits more and more over the last few months and thought I'd share some of my insights for those unconverted folks.

First I do believe that there are two user types with a fuzzy line between them. The first are the Tweeters. More on them in a moment. The second I call the the Followers. Followers are average folk who will follow tweets from the Tweeters, but don't really tweet much themselves - usually because as an individual Joe/Jane, they don't need to. After all, as an individual Joe/Jane there really isn't much need to tweet about going to get your tires aligned and other mundane life happenings.

Tweeting I personally see more as a marketing tool for celebrities and companies. The most common examples are when companies tweet about a sale they are having or some major announcement. After all, the Followers of Tweeters are usually people who already love the brand/celebrity. I'm certainly not gonna follow Sarah Palin because I'm no fan and I could care less about anything she has to say. But I do follow Ellen Degeneres, Pee Wee Herman, and sites that I know post free stuff/giveaways on a regular basis.

Another great marketing example is street food vendors. There's been a huge increase in popularity and quality of street food vendors. These new gourmet trucks/carts have been featured on news programs and in various articles lately. You can even check them out on blogs such as VendrTV and Food Cruisers. But what's great is how the street vendors use Twitter. After all, they're mobile and sometimes, depending on the jurisdiction, have to move every few hours. So how do their fans know where to go? By Twitter! The vendor will send out a tweet saying "We're at 5th and Main from 1-4. Cya there!" By the time they park their truck, they've already got customers lined up.

But lately I've been amazed at responses to my own tweets and what's come from them. The first is just a goofy example in that I had a road rage issue that happened to me. My tweet says it all - "Wacko road rage bitch nearly ran me off freeway! CHP pulled her over. LOL" Anyway, I get a response from a total stranger tweeter who suggests I post my road rage story on their road rage website. In another case, I posted a tweet about an extra ticket for sale and it got retweeted by a Tweeter who specializes in For Sale announcements.

How did they find me? They apparently use the Search feature to look for key words/phrases. So now let's take that and expand it into how a company turns that into customer service.

As of this writing I am almost 48 hours without home internet service. Comcast has been working in my area and I lost service. I called tech support twice and they couldn't get me back on. So they sent out a tech, for which I had to wait around in my house for a lovely three hour waiting period. He didn't get me back on either. I tweeted my frustration. Lo and behold, I get a response to my tweet from a Comcast customer service agent. Apparently they search for Comcast being mentioned in tweets. So now ComcastBonnie is researching and assisting and we are tweeting back and forth. Now I'm not a happy camper - yet - but I sure am impressed with this proactive use of Twitter.

So, as my title implies, I'm finding more and more interesting and intriguing uses of Twitter. I already knew of its use as a marketing tool, but had never considered the use for customer service - and Comcast has. It's companies like Comcast that are forward thinking enough to embrace new technology and use it to their advantage. As I come across new examples, I'll be sure to share them.
My father has been featured in Koi Carp magazine for his koi slates. In order to read the article, click on the image. If it isn't clear enough, click it again and you should see a magnifying icon that you can click on to get it even bigger/clearer. This works on IE.


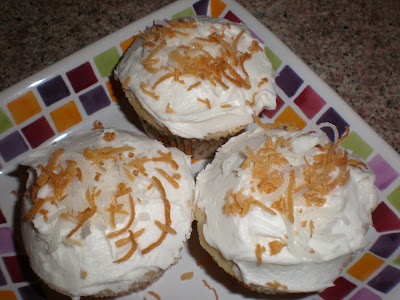
I've been wanting to make coconut cupcakes for a while now, but had been disappointed in all the recipes I saw. Pretty much all were cake mix doctoring of taking a white cake mix and throwing in some coconut milk. I wanted a cake from scratch. So I decided to just fiddle with Dorie Greenspan's Perfect Party Cake. I didn't adjust it much. I just substituted the coconut milk where the buttermilk should have gone.

Coconut Cake Batter

2 1/4 c cake flour
1 T baking powder
1/2 t salt
1 1/4 c coconut milk
4 large egg whites
1 1/2 c sugar
1 stick unsalted butter, room temperature
1/2 t vanilla

Heat oven to 350 degrees.
Sift together the flour, baking powder, and salt into a bowl.
Whisk together the egg whites and coconut milk in a medium bowl.
In a large bowl beat together the butter and the sugar until they are light and fluffy, about 3 minutes. Beat in the vanilla and 1/3 of the flour mixture at medium speed. Beat in half of the egg/milk mixture, then another 1/3 of the flour mixture. After those are mixed in, add the last of the egg/milk mixture and, finally, the last of the flour. Beat for another two minutes to mix and aerate the batter thoroughly.

I made cupcakes this time. But if you want to make a cake, be sure to butter your cake pans and cut a parchment liner for the bottom of the cake pan. Bake until the tester comes out clean.

Coconut Frosting

1 stick of unsalted butter, room temp
3-4 c powdered sugar
1/3 c coconut milk
1/2 t vanilla

Beat butter until light and fluffy. Add half of the powdered sugar and blend well. Beat in coconut milk and then add additional sugar until desired consistency is reached. Add vanilla and mix well.

I toasted some coconut flakes to sprinkle on top.


Coconut Milk

Last week Simply Recipes won the Foodbuzz Blogger Award for Best Recipe Blog. SR has repeatedly been awarded and rated highly for being one of the top recipe blogs on the internet. That's pretty impressive - the whole internet! And it is based right here in Sacramento. I've met Elise, the site creator, at a Sacramento food bloggers' potluck last year. And favorite Vanilla Garlic blogger, Garrett, often guest writes for SR as well. And yet somehow I managed to never run into Elise last week at the conference.

And, surprisingly, I've never made a SR recipe - until now. I often look at the site and admire some of the featured recipes, but just never got around to making any. But this week I wanted to make something I've never cooked before, oxtails. I looked up recipes and saw that there was one on SR and so I decided this was the one to try.


The Oxtail Stew recipe was super easy. WOW! I was blown away at how yummy this was! Considering a 500+ pound steer, that little tail is mighty flavorful. But all that taste comes from the loads of fat. It just drips of grease. Plus I made the mistake of breaking apart the meat before straining the fat, thus making it very difficult to separate. Next time I will stop fiddling with it, pull out the tail pieces, strain off the fat, and then return the meat to the pot and break it apart.

Still, I cooked the stew over two days and so the flavors were all condensed down to super potency. Each biteful was heavenly. I'll definitely be making oxtails again. What a winner!

Over 200 bloggers from across the country (and some foreign countries) showed up for a three day event. And the beautiful part? If you are a Foodbuzz Featured Publisher, it was all free!

Since I am close enough, I opted to join in on Saturday, thereby missing the Friday opening events. Apparently I missed some great food. Friday night had a special Streetcart feast held at the Ferry Building. We aren't talking about roach coaches. We are talking about higher quality street vendors with specialties such as pasties, barbecue, etc. Based on what I heard, I dare not miss opening festivities when I go next year.

Saturday had a small breakfast of pastries and coffee at the Ferry Building again. The place was bustling because it was an absolutely picture perfect warm day for S.F. Truly lucky for the out-of-town visitors. We have a fantastic farmers market in Sacramento, but the one there is pretty outrageous. Below are some shots I took from my wandering around the market.


The morning included seminars on olive oil tasting, cheese tasting, and the topic of Farm to Table. I would have loved to get in on the tastings, but I got word too late and those were full. But I was pleasantly surprised by the discussion at Farm to Table. It was led by the chef from Americano at Hotel Vitale (host site) and from the general manager of Hearst Ranch of the Hearst publishing empire. They raise grass fed cattle on the San Simeon property around Hearst castle. His beef is more expensive but delicious because they are free range living a stress free life. He sells to some of the top California restaurants and online as well. Discussion was on what is involved in the background costs and all the middlemen in the food industry chain. What he and others would like to do is to go more directly from farm to table without all those middlemen. It adds cost and delays.

He also started to sell 'shares' of beef instead of the traditional method of ordering a case of steaks or 100 pounds of ground beef. Instead you get a 1/8, 1/4, or even 1/2 a steer which means a variety of cuts. The traditional method says that you buy steaks at, say, $12/lb and ground beef at $3/lb. But if you buy shares, you average out the cost so that you get a variety of steaks, cuts, and ground for an average cost of, say, $8/lb.

I asked the winning question of the session - what kind of discount are you offering us? He hadn't prepared any at that point but quickly offered 30% off and free shipping for anyone who uses the coupon code 'foodbuzz'. This offer is open to anyone, so look into it and share the offer with your friends.


For the afternoon we moved to the top floor of the Metreon for samplings from about 50 food vendors/providors. There were breweries, wineries, confectioners, etc. Most have partnerships with and support the Foodbuzz website. They understand the importance that bloggers now have in spreading the word as marketing for their products. We got a lot more freebies and tasted all sorts of items.

One table that I'd like to share was Foodzie.com. They serve as a 'grocery' site for independent producers. For instance, let's say you decided to start a gourmet pot pie site for selling your unique pot pies over the internet. You have your own website, but you need to reach out even more. You can join with foodzie and they will also market your pot pies for you, along with other folks' chocolates, jellies, cookies, etc. Definitely a great site to check out if you are looking for unique gifts to send to people.

The biggest sponsors of the festival were Nature's Pride breads and Bertolli. We, as bloggers, can sign up to be testers with Foodbuzz and so sometimes I get free things shipped to me. So far I've gotten Quaker oat bars and two loaves of NP's breads. They ask that if you like their product you spread the word. They also ask that food bloggers try to create recipes with their product. In the case of both Bertolli and NP, submitted entries were whittled down to finalists that we all voted on. Then they presented their recipes in demos. That is the picture above. LK, from Healthy Delicious, used a Bertolli sauce to make a cioppino.

I think this way of partnering with food bloggers works. Especially since I had heard bad things with the Blogher festival last month. Bertolli also sponsors that as well and got a lot of flack for serving packaged pasta and sauce to the Blogher food bloggers. Apparently there was kind of a "food bloggers expect fresh and better quality than packaged food!" But I think it was probably a case of how the arranged partnership worked with that group. Ours worked better because they challenged our bloggers to be creative with their product.


Saturday night was a great dinner held at the Greenleaf Produce warehouses in South San Francisco. At the end of the evening they announced the winners of the Food Blogger Awards that had all been nominated and voted upon by us, other food bloggers. Jen, the Leftover Queen, was the presenter. Dinner ran late, so they were read off rapidly.