Recently I have gotten samples from companies that I saw at the Fancy Food Show in January. I've also gotten more interested in gluten-free baking. Two companies had sent me boxes of gluten-free mixes and I saw that both had sent me white and chocolate cake mixes. With so many mixes, I needed to get baking! After all, although I'm interested in trying them, I also don't need to have baked goods/mixes sitting around my house. I've gained enough weight this year. Sigh. So I decided to make my coworkers the taste testers and baked up the white cake mixes from each company to do a side by side comparison.


The first company was Something Good from Australia. Their products are distributed by the same company that I got the Damper mix from. Nice thing about their mix was that it came with icing mix and sprinkles included.


The second company was good ol Betty Crocker. I had stumbled across their gluten-free website and emailed them to see if they would send me samples. They sent mixes and frosting.

I baked both batches on Sunday morning and started with a personal taste test with Poor Girl, Kimberly, who had stopped by. I then took the rest to work for Monday and told my coworkers to halve them and try one of each and give me their opinions.

I'll start by telling you how the mixes differed and then we'll get to the actual taste comparison.

Something Good's mix is not only gluten-free, it is also dairy, soy, and nut allergen free. This is a significant difference because I'm sure it makes a difference to some of the ingredients in the mix. It required just adding eggs and water to the cake mix. The icing was surely just a package of powdered sugar and they just told you to beat some water and margarine into it to make the icing. I used butter. It is nice that it is a complete package of mix, icing, and decoration. In the pictures, obviously, they have the sprinkles on them.

Betty Crocker's mix is only gluten-free. It also made one dozen cupcakes but seemed to be just a bit more batter so that the cupcakes were larger in size. They ask you to mix in water, eggs, butter, and vanilla. This adds a lot to the moisture content and flavor. They had sent me whipped icing as well, but it is sold separately and is not labeled gluten-free.

Now I like to bake from scratch and so I use cake mixes only in emergencies or if I doctor them all up. One reason I hate mixes is because they are all air and fluff. Sure they are super moist, but they have no real substance. After all, once you start baking European style and other from-scratch cakes you truly appreciate things like density, texture, and crumb.


Here is the Something Good cupcake. These cupcakes were smaller, denser, and drier. They had little flavor. Kimberly and I agreed that while we liked the denser cake, it lacked any flavor. The cake held together well and reminded me texture-wise of some of the specialty cakes I've been baking. The coworkers disliked this one because it was very dry. So maybe these cupcakes should be eaten same day.


The Betty Crocker was the favorite from the coworkers. They liked that is was moister and had more flavor. This is easily understandable. This mix had vanilla and butter mixed in. Kimberly and I liked the flavor, but weren't that thrilled by the texture. I felt the texture was more bready and chewy.

If we go by majority vote, Betty Crocker wins. But I think it wins on flavor and Something Good wins on texture.

Here's a more concise breakdown...

Something Good - multi-allergen free, icing and decoration included, good texture and density, lacks flavor

Betty Crocker - only gluten-free, good flavor and texture, easily found in stores

You will find Something Good found at the Gluten-free Specialty Store at 2612 J Street.

Today, at every Whole Foods store in the world, a giant round of Parmigiano Reggiano was broken open at the exact same time. Here in California, that occurred at noon. In England, 8 p.m. Since I needed a little blog inspiration, I decided to head on over to the Sacramento store.

I actually got there an hour too early since I thought it was going to happen at 11. So I had some lunch, browsed the store, and tasted some cheese. I am thankful that the store is far away from me and therefore easy to avoid. Some women can't resist shoes, I can't resist good groceries. Sigh.


This particular cheese was two years old. Two years is the average time allowed for aging and some are held to seven. As they age they get grainier and darker in color. Here you can see the burned brand showing that it has passed inspection.


Finally a small crowd gathered. Here are the special knives used to open up the large rounds. There is a hooked blade for scoring the rind. There is an almond shaped blade (one edge sharp, the other not) for cutting down a bit deeper. Then there is a diamond blade (double edged) for spiking into the cheese.


The cheesemonger with the privilege was named Jeremy. Here he is doing the initial scoring with the hooked blade. He's getting through the thick rind.


He now switches to the almond blade to be able to pull the knife down along the score to a depth of about an inch.


He plunges a diamond blade into the top.


And a couple more along each side. He then stands back for about a minute. He says that the scoring and the placed knives help to relieve the pressure in the cheese...


because in the end, it kind of bursts open on its own. Like when you pull the strip on Pillsbury biscuits and the can pops open.


After the opening was finished, they gave out tastes of the cheese. They also had made an arugula salad to serve with a bit of Parm on top.

When buying Parmesan it is best to get a freshly cut piece off of a newly opened wheel. You are not supposed to buy too much since it shouldn't be kept for more than a couple of weeks. Also look for the thinnest rind possible. The rind is inedible, but can be thrown into soups for flavoring. With the price of the cheese, the thought is that you don't want to be spending money on useless rind.

According to the Cheese Primer by Steve Jenkins, the best way to store a large chunk is to wrap it in a moistened cheesecloth (or even paper towel) and then in foil and place it in your veggie drawer.

I did buy more cheeses which I will post later this week.


NOTE (2/21/13)  As of December 2012 there is a new vendor at Cafe Plaza and this review is no longer accurate. In fact, many are very unhappy with the new vendor.  Since I rarely eat there now, I will make no further comment.

There is no better State cafeteria in town than the one at CalPERS. That is a fact. For instance, the above picture was my lunch today. They are celebrating Black History month and diversity on Wednesdays. The entree area was featuring Caribbean fare today. I had the Caribbean spiced lamb stew, sweet potatoes and black eyed peas. They even gave me the ham hock from the peas. Other choices were: mango glazed barbecue ribs, coconut rice, and plantains. The next line over was making Caribbean rice bowls. Cost of my plate? $6.99

Such is the fabulous fare that Sodexo provides at our cafe. And the prices are great because they have a State subsidy. I can get a tuna melt sandwich on my 'poor' days for $2.70.

The salad bar is done by weight - $.40 an ounce. I think it is a great deal because when Sodexo took over the contract they added chopped chicken breast to the bar. Now I can build a salad to my liking without having to buy all the veggies myself that then rot away in my frig if I don't use them in time. My salad weight usually comes out to about $4. I still try to save a little cash by sometimes bringing the heavy chicken breast from home along with my dressing. Then I just buy the greens from the bar.

The CalPERS cafeteria is located inside the CalPERS building at the 3rd and Q corner. It's open from 7 a.m. to 4 p.m. Monday-Friday. You can access the weekly menu here.
OK. I know it's a little on the late side for new year resolutions. But it's only February, so it's close enough. My resolution? To bake gluten-free within my home.

The more I learn about gluten-free foods the more my curiosity has been tickled. Gluten, like corn byproducts, salt, and sugar, is found in all sorts of foods if you look at food labels. Turns out it is even found in soy sauce! You logically think soy sauce would be gluten-free, but apparently it's not.

Then I'm learning that when it comes to dietary restrictions, gluten-free is the probably the easiest to work around. (Now before those with celiac disease get all defensive, I KNOW that there are so many other issues like eating out at restaurants, etc. that you have to deal with. But I'm talking purely in terms of finding cooking alternatives.) There are so many alternatives in terms of flours and pastas, etc. that you can still pretty much make anything with simple substitutions.

That's why I figure, why not go gluten-free at home? Sure, I don't need to as I have no allergies at all. But if there's an abundance of gluten-full food out there in the world, I can eat that when I leave my home. I can get my gluten and wheat products when I order a pizza or chomp on bread at a restaurant. I can enjoy brownies, cookies, and cakes baked the normal way, with wheat flour, everywhere else. I'll just not bake with it at home and in that way open a whole new world of experimenting at home. It will open a new door to adventures in baking.

To start out I decided to find the gluten-free store I had heard was located on J Street. On a furlough Friday I took off to find the Gluten-Free Specialty store at 2612 J Street. I also wanted to meet Sacramento food blogger Debbie of Gluten Free Adventures, who also works there. Turns out the owner, Melanie, also has a blog for the store at Gluten Free Specialty.

The store is small but Debbie says that they have plans to expand to at least twice the size. They have been in business for two years and I could tell that they were doing quite well. The shelves were certainly packed with all sorts of food items. Although everything in the store is gluten-free, they also carry foods in regards to other food allergies such as soy, lactose, yeast, etc.

We talked a little about my baking decision and how to know when to use what flour. Debbie explained that you needed to always have a mixture of at least three or four flour substitutes (like potato starch, rice flour, and tapioca flour together). There was a shelving unit filled with all the flour alternatives sold individually. But you have to be willing to buy all the different types and then mix them up yourself.


Debbi also pointed out many prepackaged flour mixes if you want to avoid making your own mixtures. One of her favorites was the Gluten Free Mama brand with the almond flour. I'm a fan of almond meal/flour and so I bought a small bag of that. She explained that this brand didn't include the xanthan gum but I had already purchased that a few days ago at the Coop.

Xanthan gum is also used in gluten-free baking. Since the gluten found in wheat must be omitted, xanthan gum is used to give the dough or batter a "stickiness" that would otherwise be achieved with the gluten.


Debbie explained that baking with the different flour substitutes really is a bit of experimentation and finding out what you like. Each substitute has different properties and so it will influence the final products taste, texture, and appearance. Because you don't have gluten to provide the binding 'glue' that some baked goods need, you have to expect these differences.

Off I went home with my bag of flour and thoughts of my next baking experiments. I knew I wanted to tackle lemon bars next. I have my yearly abundance of lemons thanks to my giant tree. I also knew that lemon bar crust is supposed to be a flaky shortbread and so it probably would not suffer from an alternate flour. It was also Valentine's Day weekend and the ex-hubby loves lemons. I figured lemon bars were an easy and nice little V Day gift in exchange for his buying dinner. The lemon bars came out great. Just as I thought, the crust had a nice crumbly texture but held up enough to keep the bar form.


I figured the next big test was chocolate chip cookies. I opted to use the NY Times recipe that I made a few months ago and just sub the flour. In that recipe, time was important to age and produce the complex flavors. So I made the dough and then stuck it in the fridge to age.

I baked them up today and you would never know the difference taste-wise. The texture, though, suffered a little in comparison when I had made them with wheat flour. These really spread out flat on the pan and crumbled easily.

I'll continue my gluten-free baking and learning more about the different substitutions. I'm excited about this new baking adventure and will certainly keep sharing via the blog.
Roseville Gourmet on Urbanspoon
My ex-husband and I are lucky to be friends and have had an amicable divorce. We've now been divorced as long as we were married - 9.5 years. But we agree that we will always be in each other's lives and that any future spouses will just have to be able to accept that.

This Valentine's he asked me to dinner on Saturday for old time's sake. He took me to an old haunt, Roseville Gourmet. The last time I went there was when we were married, so it's been at least ten years. When I asked if the ownership was the same, the waitress said it was and that they've been there now for about 20 years.

You would never guess that it is a Chinese restaurant by the name. It is situated right off the freeway on Douglas Blvd. and there is plenty of parking for this good sized restaurant. It is bright, cheerful, and clean. The staff were also attentive.

On the menu are some preset choices. We always got the same one and this day was no different. After all, this was for memory sake. There was a change though.

Ten years ago we LOVED this dinner menu. I would even go to order the dumplings to go as a light dinner sometimes. I think it might be just a change in my tastebuds and dining scorecard since I am so much more the foodie now. My standards have really gone up. So I'm going to say that the meal was good, but just not great. Not great in the way my memory had it. Then again, sometimes you kinda romanticize memories, you know?


The first thing you receive is the Hot & Sour soup. The flavor is good and the soup is filled with ingredients - they don't cheap out. But this is the first time I've ever had such a thick version of the soup. Good, but a little strange since it wasn't what I was used to.


Next came a plate of sliced cured pork with mustard sauce. Nothing special there. Then the chicken dumplings in sweet chili sauce. These we always like. They are large and the sauce is plentiful. Not sure if they make it themselves but it certainly is different than any of the bottle sauces I see in the store. These big boys are pretty filling on their own. The photo shows two of the four because we had already devoured the first two.


The two entree courses came next with the nutty fried rice. One of them is Walnut Chicken. This, again, was good but not exceptional. It was like any other walnut chicken or prawns that you would get.


Our other favorite is the lamb chops. How often do you find lamb chops at a Chinese restaurant? These are done in a Hoisin sauce and are tender and yummy. I love lamb chops and always end up nibbling on the bones to get every last bit. They were good about giving you an even number of chops so that you didn't have to fight over the odd extra.

The meal was good and I don't mind recommending Roseville Gourmet. It's just that there are so many Chinese restaurants out there and if you want to find really traditional versus Americanized, then you best go elsewhere.

We all know that eating nuts, especially almonds, is good for you. High in fiber and other good nutrients but without worries of escalating your glucose levels. But plain nuts are boring. I wanted some flavored nuts but without sugar. I found this recipe and made a batch for my nibble jar at work.

Chili-Lime Almonds

2 TBSP lime juice
1 TBSP olive oil
1 tsp paprika
1 tsp salt
1 tsp chili powder
1/2 tsp ground red pepper
3 c almonds

Mix first 6 ingredients together and add nuts. Toss well. Spread on lightly greased aluminum foil-lined jelly roll pan. Bake at 350 for 12 to 14 minutes or until nutsare toasted and dry, stirring occasionally. Cool completely.


Almonds


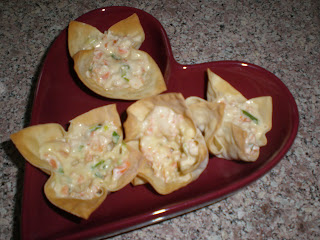
This is a Pampered Chef recipe that I like for quick and easy appetizers. You can substitute chicken for the shrimp and it's just as good.

24 square wonton wrappers
1 tablespoon butter or margarine, melted
10 ounces shelled de-veined and cooked medium shrimp
2 green onions, finely chopped
1/3 cup grated carrot
4 ounces cream cheese, softened
1 garlic clove, pressed
1/2 teaspoon Worcestershire sauce
1 cup (4 ounces) shredded mozzarella cheese

Heat oven to 350 degrees F. Lightly spray mini-muffin pan with nonstick cooking spray.


With pastry brush, brush one side of each wonton wrapper with melted butter. Press wonton buttered side up into muffin cup. Bake 8 minutes or until edges turn light golden brown. Remove pan from oven.


Meanwhile, reserve 24 shrimp. Finely chop remaining shrimp. Combine cream cheese, garlic and Worcestershire sauce in bowl, blend well. Stir in chopped shrimp, green onions, carrot and mozzarella cheese. Using small scoop fill each wonton cup with rounded scoop of cream cheese mixture. Top with reserved shrimp. Bake 5 minutes or until wontons are golden brown and filling is bubbly around edges.

We've got cowboys, they've got rovers. We've got ranches, they've got stations. We've got biscuits, they've got damper. There are a lot of similarities between the U.S. and Australia when it comes to raising cattle - except for the vocabulary.

When I was at the Fancy Food Show I came across a booth of Australian products. I started up a conversation with Michael because I have Aussie cousins and also because I was hoping he might be a purveyor of some of the new Aussie spices coming out of the Outback (such as wattleseed). He didn't have any spices, but he did offer me a sample of their Taste of the Outback damper mix. I took it happily and went on my way.


A couple weeks went by and then I thought of the damper mix and looked up some info on the internet. Basically damper is the equivalent of biscuits. When the rovers were out on the trails they often had to just make biscuits by mixing flour and water and throwing it into the ash of the campfire to cook. The difference from our biscuits seems to be only in the amount of mixing done. Biscuits are barely mixed in order to get a flaky texture. Damper is kneaded more and is more bready.

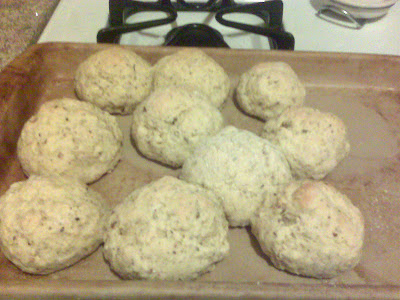
The instructions said to portion the dough into muffin tins but I was looking for more biscuit-like/scone-like and so I just made globs of the dough and put them on my baking stone.

The mix I was given was bush lemon, lime, and chili. Bush lemons have to be hardy to grow in the Outback and have a very thick skin. It was a savory scone, - much more than I anticipated! They were quite flavorful with the spice and would make an excellent side to a bowl of chili instead of cornbread. So I decided to save them and threw them into the freezer to keep for a chili day.

I'm not sure what stores locally might carry it, but you can buy it online via their site or Amazon at this link.


This is a repost of the original article/recipe with a new update of making it gluten-free.

As I delve into gluten-free baking, I've started with perhaps the most adaptable recipe to play with - brownies. I think they lend themselves so well to gluten-free baking because they don't call for much flour at all - only one cup.

So if you choose to do the GF version, instead of the cup of flour, mix together 3/4 cup potato starch, 1/4 cup tapioca starch, 1 cup rice flour, and 1 teaspoon of xanthum gum. This will make two cups. Use only one cup for the brownie recipe (equal 1-1 substitution) and save the other cup for next time.

They taste and feel exactly the same as the original recipe. Enjoy.

Original post:

There are two important elements involved in this recipe. First is that I took a brownie recipe from Cooks Illustrated and then altered it by adding kahlua. I figured if alcohol keeps cakes nice and moist, surely it would do that for brownies. Second, I've sold Pampered Chef for over 10 years and am a true believer in Stoneware and love the fact that you can cook in the microwave with it. But even though I tend to make these brownies in the microwave because I'm impatient, you can bake them in the regular oven if you want. I like a fudgy, moist brownie versus a cakey brownie, so the microwave does that great.

This is what I say at shows to demonstrate the benefits of Stoneware:

How many times have you made a brownie in a metal or glass pan and when the timer rings you open the oven door to find a brownie cooked around the edges, but still goopy in the middle? Then you add another 5 or so minutes, check it again, and do the finger test - touch the center to see if it is set. You pull it out and you look at it and you have a sinkhole brownie. The edges are higher up, but the center is sunken in. That's because metal and glass cook from the outer edges in. Stoneware cooks evenly throughout so that when that timer rings and you open the door you have a perfectly cooked brownie, even across the pan - no sinkhole! Also, those sinkhole brownies might have a nicely cooked center, but those edges are dry, crunchy, overcooked. Because a stoneware brownie is evenly cooked, you don't have to worry about that. Martha Stewart once said she cuts the edges off and then uses them for ice cream sundae toppings. Whatever! I'd rather have beautifully baked, moist, chewy brownies I can proudly take to the office!


Catherine's Kahlua Brownies

5 oz of semisweet chocolate
2 oz of unsweetened baking chocolate
1 stick butter
3 T cocoa
3 large eggs
1 1/4 c sugar
2 t vanilla
1 c flour
1/3 c kahlua
walnuts - optional

Spray a Stoneware Square Baker with oil (I prefer Bakers Joy spray). Set aside. Melt the semisweet and unsweetened chocolate with the butter in the microwave set on low. Blend until smooth. Add cocoa. Let cool slightly. In large bowl mix together eggs, sugar, vanilla, and kahlua. Add cooled chocolate mixture and mix well. Stir in flour. Add walnuts if desired. Pour into baker and level off. Bake on high in microwave for 7-8 minutes or bake in 350 degree oven for 30-40 minutes. Toothpick should come out with a small amount of sticky crumbs on it. Cool on rack.

I had a nice surprise this week when I was handed a box by the UPS guy. Inside was a bunch of rum cake!

One of the exhibitors that we met at the Fancy Food Show was Island Treasure Gourmet who make a variety of rum cakes. They make Vanilla, Chocolate, Coconut, Banana, Raspberry and Cinnamon Pecan Streusel cakes. Wow!

I might not drink alcohol, but I will happily put it in any baked good and have it baked out. The beauty of alcohol in baked goods is that it keeps them nice and moist and extends their shelf life considerably. I'm not sure of the science for it and so I would be interested to know just how long it will extend the shelf life for. Anyway, for these cakes they use Whaler’s Original Rum which apparently is from a Hawaiian recipe.

I took the bundt cake to a Superbowl party for everyone to enjoy. There is no doubt what you are getting when you cut into these cakes. They are sticky moist with rum syrup, so much so that you almost expect a pool of rum to settle on the cake plate. They are delicious, especially if you add some fruit or other accompaniments.

Island Treasure is not sold in stores in California, so you have to order by phone or online. For those on the east coast, there are a list of stores where you can find them here.

I want to thank Island Treasures for their generosity. We really love your cakes!

On Saturday I attended a Souffle class offered by Ginger Elizabeth Chocolates with Ginger as instructor. The class was held in a penthouse loft across the street from the store. It included three souffles with samplings and tastings of some of her chocolates.

The first was a Classic Souffle from the recipe she did every day at the Chicago Ritz Carlton. This was a base recipe from which you could add flavorings to your liking: raspberry, lemon, chocolate. To top this she made a Creme Anglaise that can also be flavored - today with Grand Marnier.


Our samples came out in small aluminum tins and so they deflated immediately. But she made another two in ramekins to show how they would rise and retain their height better in the ceramic. The ramekins had been greased thickly with butter and then a coating of sugar. This gave a nice crunch to the edges in contrast to the soft, melty center. Then you spooned some of the Creme Anglaise into that and it was heavenly.

Next up were chocolate molten lava cakes - the trendy dessert that all restaurants seem to have these days besides creme brulee. I've made these myself and really the secret is all in the timing of the baking so that you remove them when the outer surfaces are cooked and the interior is still raw. I reminded my friend, Jackie, that this really goes back to the spiel I always give about cooking brownies in metal or glass - they cook from the outside in. (See my brownie post for more on this.)


Our samplings had been made the day before in mini-muffin pans and then just reheated enough to warm them. Tiny morsels so that you wanted more. Luckily I snagged a second.


The final souffle was a semifreddo or frozen Meyer lemon souffle. Ginger again demonstrated the base recipe and then flavored it with lemon juice and zest. This one needed to be frozen overnight and so we were given tiny little cups of mousse-like frozen goodness.


After the souffles we were had three chocolates to taste. The first was a sample of a base milk chocolate to demonstrate the melt point of chocolate in your mouth. The second was one of her Meyer lemon truffles as she explained that it is possible to pair citrus with chocolate. This one is particularly popular in our citrus minded city. The last one I highly recommend. It is a new milk chocolate with crushed Kaffir lime leaves and, I believe she said, caramelized coconut. What a great blend of flavors with the texturing of the coconut. If you haven't been to the shop lately, definitely drop by to try this new flavor.

Ginger then reminded us that the shop also sells baking supplies. You can get quality chocolate, cocoa powder, or vanilla beans from her.

Unlike my posting for the gnocchi class, this time I was very pleased with what I had paid for. Three fabulous souffle tastings plus chocolate from a knowledgeable instructor. Ginger talked non-stop in an informative, fun way and everyone enjoyed her class. Afterwards you got to shop with a 10% discount at the shop.


I'm a little late with posting this because other posts took precedence. I took a gnocchi class a couple of weeks ago and had a rather disappointing experience. But it was really my own fault. I learned that not all gnocchi classes are created equal.

We are blessed in Sacramento to have many opportunities for cooking classes. Most are offered through the Sacramento Food Coop, Whole Foods, or The Learning Exchange. Often the classes are similar, and that's where I went wrong.


The Learning Exchange was having a sale in December and so I loaded up on some classes. I mentioned the one on glass fusing already. This time I had signed up for a gnocchi making class held at East Bay Restaurant Supply. They have a fabulous demonstration kitchen there.

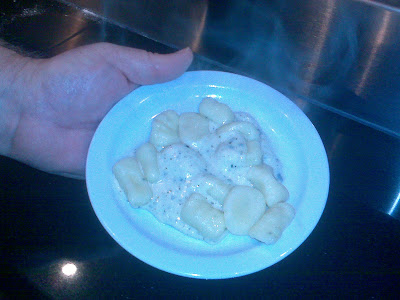
The problem was that I must have been thinking of the class that is held at the Coop instead. The SacFoodies had blogged about a class they had taken where they made three gnocchis - potato, ricotta, and squash. That was what I was expecting - three gnocchis. Instead I discovered we were only making potato gnocchi and, to top it all off, a gorgonzola sage sauce to go with it. I hate gorgonzola. In fact, I pretty much dislike any type of blue, moldy cheese.


So I'm already pretty grumpy that we are only making one gnocchi with a sauce I dislike. I did ask if I could just make some sage butter on the side as I faked a gorgonzola allergy. Two more disappointments were soon on their way.

The teacher was boring. Oh she said that she's got 16 cookbooks out so as to give herself some credibility, but that doesn't help with teaching style. There were long periods of silence as we twiddled our thumbs.


Now I do have a right to be critical here. After all, I've got 13 years of Pampered Chef under my belt and so I know how to give a cooking presentation. I think I'm pretty good at it too. I pepper my shows with a lot of informative tidbits about food along with my demonstration of products. This lady, however, was dull and quiet.

Then I watched as she made the gorgonzola sage sauce with dry sage! The horror! Only the day before I had had to buy fresh sage for a recipe I was doing. It's a basic herb that is readily found in the produce section (except at Thanksgiving and Christmas when it gets wiped out). So my sage butter sauce was on the lame side and probably the gorgonzola one was too.


Anyway, the lesson is that not all cooking classes are created equal. Shankari reminded me too that Coop classes don't charge an additional "material" fee like the Learning Exchange does. I had to pony up $10 at class for the ingredients. That would have been great had there been three types of gnocchi. But $240 (class total) for some potatoes, cream, butter, and gorgonzola?!?!

Just be sure and read your class descriptions thoroughly (and with the attentiveness I lacked) and choose wisely. I won't say that all Learning Exchange cooking classes are bad, but I think the other places are better. Especially since I am friends with a couple of the teachers.