Showing posts with label gluten-free. Show all posts


Well, I didn't win. But I'm still really proud of my effort. Especially when you know that recipe development is not my forte. I had entered Scharffenberger Chocolate's yearly Chocolate Adventure contest. The 2012 theme had been Cookie Sandwiches. 

Another fact about me is that I don't care for fruit and chocolate. I'm a nuts and chews girl. So don't give me chocolate covered cherries or a chocolate cake that has raspberry jam in the center. Yuck. Yet last year I learned that having a bit of fruit, chopped up, can really add nice texture to cookies. Thank you, Yigit Pura. 

And I do like a good panforte. Panforte means "strong bread" in Italian.  But it's more dessert than bread. The best description is that it is an Italian fruit cake, although it is really closer to a candy than a baked good. It's so rich that you only eat a sliver at a time. Like all those jokes about fruit cakes lasting for years, panforte will last a long time. It was because of this that it was often carried by travelers in the Middle Ages. You can store it in a cupboard, no need to refrigerate, for weeks.
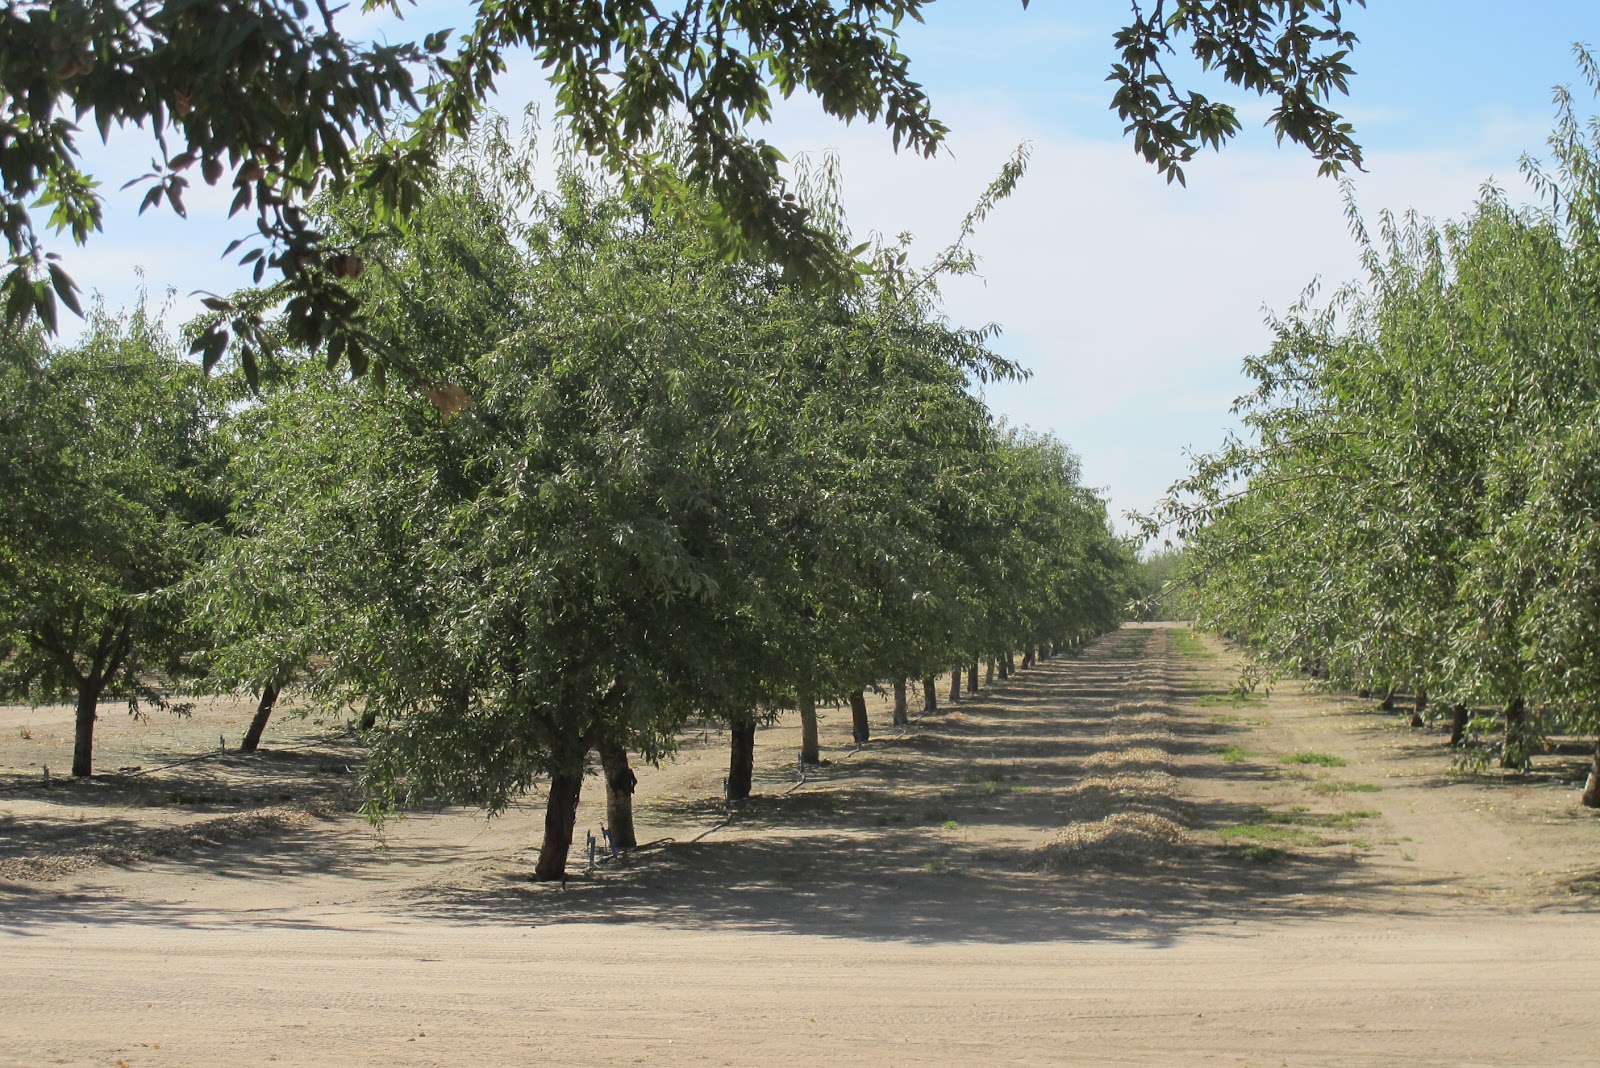

I'm looking at almonds strewn all over the ground and look up to see none in the trees. I wonder why they are there but know that I'm sure to get the answer shortly. I've pulled off the highway for a minute to get water from the trunk of my car and the sight has me curious. I continue just a few more miles to Ripon and pull into the shelling facility of Boersma Brothers, Inc. 

Almonds almost ready for harvest
Brent Boersma walks up to greet me. We've only really known each other via Twitter and through Know a California Farmer. Brent is a third generation almond farmer and has invited me down to see the harvest of this year's almond crop. As we climb into his pickup I am impressed that it's tricked out with a mounted iPad. Brent explained that now that cell service has improved in his area, it has really helped him to keep connected with the office and the goings-on in the fields.

The Boersma Brothers have almond trees on 17 ranches/fields in the Ripon/Modesto area. Most are owned by them, but a few are leased. Brent explains that there are 30 varieties of almonds, but they deal in the 10 major ones with such names as Carmel, Butte, Aldrich, and the most common, Nonpareil. The Nonpareil are the ones that most people are used to eating straight out of a can/jar of nuts as they are the most consistent in size, shape, taste. 

Brent Boersma
Each field will have a minimum of two varieties but more often three or four for the purposes of cross pollination. Most of the fields will have half Nonpareil and the rest will be other varieties. You might have a row of Nonpareil, then Butte, Nonpareil, Carmel, Nonpareil, repeat. Having a mixture of trees in each field means a lot of work as each variety will mature at different rates and each must be harvested separately. They might come through and do all the Nonpareils over a course of a few weeks, then come back another few weeks to do the Carmels and repeat again for the Buttes as they must keep the varieties separate. Only a few varieties are allowed to be mixed together. So a field can have as many as four different harvesting passes, which in itself takes a lot of time. More on that shortly.

Repost from  8/17/10

GF Note: For those unfamiliar with my blog, I do not have any dietary reason that I need to eat gluten-free. I choose to bake gluten-free within my home because I have an interest in all the other types of grains and flours that have been used by cultures for centuries. Why is America so wheat focused? I figure I can get gluten filled products everywhere else outside my home.

This is one of the most successful gluten-free baking recipes I've done yet. The banana acts as the 'glue' to hold it together well without the gluten. You will not notice any difference from regular banana bread. Definitely give this recipe a try.

Gluten-free Banana Bread

2 eggs
3 bananas, mashed
1/2 c yogurt
1/2 c butter, melted
2 t vanilla
3 c gluten-free flour blend
3/4 c brown sugar
3/4 c sugar
1 1/2 t xanthan gum
1 1/2 t baking soda
1/2 t salt
1 c chocolate chips, optional

Grease bread pans and set aside. Heat oven to 350 degrees.

In a small bowl mix together eggs, yogurt, banana, butter, and vanilla.
In a large bowl mix together all the dry ingredients.
Add the wet ingredients to the dry and mix thoroughly. Mix in chocolate chips if desired. Pour into pans and bake for 45-60 minutes, checking to make sure a tester draws out cleanly. For best results, let sit overnight for best flavor.


Bananas

I can become fixated, especially when it comes to flavors.  I'll fixate on a flavor or flavor combination and then need to see what I can do with it by making numerous items. Lately that obsession has been chai.

I've never been a coffee or tea drinker. The hot drinks I like are hot chocolate and cider. About a year ago, though, I saw a Chai Hot Chocolate up on a menu board and decided to try it out. After all, I was always putting cinnamon and nutmeg in my cocoas anyway. After that discovery I switched to ordering chocolate chai lattes when I was at a coffee bar. Six weeks ago I decided that I needed to cut down on the sugar and so I started to order just chai lattes without the chocolate. That is my current hot drink.

It then occurred to me one day that snickerdoodle cookies are rolled in cinnamon sugar and so it wasn't that much of a leap to think of chai snickerdoodles. I was all proud of myself until I decided to search the internet and found out that other people had already had that thought. Oh well.


My office loves me just for the fact that I constantly bring treats to work. Being single, I bake all these goodies and then need to unload them as soon as I can to prevent me from eating them! (Which I surely would.) In some cases, I will spring an item on them without giving them the info on what's in it until they have given me feedback. 

I was thrilled when I got my order of fermented black garlic last week. I first heard about black garlic from Garrett on Vanilla Garlic. Bulbs of garlic are fermented for 40 days and then dried for a week. The result are the beautiful black cloves. Used for centuries in Asia, it's becoming a trendy food ingredient in the West. Eaten by itself, it's amazingly sweet with smokey undertones, which is why it is used in both sweet and savory dishes. It also brings chocolate instantly to mind as a perfect thing to pair it with.

The first dessert recipe I came across featuring black garlic was the post by Irvin from Eatthelove.com. He had made Black Garlic-Dark Chocolate and Vanilla Bean-White Chocolate Marble Brownies. He used the black garlic in the dark chocolate swirls of the dessert. I knew I wanted to try the black garlic with chocolate, so I decided to go with straight chocolate brownies. I noted that Irvin used a whole bulb of his garlic for only half (the dark part) of the overall brownie.

I've decided that Bibingka would be a good name for my next cat. I'm not planning to get another cat for some time, as I already have 2 and 3 year olds, but it seems like a good pet name.
Banana leaves found in frozen section of Asian markets

In actuality, bibingka is a Filipino cake, most often rice based. It's slightly sweet and features, get this, a slice of salted egg on the top. That seems pretty odd for a dessert, but then again, Asian foods are often like that - using contrasting flavors in the same recipe. Filipinos love salty sour. Here in the States we've seen this done more often lately with things like kettle corn, salted caramels, etc.

The bibingka recipe comes from my Filipino blogging friend, Jun at Jun-blog. Jun says that this particular type is traditionally eaten at Christmas time. I had a few Christmases in the Philippines when I was a child, but I guess my family was too Western - I don't recall these cakes at all. I must learn bits of my Filipino culture late in life, on my own, with assistance from my adopted Filipino 'family'. But for Jun, these are an important part of his memories and associations with Christmas time on the islands.

Think Thin Bars
Like anybody, I get lazy about cooking or making a meal. Sometimes you just want to do the old grab-n-go. Hopefully you are going to pick a healthy item to grab instead of a doughnut or a brownie. Oftentimes we use protein/energy bars or drinks to take the place of a meal.

But there are so many protein/energy bars and shakes out there. Often you stand before them at the store shelves overwhelmed and wondering two things:

1) This one looks healthy, but does it taste good?
2) This one tastes good, but is it really healthy?

I've got the products for you!

THINK THIN!

Think Thin bars are the answer because they taste great AND they are good for you. They have low to no sugar, lots of fiber and protein, and are gluten-free.

Now sure, many other bars might claim the same things, but let's give an example. Before I got these Think Thins I was looking at bars out there and thinking to myself, "Oh. This one has 9 grams of protein and 4 grams of fiber. That seems pretty good." And that's about average out there.

But check this out! A Think Thin peanut butter bar has 20 grams of protein and 0 sugar! In fact, all their Protein Bars are sugar free and have 15-20 grams of protein. And yet they still taste good. The ingredients taste good enough that they don't need to add sugar.

I personally prefer the Crunch Bars which have 10+ grams of protein and 4+ grams of fiber. They have 3 grams of sugar versus competition bars which average 13 grams of sugar. They are loaded with nuts and soy crisps. Don't they look yummy in the picture? The sweetness comes from the honey mixture used to bind the bar together.

Think Thins can be found locally at Trader Joe's, Whole Foods, and Nugget. But why not win some! See end of this post.

From AOLHealth.com:

Eat Smart:
1) If you're replacing a meal with an energy bar, choose one with 200 to 300 calories; for a snack, shoot for 150 calories or fewer.
2) Opt for a bar whose ingredient list is short and begins with a whole grain such as brown rice, whole wheat, or whole oat flour.
3) Make sure your pick meets at least two of Greaves's requirements: fewer than 15 grams of sugar, less than 2 grams of saturated fat, at least 3 grams of fiber, and at least 5 grams of protein.
4) If you can't find one containing that much protein, add it yourself: Spread a low-calorie bar with a thin layer of peanut butter, or enjoy a glass of low-fat milk or a piece of low-fat string cheese with it. "Adding in the protein will help you feel more satisfied longer," says Greaves.
Svelte Protein Drinks

Think SVELTE!

One of my big problems is that I get super dehydrated during the night. I wake up with a slight headache and wonder how my thick blood is managing to pump through my veins. I need to get liquid back into my body asap. Sometimes I conquer two birds with one stone. I drink my breakfast. If I'm too lazy to blend up a smoothie, I can grab a Svelte. I also drink them after workouts, when you are supposed to replenish nutrients to your muscles, but I'm too lazy to cook. You are supposed to intake something  (healthy)within an hour of your cardio.

A Svelte is 16 ounces of soy goodness in four fab flavors: French Vanilla, Chocolate, Cappuccino, and Spiced Chai. I've been loving chai lately and so I really like their newest flavor.

What makes them stand out?

They are made from organic soymilk and all natural products right here in Northern California. They have 16 grams of protein and 8 grams of fiber. They are sweetened with stevia, which means you don't have to worry about glucose spiking in your blood since stevia doesn't effect your glucose levels. Svelte is also gluten-free.

If you are interested in more info on protein shakes, here's a great article at WebMD.

Svelte can be found locally at Whole Foods.


Giveaway!

Win some Think Thin bars to try yourself. 2-3 Winners!
This one is a Facebook contest. Join the Munchie Musings fan page and then post on the wall what is your current favorite type of energy/diet bar.

Deadline: Monday midnight (1/31)


Disclaimer: Samples were received from both companies.
Thai Rice Cake
I belong to a gourmet dinner group and this round we picked chefs out of a hat. I had pulled Mai Pham from the Lemon Grass restaurant. She makes Vietnamese and Thai dishes and so my dinner next month must reflect that. I came across this cake and thought I would maybe use it for my dessert. I actually made it six months ago for a test run and took it to a potluck. It got a lot of good reviews and requests for the recipe. But recently I've decided on a different dessert for my upcoming dinner.

Don't think rice cakes like those puffy, dry, crispy snack cakes in the store. This is an out-right dense, sweet, moist cake made with rice.


My only comments on making it is that the term of Thai rice in the ingredients is pretty ambiguous. There are so many varieties of rice. I took it to mean jasmine rice, since that is what is most often thought of and used in Thai dishes. But I did find the rice grains to be big and would consider next time pulsing them in a food processor a bit to cut them down a bit.

Thai Rice Cake
(Gluten-free)

1 c  Thai rice
4 c milk
1/2 c sugar
6 green cardamom pods, crushed
2 bay leaves
1 1/4 c whipping cream
6 eggs, separated


Grease and line a 10 inch round, deep cake pan. Cook the rice in boiling water for 3 mins, then drain. Return the rice to pot with milk, cardamom, bay leaves, and sugar. Bring to a boil, then reduce and simmer for 20 minutes, stirring occasionally. Allow mixture to cool and remove the bay leaves and cardamom pods.

Preheat oven to 350 degrees. Beat together egg yolks and cream. Add rice mixture. In another bowl, beat egg whites to soft peaks. Fold whites into the rice mixture. Pour mixture into cake pan and bake for 45-50 minutes until risen and golden brown. Chill overnight in pan. Turn cake out onto a serving plate. Top with whipped cream and fruit.

Note: Cake may be a bit wobbly when removing from the oven.

   
While I was at the International Food Blogger Conference in Seattle in August I met Diane Eblin. She runs the blog The W.H.O.L.E. Gang, and she came up with a wonderful idea to get bloggers together in honor of Jamie Oliver’s Food Revolution and have our own 30 Day Food Revolution. Last week I was a guest blogger on her site. Today I reprint that post on my own site in case you missed it.


I am lucky enough to not have any food allergies. I can eat what I want. That’s not to say I like everything. I hate olives, mushrooms, eggplant, okra, and raw tomatoes. But really, it boils down to being blessed that I can always find something I want to eat on any menu.

Not so for people who suffer from celiac disease. Those are the gluten-free folks who have to stay away from wheat products because their digestive system is unable to break down the protein, causing them incredible discomfort. There are several other grains and foods that have gluten, but for purposes of the discussion here we are going to think in terms of wheat.

For those who are unfamiliar with the gluten in their world, a short lesson. Gluten is derived from the Latin word for “glue”. It is a form of protein that exists in many grains including wheat, rye, and barley. It’s what gives pizza dough its stretchiness, elasticity to doughs, and chewiness to bagels. Without it many baked goods would simply crumble apart.

As I learned more about gluten-free cooking and baking I began to think.  I was amazed at all the different grains that were used in gluten-free baking to substitute for regular wheat flour. You can’t simply replace wheat flour with rice flour. Gluten-free baking requires a mixture of flours and then xanthan gum, which acts as the glue in place of the gluten. For instance, this is the blend I have been using lately:

1 1/2 c rice flour
1 c sorghum flour
3/4 c tapioca flour
3/4 c potato starch

As I learned more about the different flours out there it occurred to me – Why is America so wheat-centric?

I am really into history and cultures and so I was suddenly thinking about how certain grains have been used for millennia by other cultures and yet we Americans are all about wheat. Think about it. The Inca used quinoa in Peru, rice has been used throughout Asia, and amaranth was used by the Aztecs and throughout ancient India and Africa. Flours can be and have been made out of tapioca, potato, nuts, corn, chickpeas and more. If you go to some of the best patisseries in Europe you’ll find that the best cakes and pastries are made from nut flours and without any wheat flour at all.

Here in the United States almost all of our baked goods are made with wheat. There are a lot of reasons that led us down this wheat-centric path, such as improvements in wheat varieties, farming methods, government subsidies and corporate controls over farms, but I’m not going to go into that. Suffice it to say, wheat is our dominant grain.

I came to a decision. I will bake gluten-free in my own home. After all, I can get my fill of gluten everywhere outside my house. Any restaurant I go to or snack food I grab while at work or traveling will have gluten. Any time I order a pizza, have a sandwich, or a piece of coworker’s birthday cake there will be gluten. So in my home – gluten-free baking.

You know what? It’s not a big deal. Typically you will find no discernible difference taste-wise from regular baked goods. The difference with gluten-free goods is often just in the texture. Without the gluten some gluten-free baked goods will just crumble. But you will find that many things should be crumbly, like shortbread, and other foods compensate through other ingredients, like bananas in banana bread.

Now I bring my gluten-free items to work and wait for everyone to enjoy them before I announce, “that was gluten-free”. My coworkers are amazed and are learning to not be afraid of gluten-free baked goods.

To try some GF recipes yourself, click on the "gluten-free" tag in the topic cloud on the left.


I've posted a little bit about my baking gluten-free at home. While I was at the International Food Blogger Conference in Seattle in August I met Diane Eblin. She runs the blog The W.H.O.L.E. Gang, and she came up with a wonderful idea to get bloggers together in honor of Jamie Oliver’s Food Revolution and have our own 30 Day Food Revolution. Bloggers have been asked to share their tips for cooking real food and living a healthy lifestyle. Today my guest post appears on her site. I wrote on Baking Gluten-free for Non-Dietary Reasons. Please click on the link and check it out. Thanks
GF Note: For those unfamiliar with my blog, I do not have any dietary reason that I need to eat gluten-free. I choose to bake gluten-free within my home because I have an interest in all the other types of grains and flours that have been used by cultures for centuries. Why is America so wheat focused? I figure I can get gluten filled products everywhere else outside my home. 


The September 2010 Daring Bakers’ challenge was hosted by Mandy of “What the Fruitcake?!” Mandy challenged everyone to make Decorated Sugar Cookies based on recipes from Peggy Porschen and The Joy of Baking.


I made these gluten-free as I continue to try to bake that way more. I was a little worried that the cookies might come out too crumbly to stand up to the decorating, but there was no problem.

This was my first time really decorating to this extent with royal icing. I think my only problem was that I didn't get it thin enough to 'flood' properly to get a nice smooth finish - they appear a little lumpy. But overall I was pleased with the results. I'm not an icing fan, so after I got the cookies above decorated I did the rest with much less icing, with the cookie showing through a lot more.

Basic Sugar Cookies: (note that italicized comments are from Mandy)


½ cup + 6 Tbsp Unsalted Butter, at room temperature
3 cups + 3 Tbsp All Purpose / Plain Flour or Gluten-free blend
3/4 t xanthan gum (only needed for GF version)
1 cup Caster Sugar / Superfine Sugar
1 Large Egg, lightly beaten
1 tsp Vanilla Extract / Or seeds from 1 vanilla bean

Directions
• Cream together the butter, sugar and any flavourings you’re using. Beat until just becoming
creamy in texture.
Tip: Don’t over mix otherwise you’ll incorporate too much air and the cookies will spread during
baking, losing their shape.

• Beat in the egg until well combined, make sure to scrape down the sides of the bowl.
Add the sifted flour and mix on low until a non sticky dough forms.
Tip: I don’t have a stand mixer so I find it easier to switch to dough hooks at this stage to avoid
flour flying everywhere.

• Knead into a ball and divide into 2 or 3 pieces.
• Roll out each portion between parchment paper to a thickness of about 5mm/1/5 inch (0.2 inch)
• Refrigerate for a minimum of 30mins.
Tip: Recipes commonly just wrap the whole ball of dough in clingwrap and then refrigerate it for an
hour or overnight, but by rolling the dough between parchment, this shortens the chilling time and
then it’s also been rolled out while still soft making it easier and quicker.

• Once chilled, peel off parchment and place dough on a lightly floured surface.
• Cut out shapes with cookie cutters or a sharp knife.
• Arrange shapes on parchment lined baking sheets and refrigerate for another 30mins to an hour.
Tip: It’s very important you chill them again otherwise they’ll spread while baking.
• Re-roll scraps and follow the above process until all scraps are used up.
• Preheat oven to 180°C (160°C Fan Assisted) / 350°F / Gas Mark 4.
• Bake until golden around the edges, about 8-15mins depending on the size of the cookies.
Tip: Bake same sized cookies together otherwise mixing smaller with larger cookies could result in
some cookies being baked before others are done.

Tip: Rotate baking sheets half way through baking if your oven bakes unevenly.
• Leave to cool on cooling racks.
• Once completely cooled, decorate as desired.
Tip: If wrapped in tinfoil/cling wrap or kept in airtight containers in a cool place, un-decorated
cookies can last up to a month.


Royal Icing:
2½ - 3 cups Icing / Confectioner’s / Powdered Sugar, unsifted
2 Large Egg Whites
2 tsp Lemon Juice
1 tsp Almond Extract, optional

Directions
• Beat egg whites with lemon juice until combined.
Tip: It’s important that the bowls/spoons/spatulas and beaters you use are thoroughly cleaned and
grease free.

• Sift the icing sugar to remove lumps and add it to the egg whites.
Tip: I’ve listed 2 amounts of icing sugar, the lesser amount is good for a flooding consistency, and the larger amount is for outlining, but you can add even more for a much thicker consistency good for writing. If you add too much icing sugar or would like to make a thinner consistency, add very small amounts of water, a few drops at a time, until you reach the consistency you need.
• Beat on low until combined and smooth.
• Use immediately or keep in an airtight container.
Tip: Royal Icing starts to harden as soon as it’s in contact with air so make sure to cover containers with plastic wrap while not in use.

I had stepped away from my gluten-free baking for a while and had wanted to get back to it. I was interested in making a good cupcake. I also had some large zucchini from a neighbor. Combine the two to get some yummy gluten-free chocolate zucchini cupcakes.


I topped them with a simple chocolate buttercream with some cinnamon and nutmeg. I had to be sure it was really soft for icing the cupcakes because they were delicate and crumbled easily - a problem often with gluten-free baked goods. Without that gluten, you don't get the gluey proteins from the flour to hold it together well.

This recipe was adapted from one that I found on 101 Cookbooks.

Gluten-Free Chocolate Zucchini Cupcakes

    1 1/2 cups ) brown sugar
    1/4 cup  melted butter
    3/4 cup  vegetable oil
    3 eggs
    1 tsp  vanilla
    1/2 cup  buttermilk
    2 cups  grated zucchini
    1 cup  chocolate chips
    1/2 cup tapioca flour
    3/4 cup potato starch
    3/4 cup sorghum flour
    1/4 tsp xanthan gum
    1 cup cocoa, sifted
    1/2 tsp salt
    2 tsp  baking soda
    1 1/2 tsp cinnamon

Pre-heat oven to 350 degrees F. Lightly grease large muffin pans and line with muffin cups.
In a medium bowl mix together the sugar, butter and oil. Beat in eggs, one at a time until well Incorporated. Stir in vanilla, buttermilk, zucchini and chocolate chips.
In a separate bowl mix together all of the dry ingredients. Add the liquid ingredients and mix until well combined. Spoon batter into large muffin pans. Bake in the center of the oven for about 35 minutes. Cool on a wire rack, while preparing the icing.


Icing

1 stick of unsalted butter
2 cups of powdered sugar
1/3 cup cocoa powder
1/4 teaspoon cinnamon
1/8 teaspoon nutmeg
1 T hot water

Cream together butter, sugar, and cocoa powder. Add spices and blend til smooth. Add hot water if necessary to loosen the icing even more.


Zucchini on FoodistaZucchini

Repost from archive

Update 10/08: Attention diabetics! I made this recently with stevia! For those that don't know, stevia is a natural plant product that is molecularly structured so that it doesn't enter the bloodstream and mess with your blood sugar levels. I substituted 1/4 cup of stevia for the 1/3 cup of sugar. Also, because this is flourless, you don't get the blood sugar change from the carby flour either!

Today I tried a new recipe and it was a hit. Chestnut Chocolate Truffle Cake - flourless. I was especially thrilled because my best friend's sister is a 5 star pastry chef and she declared it delicious. The recipe, below, is European and in metric. But I've supplied the American equivalents next to it.


Another important aspect is the chestnut piece. You'll see that it is labor intensive with roasting and boiling fresh chestnuts. But my Romanian coworker saved the day. She told me of a European market that sold the chestnut puree in a jar (Marconi and Fair Oaks Blvd.)! Now I can make this cake any time!

The texture of this cake is really light and smooth. And with the chestnut puree, it is a very easy recipe.


Chestnut and chocolate truffle cake

250g (1 c) dark chocolate, in chunks
250g (1 c) unsalted butter, cubed
250g (1 c) peeled, cooked chestnuts
250ml (1 c) whole milk
4 eggs, separated
125g (1/3 c) sugar
Preheat the oven to 170°c/Gas Mark 3 (340 F) and grease and line a 23cm (9 inch)-diameter springform cake tin. (I used a cake pan)

Melt the chocolate and butter together in a pan over a very gentle heat. In another pan, heat the chestnuts with the milk until just boiling, then mash thoroughly with a potato masher (or process to a rough purée in a machine). This is where I substituted the puree, so I didn't use milk at all.

Put the egg yolks in a bowl and mix with the caster sugar. Stir in the chocolate mixture and the chestnut purée until you have a smooth, blended batter. Whisk the egg whites until stiff and fold them carefully into the batter.

Transfer the mixture to the greased, lined tin and bake for about 25–30 minutes until it is just set but still has a slight wobble.

Part two of my April Daring Bakers' Challenge was a sweet steamed pudding. This was an optional project I took on after having made my savory steak pudding and being rather unimpressed.

I found a chocolate pudding recipe online and doctored it up a bit with spices. The flavor came out fabulous, but as far as a steamed pudding versus a baked cake, I'll take the baked one. You can see that my pudding broke apart a bit and it was very crumbly, although moist. I attribute this to my using gluten-free flour instead of regular flour.

Serve this with a chocolate sauce, or some whipped or ice cream.


Spiced Steamed Chocolate Pudding


2 oz chocolate
1 tablespoon butter
8 oz plain or gluten-free flour
1 1/2 teaspoons baking powder
Pinch of salt
1/2 teaspoon of cinnamon blend
1/8 teaspoon ground cayenne pepper
1 egg
4 oz sugar
120ml milk with 1 teaspoon vanilla extract added

1. Lightly grease a 1.5 pint pudding basin.
2. Melt chocolate and butter together.
3. Sift flour, cinnamon, cayenne, baking powder and salt together.
4. Beat egg; add sugar gradually and continue beating till mixture is creamy. Add melted chocolate and mix thoroughly.
5. Stir dry ingredients alternately with milk mixture, beating until smooth after each addition.
6. Fill the greased pudding basin 2/3 full. Cover tightly with a roomy tin foil or greaseproof paper lid. Secure lid with string.
7. Place inside a large pot and pour water in until the pudding is half immersed in water. Bring to a boil and then simmer for 1 1/2 hours.
8. Serve hot with custard, whipped or ice cream.


I had a girls' weekend up in Amador County. I was designated driver for my girlfriends so that they could enjoy the wine tasting up there. Afterward we stayed at my BFF's cousin's cabin at Mt. Aukum. He was gonna BBQ for us and told us we didn't have to worry about bringing up any food. But he did request I bring up dessert. He's had some of my Daring Bakers' Challenges and knows that I can bake.

The question was, what to make that would survive hours in the car? And I wanted to use some of the lemons I had on hand. Quick search of the internet and I found a Lemon Yogurt Cake at the Gluten-free Goddess' blog. I did change it up a bit, though. I used sorghum and tapioca flour in place of the rice flour she calls for. Then to top it off, I put a thin layer of my marmalade I made this week.


The finished product was fabulous. It is a very moist, dense cake. That's why I'm calling it 'rustic'. It reminds me of a dense cake you'd find at a Tuscan farmhouse while drinking wine in Italy. And I do mean moist. It probably also helped to retain the moisture because I topped it with marmalade while it was still hot so that the marmalade would melt and be easy to spread evenly.


Rustic GF Lemon Cake

1 cup blanched almond flour
1/4 cup sorghum flour
1/4 cup tapioca flour
1/2 teaspoon baking powder
1/2 teaspoon baking soda
Pinch of fine sea salt
1 cup packed organic light brown sugar
5 medium free-range organic eggs
4 oz. light cream cheese (or butter or vegan margarine), softened
1/2 cup organic plain or lemon yogurt- low fat is fine
2 tablespoons fresh lemon juice
Lemon zest (fine grated peel) from 1 fresh lemon
1 teaspoon bourbon vanilla extract
1/4 cup marmalade

Preheat the oven to 350 degrees F. Line the bottom of a 9-inch Springform or cake pan with buttered parchment paper.

In a bowl whisk together the almond flour, sorghum and tapioca flours, baking powder, baking soda, sea salt and sugar.

Beat the eggs in separate large mixing bowl until they are light and foamy. Beat in the cream cheese and yogurt until combined.

Add in the lemon juice, lemon zest and vanilla; beat to combine.

Add in the flour mixture a bit at a time and beat on medium speed for a minute or two.

Pour the batter into the prepared cake pan. Bake in the center of a pre-heated 350 degree F. oven for about 40 minutes or until a wooden toothpick inserted into the center of the cake emerges clean.

While hot, top with the marmalade and spread it evenly across. Let cool and enjoy.


Lemon


Recently I have gotten samples from companies that I saw at the Fancy Food Show in January. I've also gotten more interested in gluten-free baking. Two companies had sent me boxes of gluten-free mixes and I saw that both had sent me white and chocolate cake mixes. With so many mixes, I needed to get baking! After all, although I'm interested in trying them, I also don't need to have baked goods/mixes sitting around my house. I've gained enough weight this year. Sigh. So I decided to make my coworkers the taste testers and baked up the white cake mixes from each company to do a side by side comparison.


The first company was Something Good from Australia. Their products are distributed by the same company that I got the Damper mix from. Nice thing about their mix was that it came with icing mix and sprinkles included.


The second company was good ol Betty Crocker. I had stumbled across their gluten-free website and emailed them to see if they would send me samples. They sent mixes and frosting.

I baked both batches on Sunday morning and started with a personal taste test with Poor Girl, Kimberly, who had stopped by. I then took the rest to work for Monday and told my coworkers to halve them and try one of each and give me their opinions.

I'll start by telling you how the mixes differed and then we'll get to the actual taste comparison.

Something Good's mix is not only gluten-free, it is also dairy, soy, and nut allergen free. This is a significant difference because I'm sure it makes a difference to some of the ingredients in the mix. It required just adding eggs and water to the cake mix. The icing was surely just a package of powdered sugar and they just told you to beat some water and margarine into it to make the icing. I used butter. It is nice that it is a complete package of mix, icing, and decoration. In the pictures, obviously, they have the sprinkles on them.

Betty Crocker's mix is only gluten-free. It also made one dozen cupcakes but seemed to be just a bit more batter so that the cupcakes were larger in size. They ask you to mix in water, eggs, butter, and vanilla. This adds a lot to the moisture content and flavor. They had sent me whipped icing as well, but it is sold separately and is not labeled gluten-free.

Now I like to bake from scratch and so I use cake mixes only in emergencies or if I doctor them all up. One reason I hate mixes is because they are all air and fluff. Sure they are super moist, but they have no real substance. After all, once you start baking European style and other from-scratch cakes you truly appreciate things like density, texture, and crumb.


Here is the Something Good cupcake. These cupcakes were smaller, denser, and drier. They had little flavor. Kimberly and I agreed that while we liked the denser cake, it lacked any flavor. The cake held together well and reminded me texture-wise of some of the specialty cakes I've been baking. The coworkers disliked this one because it was very dry. So maybe these cupcakes should be eaten same day.


The Betty Crocker was the favorite from the coworkers. They liked that is was moister and had more flavor. This is easily understandable. This mix had vanilla and butter mixed in. Kimberly and I liked the flavor, but weren't that thrilled by the texture. I felt the texture was more bready and chewy.

If we go by majority vote, Betty Crocker wins. But I think it wins on flavor and Something Good wins on texture.

Here's a more concise breakdown...

Something Good - multi-allergen free, icing and decoration included, good texture and density, lacks flavor

Betty Crocker - only gluten-free, good flavor and texture, easily found in stores

You will find Something Good found at the Gluten-free Specialty Store at 2612 J Street.
OK. I know it's a little on the late side for new year resolutions. But it's only February, so it's close enough. My resolution? To bake gluten-free within my home.

The more I learn about gluten-free foods the more my curiosity has been tickled. Gluten, like corn byproducts, salt, and sugar, is found in all sorts of foods if you look at food labels. Turns out it is even found in soy sauce! You logically think soy sauce would be gluten-free, but apparently it's not.

Then I'm learning that when it comes to dietary restrictions, gluten-free is the probably the easiest to work around. (Now before those with celiac disease get all defensive, I KNOW that there are so many other issues like eating out at restaurants, etc. that you have to deal with. But I'm talking purely in terms of finding cooking alternatives.) There are so many alternatives in terms of flours and pastas, etc. that you can still pretty much make anything with simple substitutions.

That's why I figure, why not go gluten-free at home? Sure, I don't need to as I have no allergies at all. But if there's an abundance of gluten-full food out there in the world, I can eat that when I leave my home. I can get my gluten and wheat products when I order a pizza or chomp on bread at a restaurant. I can enjoy brownies, cookies, and cakes baked the normal way, with wheat flour, everywhere else. I'll just not bake with it at home and in that way open a whole new world of experimenting at home. It will open a new door to adventures in baking.

To start out I decided to find the gluten-free store I had heard was located on J Street. On a furlough Friday I took off to find the Gluten-Free Specialty store at 2612 J Street. I also wanted to meet Sacramento food blogger Debbie of Gluten Free Adventures, who also works there. Turns out the owner, Melanie, also has a blog for the store at Gluten Free Specialty.

The store is small but Debbie says that they have plans to expand to at least twice the size. They have been in business for two years and I could tell that they were doing quite well. The shelves were certainly packed with all sorts of food items. Although everything in the store is gluten-free, they also carry foods in regards to other food allergies such as soy, lactose, yeast, etc.

We talked a little about my baking decision and how to know when to use what flour. Debbie explained that you needed to always have a mixture of at least three or four flour substitutes (like potato starch, rice flour, and tapioca flour together). There was a shelving unit filled with all the flour alternatives sold individually. But you have to be willing to buy all the different types and then mix them up yourself.


Debbi also pointed out many prepackaged flour mixes if you want to avoid making your own mixtures. One of her favorites was the Gluten Free Mama brand with the almond flour. I'm a fan of almond meal/flour and so I bought a small bag of that. She explained that this brand didn't include the xanthan gum but I had already purchased that a few days ago at the Coop.

Xanthan gum is also used in gluten-free baking. Since the gluten found in wheat must be omitted, xanthan gum is used to give the dough or batter a "stickiness" that would otherwise be achieved with the gluten.


Debbie explained that baking with the different flour substitutes really is a bit of experimentation and finding out what you like. Each substitute has different properties and so it will influence the final products taste, texture, and appearance. Because you don't have gluten to provide the binding 'glue' that some baked goods need, you have to expect these differences.

Off I went home with my bag of flour and thoughts of my next baking experiments. I knew I wanted to tackle lemon bars next. I have my yearly abundance of lemons thanks to my giant tree. I also knew that lemon bar crust is supposed to be a flaky shortbread and so it probably would not suffer from an alternate flour. It was also Valentine's Day weekend and the ex-hubby loves lemons. I figured lemon bars were an easy and nice little V Day gift in exchange for his buying dinner. The lemon bars came out great. Just as I thought, the crust had a nice crumbly texture but held up enough to keep the bar form.


I figured the next big test was chocolate chip cookies. I opted to use the NY Times recipe that I made a few months ago and just sub the flour. In that recipe, time was important to age and produce the complex flavors. So I made the dough and then stuck it in the fridge to age.

I baked them up today and you would never know the difference taste-wise. The texture, though, suffered a little in comparison when I had made them with wheat flour. These really spread out flat on the pan and crumbled easily.

I'll continue my gluten-free baking and learning more about the different substitutions. I'm excited about this new baking adventure and will certainly keep sharing via the blog.


This is a repost of the original article/recipe with a new update of making it gluten-free.

As I delve into gluten-free baking, I've started with perhaps the most adaptable recipe to play with - brownies. I think they lend themselves so well to gluten-free baking because they don't call for much flour at all - only one cup.

So if you choose to do the GF version, instead of the cup of flour, mix together 3/4 cup potato starch, 1/4 cup tapioca starch, 1 cup rice flour, and 1 teaspoon of xanthum gum. This will make two cups. Use only one cup for the brownie recipe (equal 1-1 substitution) and save the other cup for next time.

They taste and feel exactly the same as the original recipe. Enjoy.

Original post:

There are two important elements involved in this recipe. First is that I took a brownie recipe from Cooks Illustrated and then altered it by adding kahlua. I figured if alcohol keeps cakes nice and moist, surely it would do that for brownies. Second, I've sold Pampered Chef for over 10 years and am a true believer in Stoneware and love the fact that you can cook in the microwave with it. But even though I tend to make these brownies in the microwave because I'm impatient, you can bake them in the regular oven if you want. I like a fudgy, moist brownie versus a cakey brownie, so the microwave does that great.

This is what I say at shows to demonstrate the benefits of Stoneware:

How many times have you made a brownie in a metal or glass pan and when the timer rings you open the oven door to find a brownie cooked around the edges, but still goopy in the middle? Then you add another 5 or so minutes, check it again, and do the finger test - touch the center to see if it is set. You pull it out and you look at it and you have a sinkhole brownie. The edges are higher up, but the center is sunken in. That's because metal and glass cook from the outer edges in. Stoneware cooks evenly throughout so that when that timer rings and you open the door you have a perfectly cooked brownie, even across the pan - no sinkhole! Also, those sinkhole brownies might have a nicely cooked center, but those edges are dry, crunchy, overcooked. Because a stoneware brownie is evenly cooked, you don't have to worry about that. Martha Stewart once said she cuts the edges off and then uses them for ice cream sundae toppings. Whatever! I'd rather have beautifully baked, moist, chewy brownies I can proudly take to the office!


Catherine's Kahlua Brownies

5 oz of semisweet chocolate
2 oz of unsweetened baking chocolate
1 stick butter
3 T cocoa
3 large eggs
1 1/4 c sugar
2 t vanilla
1 c flour
1/3 c kahlua
walnuts - optional

Spray a Stoneware Square Baker with oil (I prefer Bakers Joy spray). Set aside. Melt the semisweet and unsweetened chocolate with the butter in the microwave set on low. Blend until smooth. Add cocoa. Let cool slightly. In large bowl mix together eggs, sugar, vanilla, and kahlua. Add cooled chocolate mixture and mix well. Stir in flour. Add walnuts if desired. Pour into baker and level off. Bake on high in microwave for 7-8 minutes or bake in 350 degree oven for 30-40 minutes. Toothpick should come out with a small amount of sticky crumbs on it. Cool on rack.

The January 2010 Daring Bakers’ challenge was hosted by Lauren of Celiac Teen. Lauren chose Gluten-Free Graham Wafers and Nanaimo Bars as the challenge for the month. The sources she based her recipe on are 101 Cookbooks and www.nanaimo.ca.

In celebration of the Winter Games in Vancouver, we did a Canadian recipe. Here is the basic info:

Nanaimo Bars are a classic Canadian dessert created in none other than Nanaimo, British Colombia. In case you were wondering, it’s pronounced Nah-nye-Moh. These bars have 3 layers: a base containing graham crackers, cocoa, coconut and nuts, a middle custard layer, and a topping of chocolate. They are extremely rich and available almost everywhere across the country.


What particularly interested me was the gluten-free part of the project. I'm getting more interested in going to gluten-free baking. As I said a few posts ago, I dabbled in modeling back in the late 80's. At the time one of the agents had told me to lay off baked goods and wheat products because it added puffiness. Then if you think about people with celiac disease, most are thin. So I'm thinking it might be a beneficial way to go.

Below is the recipe for the Gluten-free Graham Crackers - which turned out to be pretty yummy! I'm saving the rest for future crusts, etc. The only troublesome thing was that the dough is so soft and sticky that it was hard to transfer to the baking sheets. Also, they puffed up quite a bit during baking and erased my fork pricks. Then they deflated a bit until I decided to take them out. You take them out still soft to the touch and then they crisp up hard as they cool. Because I was going to crush them up for the Nanaimo bars I did not bother to make them pretty and square.

The recipe is to put them in a square pan and then cut them into bars. I decided to be a little different and used my Pampered Chef mini-muffin pan and then the rest in a muffin pan. I put in the crust mix and then the custard layer. The custard layer is a pretty small amount so I added another half recipe to have enough for both pans. I then put them into the freezer. This morning I melted the chocolate and dunked the bottoms and drizzled the tops.

How do they taste? These are definitely rich, sweet, decadent desserts. You only need the bite size morsel. The larger muffin cup ones I cut into quarters. I really like the crust but would do more of a cheesecake middle in the future. Still, a nice new treat to try.


Gluten-free Graham Crackers


Ingredients
1 cup (138 g) (4.9 ounces) Sweet rice flour (also known as glutinous rice flour)
3/4 cup (100 g) (3.5 ounces) Tapioca Starch/Flour
1/2 cup (65 g) (2.3 ounces) Sorghum Flour
1 cup (200 g) (7.1 ounces) Dark Brown Sugar, Lightly packed
1 teaspoon (5 mL) Baking soda
3/4 teaspoon (4 mL ) Kosher Salt
7 tablespoons (100 g) (3 ½ ounces) Unsalted Butter (Cut into 1-inch cubes and frozen)
1/3 cup (80 mL) Honey, Mild-flavoured such as clover.
5 tablespoons (75 mL) Whole Milk
2 tablespoons (30 mL) Pure Vanilla Extract

Directions:
1. In the bowl of a food processor fitted with a steel blade, combine the flours, brown sugar, baking soda, and salt. Pulse on low to incorporate. Add the butter and pulse on and off, until the mixture is the consistency of a coarse meal. If making by hand, combine aforementioned dry ingredients with a whisk, then cut in butter until you have a coarse meal. No chunks of butter should be visible.
2. In a small bowl or liquid measuring cup, whisk together the honey, milk and vanilla. Add to the flour mixture until the dough barely comes together. It will be very soft and sticky.
3. Turn the dough onto a surface well-floured with sweet rice flour and pat the dough into a rectangle about 1 inch thick. Wrap in plastic and chill until firm, about 2 hours, or overnight.
4. Divide the dough in half and return one half to the refrigerator. Sift an even layer of sweet rice flour onto the work surface and roll the dough into a long rectangle, about 1/8 inch thick. The dough will be quite sticky, so flour as necessary. Cut into 4 by 4 inch squares. Gather the scraps together and set aside. Place wafers on one or two parchment-lined baking sheets. Chill until firm, about 30 to 45 minutes. Repeat with the second batch of dough.
5. Adjust the rack to the upper and lower positions and preheat oven to 350 degrees Fahrenheit (180 degrees Celsius).
6. Gather the scraps together into a ball, chill until firm, and reroll. Dust the surface with more sweet rice flour and roll out the dough to get a couple more wafers.
7. Prick the wafers with toothpick or fork, not all the way through, in two or more rows.
8. Bake for 25 minutes, until browned and slightly firm to the touch, rotating sheets halfway through to ensure even baking. Might take less, and the starting location of each sheet may determine its required time. The ones that started on the bottom browned faster.
9. When cooled completely, place enough wafers in food processor to make 1 ¼ cups (300 mL) of crumbs. Another way to do this is to place in a large ziplock bag, force all air out and smash with a rolling pin until wafers are crumbs.


Nanaimo Bars

For Nanaimo Bars — Bottom Layer
1/2 cup (115 g) (4 ounces) Unsalted Butter
1/4 cup (50 g) (1.8 ounces) Granulated Sugar
5 tablespoons (75 mL) Unsweetened Cocoa
1 Large Egg, Beaten
1 1/4 cups (300 mL) (160 g) (5.6 ounces) Gluten Free Graham Wafer Crumbs (See previous recipe)
1/2 cup (55 g) (1.9 ounces) Almonds (Any type, Finely chopped)
1 cup (130 g) (4.5 ounces) Coconut (Shredded, sweetened or unsweetened)

For Nanaimo Bars — Middle Layer
1/2 cup (115 g) (4 ounces) Unsalted Butter
2 tablespoons and 2 teaspoons (40 mL) Heavy Cream
2 tablespoons (30 mL) Vanilla Custard Powder (Such as Bird’s. Vanilla pudding mix may be substituted.)
2 cups (254 g) (8.9 ounces) Icing Sugar

For Nanaimo Bars — Top Layer
4 ounces (115 g) Semi-sweet chocolate
2 tablespoons (28 g) (1 ounce) Unsalted Butter

Directions:
1. For bottom Layer: Melt unsalted butter, sugar and cocoa in top of a double boiler. Add egg and stir to cook and thicken. Remove from heat. Stir in crumbs, nuts and coconut. Press firmly into an ungreased 8 by 8 inch pan.
2. For Middle Layer: Cream butter, cream, custard powder, and icing sugar together well. Beat until light in colour. Spread over bottom layer.
3. For Top Layer: Melt chocolate and unsalted butter over low heat. Cool. Once cool, pour over middle layer and chill.