Daring Bakers: Biscuit Joconde Imprime

The January 2011 Daring Bakers’ challenge was hosted by Astheroshe of the blog accro. She chose to challenge everyone to make a Biscuit Joconde Imprime to wrap around an Entremets dessert.

That means - a sponge cake where a pattern is imprinted in it and is used to create the surrounding shell of a filled dessert. The main part of the challenge was the decorated sponge, then we could fill it with whatever we wanted. I would highly recommend that you check out the DB link below for a couple of weeks. You'll see pictures of other people's before they take it down.

This was one of the best Daring Bakers' challenges yet. I learned a great, decorative technique that was not very difficult. I would certainly do this again for some special occasion. I used it as a dessert for a birthday dinner I made for a friend and I think it turned out rather well. 

pattern on parchment before sponge added
Since my friend works with flowers and plants, I decided to go with a floral theme. I only had a few gel colors left and so grabbed a royal blue and a green. I had seen others' examples and knew that I should mix the color dark for it to show well. You pipe your design onto parchment paper and freeze it for 30 minutes. Meanwhile you make the sponge and heat the oven. After the time is up, you spread the sponge batter over the pattern and then bake. The resulting sponge is flexible enough to be put into a mold. 

I made a chocolate dacquoise for the bottom and a no-bake cheesecake type filling. In the middle I placed some frozen blackberries. I flavored the cheesecake mixture with lemon curd and lemon zest. 


Patterned Joconde-Decor Paste
(I only used a half recipe, and even then, had plenty left over.)

YIELD: Two ½ size sheet pans or a 13” x 18” (33 x 46 cm) jelly roll pan

Ingredients
14 tablespoons/ 210ml/ 7oz/ 200g unsalted butter, softened
1½ cups plus1½ tablespoons/ 385ml/ 7oz/ 200g Confectioners' (icing) sugar
7 large egg whites - about 7 oz / 200g
1¾ cup/ 420ml/ 7¾ oz/ 220g cake flour
Food coloring gel, paste or liquid
COCOA Décor Paste Variation: Reduce cake flour to 6 oz / 170g. Add 2 oz/ 60 g cocoa powder. Sift the flour and cocoa powder together before adding to creamed mixture.

Directions:
  1. Cream butter and sugar until light and fluffy (use stand mixer with blade, hand held mixer, or by hand)
  2. Gradually add egg whites. Beat continuously.
  3. Fold in sifted flour.
  4. Tint batter with coloring to desired color, if not making cocoa variation.
Joconde Sponge

YIELD: Two ½ size sheet pans or a 13” x 18” (33 x 46 cm) jelly roll pan
Ingredients:
¾ cup/ 180 ml/ 3oz/ 85g almond flour/meal - *You can also use hazelnut flour, just omit the butter
½ cup plus 2 tablespoons/ 150 ml/ 2⅔ oz/ 75g confectioners' (icing) sugar
¼ cup/ 60 ml/ 1 oz/ 25g cake flour *See note below
3 large eggs - about 5⅓ oz/ 150g
3 large egg whites - about 3 oz/ 90g
2½ teaspoons/ 12½ ml/ ⅓ oz/ 10g white granulated sugar or superfine (caster) sugar
2 tablespoons/ 30 ml/ 1oz / 30g unsalted butter, melted
*Note: How to make cake flour: http://www.joythebaker.com/blog/2009/09/how-to-make-cake-flour/
Directions:
  1. In a clean mixing bowl whip the egg whites and white granulated sugar to firm, glossy peeks. Reserve in a separate clean bowl to use later.
  2. Sift almond flour, confectioner’s sugar, cake flour. (This can be done into your dirty egg white bowl)
  3. On medium speed, add the eggs a little at a time. Mix well after each addition. Mix until smooth and light. (If using a stand mixer use blade attachment. If hand held a whisk attachment is fine, or by hand. )
  4. Fold in one third reserved whipped egg whites to almond mixture to lighten the batter. Fold in remaining whipped egg whites. Do not over mix.
  5. Fold in melted butter.
finished decorated sponge, trimmed

Preparing the Joconde- How to make the pattern:
(Note: The directions here explain making a striped pattern. I chose to pipe a freehand pattern using a pastry bag.) 
  1. Spread a thin even layer of décor paste approximately 1/4 inch (5 millimeter) thick onto silicone baking mat with a spatula, or flat knife. Place mat on an upside down baking sheet. The upside down sheet makes spreading easier with no lip from the pan.
  2. Pattern the décor paste – Here is where you can be creative. Make horizontal /vertical lines (you can use a knife, spatula, cake/pastry comb). Squiggles with your fingers, zig zags, wood grains. Be creative whatever you have at home to make a design can be used. OR use a piping bag. Pipe letters, or polka dots, or a piped design. If you do not have a piping bag. Fill a ziplock bag and snip off corner for a homemade version of one. 
  3. Freeze for at least 15 minutes.
  4. After you remove from the freezer, immediate spread sponge batter over the pattern evenly.
  5. Bake at 475ºF /250ºC until the joconde bounces back when slightly pressed, approx. 15 minutes. You can bake it as is on the upside down pan. Yes, it is a very quick bake, so watch carefully.
  6. Cool. Do not leave too long, or you will have difficulty removing it from mat.
  7. Flip cooled cake on to a powdered sugared parchment paper. Remove silpat. Cake should be right side up, and pattern showing! (The powdered sugar helps the cake from sticking when cutting.)
Chocolate Dacquoise- this is a crisp meringue so use it as a base You could also use any cake you have as a base.
35 g confectioner's sugar
3 g cake flour
4 g cocoa powder
42 grams almond flour
50 grams egg whites
9 grams white sugar
Sift together first three ingredient's.
Mix in almond flour
Whip egg whites and sugar to medium peaks.
Fold the dry into meringue.
Draw a circle on parchment paper smaller than your mold. turn over. Pipe dacquoise in concentric circles inside drawn circle. It is smaller smaller than your mold so when you pour the bavarian over it, it will encase it completely. Pipe to 1/2 inch thickness. Bake at 320 f def convection until dry and crisp. Reserve.

Final assembly:
  1. Line a springform pan with plastic wrap.
  2. Place the dacquoise bottom into the pan.
  3. Cut and shape the patterned joconde around the sides of the pan with the pattern facing outward.
  4. Fill the entremet with whatever fillings you choose.


Think Thin Bars
Like anybody, I get lazy about cooking or making a meal. Sometimes you just want to do the old grab-n-go. Hopefully you are going to pick a healthy item to grab instead of a doughnut or a brownie. Oftentimes we use protein/energy bars or drinks to take the place of a meal.

But there are so many protein/energy bars and shakes out there. Often you stand before them at the store shelves overwhelmed and wondering two things:

1) This one looks healthy, but does it taste good?
2) This one tastes good, but is it really healthy?

I've got the products for you!

THINK THIN!

Think Thin bars are the answer because they taste great AND they are good for you. They have low to no sugar, lots of fiber and protein, and are gluten-free.

Now sure, many other bars might claim the same things, but let's give an example. Before I got these Think Thins I was looking at bars out there and thinking to myself, "Oh. This one has 9 grams of protein and 4 grams of fiber. That seems pretty good." And that's about average out there.

But check this out! A Think Thin peanut butter bar has 20 grams of protein and 0 sugar! In fact, all their Protein Bars are sugar free and have 15-20 grams of protein. And yet they still taste good. The ingredients taste good enough that they don't need to add sugar.

I personally prefer the Crunch Bars which have 10+ grams of protein and 4+ grams of fiber. They have 3 grams of sugar versus competition bars which average 13 grams of sugar. They are loaded with nuts and soy crisps. Don't they look yummy in the picture? The sweetness comes from the honey mixture used to bind the bar together.

Think Thins can be found locally at Trader Joe's, Whole Foods, and Nugget. But why not win some! See end of this post.

From AOLHealth.com:

Eat Smart:
1) If you're replacing a meal with an energy bar, choose one with 200 to 300 calories; for a snack, shoot for 150 calories or fewer.
2) Opt for a bar whose ingredient list is short and begins with a whole grain such as brown rice, whole wheat, or whole oat flour.
3) Make sure your pick meets at least two of Greaves's requirements: fewer than 15 grams of sugar, less than 2 grams of saturated fat, at least 3 grams of fiber, and at least 5 grams of protein.
4) If you can't find one containing that much protein, add it yourself: Spread a low-calorie bar with a thin layer of peanut butter, or enjoy a glass of low-fat milk or a piece of low-fat string cheese with it. "Adding in the protein will help you feel more satisfied longer," says Greaves.
Svelte Protein Drinks

Think SVELTE!

One of my big problems is that I get super dehydrated during the night. I wake up with a slight headache and wonder how my thick blood is managing to pump through my veins. I need to get liquid back into my body asap. Sometimes I conquer two birds with one stone. I drink my breakfast. If I'm too lazy to blend up a smoothie, I can grab a Svelte. I also drink them after workouts, when you are supposed to replenish nutrients to your muscles, but I'm too lazy to cook. You are supposed to intake something  (healthy)within an hour of your cardio.

A Svelte is 16 ounces of soy goodness in four fab flavors: French Vanilla, Chocolate, Cappuccino, and Spiced Chai. I've been loving chai lately and so I really like their newest flavor.

What makes them stand out?

They are made from organic soymilk and all natural products right here in Northern California. They have 16 grams of protein and 8 grams of fiber. They are sweetened with stevia, which means you don't have to worry about glucose spiking in your blood since stevia doesn't effect your glucose levels. Svelte is also gluten-free.

If you are interested in more info on protein shakes, here's a great article at WebMD.

Svelte can be found locally at Whole Foods.


Giveaway!

Win some Think Thin bars to try yourself. 2-3 Winners!
This one is a Facebook contest. Join the Munchie Musings fan page and then post on the wall what is your current favorite type of energy/diet bar.

Deadline: Monday midnight (1/31)


Disclaimer: Samples were received from both companies.
Filipino Chicken Adobo Rice
Rating: 4/5

I've mentioned before that I'm have Filipino but am pretty ignorant about Filipino food. My mom never learned to cook much Filipino food and so the only things I can even remember her making are lumpia, pancit, and adobo.

Filipino food is definitely its own thing. Being situated in southeast Asia and made up of over 7,000 islands, it has often been the stomping ground of invaders. Thus the influences over the centuries include Chinese, Japanese, Spaniards, Americans, and others. All of these influences mish-mash together to create unique dishes  - the true example of fusion cooking.

One notable flavor trait of Filipino cooking is their mix of salt/sour. Adobo is a perfect example. Adobo is considered the national dish of the Philippines. It is usually made with either pork or chicken. I prefer the chicken, and it's important that you use chicken thighs, not breasts. The breasts will be too dry.

The primary ingredients for the marinade are vinegar, soy sauce, garlic, and pepper. The normal method calls for marinating, then simmering the meat in it to cook, remove the meat and boil down the sauce to make it even more potent, and fry the meat to give it a bit of crispiness. Then serve it all over rice.

I'm changing it up a bit in this version. After removing the chicken we toss in rice to cook in the sauce and then at the end throw in the chicken, now shredded. Your finished product is a nice, potent chicken and rice dish. No more fighting over the adobo sauce. I suppose you could throw the rice in from the start, but part of the beauty of adobo is the slow cooking of the meat in the marinade. The meat really takes on the flavor of the sauce.

Note: Cooking times can vary depending on slow cookers.

Chicken Adobo Rice
1 lb. chicken thighs
1/3  c vinegar
2 T soy sauce
3 cloves of garlic, minced
1 small bay leaf
¼ t pepper
½ c water
3/4 c rice

Remove the skins and trim any fat from the chicken thighs. Place in slow cooker.
Mix together remaining ingredients except  for the rice and pour into cooker. Cook on low for 6 hours. (Mine was on while I was at work, so over 8 hrs.)

Remove the chicken breasts and set aside. Add rice to the sauce in the cooker. Cook on high for 1 hour or until rice is cooked. Remove chicken from the bone and shred. Toss with cooked rice mixture. Serve.


Chicken Thigh
Opa Opa on Urbanspoon


Repost

There is no real translation for the Greek "Opa!". It's kind of a "hurrah" or "bravo". In that case, Opa Opa restaurant is aptly named. Located at 5644 J Street, Opa Opa is casual in setup. It is cafeteria style. After looking at a menu, you go up to the counter and place your order as you grab a tray. The menu had the full variety of Greek dishes from dolmathes (stuffed grape leaves) to leg of lamb and gyros.


Our meetup group went through the line and sat and devoured our food. Dianne and I had the pastitso (pic above)- layers of elbow macaroni, parmesan cheese and a spicy meat filling, all held together by a rich bechamel sauce. It was served with a side of grilled veggies, that were nicely seasoned and still had a crispness to the green beans.


Robert had the seafood souvlaki, basically a shrimp and scallop kabob with rice. Melodee had a simple tomato, cucumber, feta salad. Kieran had the gyro plate.

But even after all that, we weren't done! Phil, the owner, asked if it was our first time there. We all said it was and so he brought us extra food to try! And boy was he generous! He brought out a huge plate of hummus and bread. The hummus was salty, garlicy, and delicious. There was also a small plate with a few slices of lamb and their special mint paste. Phil came out to explain that they go through 100 gallons of hummus a month! He said the hummus, tzatziki, and falafel were all made there. Melodee and I admitted that we really didn't care for falafel. Well that might as well have been a dare to Phil. He then brought a plate of their homemade falafel and explained the best way to eat it - dipped in the tzatziki and then with a bit of hot sauce. I must admit, they were very good.


Right next door to Opa Opa is Sweeties - a dessert shop. I am constantly arguing that there need to be more quality dessert places in Sacramento. This is just a shop without tables. There is a counter along the window where you can stand and eat your treats. Pretty much all of the desserts are done in single servings - mini cakes versus getting a slice of cake. There was tiramisu, cheesecakes, cakes, cupcakes, brulees, etc. I chose the coconut cream cake and enjoyed it. They stay open until 10 for that nightly sweet tooth craving.

Prior Chocolate Fish post.
Guatemalan Coffee Farm post.


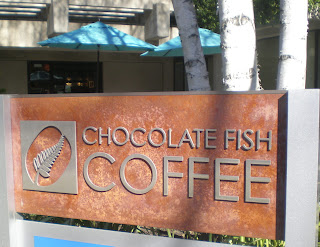
If you haven't stopped into Chocolate Fish Coffee (3rd & Q) then you are missing out on quality coffee, award winning baristas, and coffee education. About once a month CF offers some sort of a coffee class, be it brewing, the story of coffee from farm to table, or coffee tasting - which I went to this weekend.


Coffee tasting is offered to only eight people per class and takes about an hour. For $15 you get the class and then a half pound of coffee of your choice to take home.


Erik serving up coffees before class.


I don't want to tell you everything, since you really should go to the class. But I will tell you a few things I came away with. Erik was our teacher for the day with Alfonso prepping the coffee in the back for our blind tasting. Erik started off by going over things that influence coffee taste: climate, soil, etc.


There are two types of varietals of coffee. Arabica coffee is grown at higher elevation, has a lower yield, and slower maturation rate, which equates to more sugar. Robusta beans are grown at a lower elevation, yield more, are often machine harvested, and have more caffeine. Coffee houses generally only use Arabica beans and the Robusta are generally used for mass produced coffees.


After picking the coffee cherries are processed in different ways. There is washing, which is where the fruit is completely removed from the beans. This is what you see in my Guatemala post.  There is also the dry method and pulped natural, which "consists of pulping a coffee, but emitting the fermentation stage to remove the silverskin". Usually the processing method depends on the country and the resources they have, such as enough water. Each method imparts different flavor profiles on the coffee.


Another contributor to flavor is the roasting. Roasting changes the sugars and the caffeine. Many coffees are dark roasted, which is more common. CF roasts their coffee medium.  Think about sugar when it is cooked goes to caramelized to carbonized (think a toasty brown, caramelized marshmallow versus a burnt, carbonized marshmallow). Also, the lighter the roast, the more caffeine. 


Erik then started with the actual tasting. He used a glass dripper, which they sell. After we smelled the coffee grounds, he set them in the dripper. The dripper is conical with cyclone style ridges that help funnel the coffee down the sides. Erik was very precise in the amount of water he poured each time. First he poured about a 1/4 cup to bloom the coffee - an initial release of the CO2 in the grounds and when you get the most powerful hit of aroma. This also soaks the grounds and gets them to "open up" so that they will release more flavor to the water. After about 20 seconds he continued pouring water in a slow, steady stream around the sides of the coffee, not on the paper liner. It took over three minutes for the pour/drip. We all tasted each coffee and used a sheet to note aroma, taste, and mouth feel.


Glass dripper with cyclone ridges


The four turned out to be (flavor details here):

1) Guatemalan La Merced - the most popular with the group, washed
2) Brazilian Chapadeo - the most bitter of the group, pulped natural
3) Ethiopian Yirgacheffe - washed
4) Panama Elida Estate - the 2nd most favorite, pulped natural

Asian Pearl 2009 on Urbanspoon
Asian Pearl Dim Sum Cart


Dim sum is the Chinese equivalent of small plates, similar to tapas for Spaniards. They had their origin in the roadside teahouses of old China as travellers would stop for repast on their long journeys.  Dim sum is eaten while sipping tea and soon became a normal part of every day life. Farmers would go to the teahouses to relax after a hard day in the fields.

Here in the States dim sum is served usually at Chinese restaurants that specialize in it since it takes a lot of time and effort to create the dozens of small dishes that are needed. There are chefs that are speciliazed in creating these morsels, with nimble fingers for shaping many of the dumplings that are standard favorites.

For non-Chinese, dim sum is usually a weekend brunch affair. This was the case when I went with my dining companions one Sunday. In Sacramento the best known and oldest dim sum restaurant is New Canton on Broadway. But it is so popular that there can be a wait and the tables are crowded together. I had heard about Asian Pearl and asked that we go give this other popular location a try.

Asian Pearl interior

Asian Pearl is located at 6821 Stockton Blvd #165. It's a bit difficult to find because the street sign is not large and it is tucked back deep in the shopping complex. Once you walk in you will find a giant dining room with loads of tables. There is no crushed feeling here. We arrived around 11 and the place was about half full. By the time we left it was nearing capacity. Still, there is plenty of room with spacious aisles for the carts.


Some restaurants  just have a dim sum menu, but the best use the carts. Servers wheel by with one or a few dishes on their carts and ask if you would like something. Often this can be awkward if they only speak Chinese and you are left playing dining Chinese roulette. Luckily the servers at AP spoke enough English to at least say pork, scallop, shrimp, etc. Your table has a kind of tally sheet (shown below) where they tick off what you take. The dishes range from $1.95 to $4.85  and usually have enough for 3-4 people per serving if you are sharing family style. Kitchen specials are $6 but probably most Caucasians will shy away from those - duck chins, seaweed, and organ meats.


The restaurant does serve a regular, full Chinese menu and has a take-out BBQ booth for picking up Chinese style BBQ duck, pork, etc. During our brunch there was also this long table with ladies ready to prepare you a soup to order. Next time I'll have to check this out more.


The three of us were stuffed in a short amount of time. Sadly we had to watch carts wheel by with more things we wish we could try. There's always next time! Our bill came out to a mere $10 each. Pretty darn good for full tummies.

All in all, Asian Pearl is a definite winner for dim sum. New Canton might be walking distance from my house, but I'll gladly make the 10 minute drive to Asian Pearl again - soon.
Dutch baby fresh from the oven

Oregon has a lot of pie houses and pancake houses. Near my college in Portland there was an Original Pancake House that had hour-long waits on the weekends. One of the items they were known for was their Dutch Babies. Thing is, DBs take at least 20 minutes to bake, so if you ordered them, you had to be patient. You were then rewarded with this glorious pancake puff.

I soon learned to make them myself. They only have 3 real ingredients. I like to eat them with a lot of powdered sugar and fresh-squeezed lemon juice on them. So they are a great Sunday breakfast to have with my crazy lemon tree in season. The size here is good for two people. If you have a large enough pan/pot, you can increase by an egg and 1/4 c of each item at a time.

2 T. butter
4 eggs
1 c. milk
1 c. flour

The butter is just to grease your pan. You need a souffle or stoneware bowl for a good baby to climb up the sides. But I've read that some people use a cast iron skillet and I've used my stoneware square pan, like I did for this one. Again, the higher the sides, the more dramatic the climb of your baby. Anyway, heat your oven to 425 degrees and put your pan in with the butter as it heats. The butter will melt in your pan.

Meanwhile, beat the eggs in a medium mixing bowl. Beat in the milk, and then beat in the flour. When your oven, pan, and butter are hot, open the oven and quickly rotate your pan so that the butter is evenly melted around the bottom and a bit up the sides. Immediately pour your batter into the hot pan and close the oven.

Dutch baby, add lemon juice and powdered sugar

Let the baby cook for about 15 minutes. It's a kind of souffle, so don't open the door! You'll see it start to climb the sides. After about 15 minutes you can turn the heat down to about 365 to finish it off. The full cooking time is only going to be about 20-25 minutes. Remove from the oven and serve right away. Dust heavily with powdered sugar and then use the topping of your choice. Some people like jam or syrup, but I just like the lemon juice. Enjoy!
Lucille's Smokehouse BBQ on Urbanspoon
I LOVE barbecue pork ribs. MMMMMMMMMMMMMMMMM. I am happy to try any barbecue place except for Texas style. Lucille's has been open in Rocklin for a while now, but I rarely head out that way anymore. (Used to live there when I was married.) Anyway, I decided it was time to organize a meetup dinner for out that direction and finally get it checked off of my To Eat List.

There are so many types of barbecue in this country. You've got Memphis, Texas, Carolina, sweet, spicy, honey based, vinegar based, etc. I believe Lucille's is Carolina barbecue - for the most part. After all, there were traces of Louisiana with the jambalaya and the gumbo. Anyway, I had made reservations for our group and was disappointed that we still ended up having to wait for quite some time at 6:00 (early)!

I am big into baked goods and sweets. So I can appreciate a good quality biscuit. The biscuits are served up when you are seated and come with honey butter. I asked for regular butter. The biscuits are huge! And oh, so fresh, hot, and yummy!


OK. Who likes okra? Raise your hands! I am one of those who grew up with bad okra experiences. My mom made some stewy dish with the slimy okra. Others at our table had never had okra. Connie ordered the fried okra (above) and was kind enough to share it with everyone. It was good! The okra was cut into small chunks that had been battered and deep fried and then served with dipping sauces. They were crisp, tasty, and not slimy. Well, maybe just a tad. But that was the beauty of it. Because of the small chunks, the amount of slime of the inside seeds was minimal and easy to tolerate. After all, okra's bad rap comes from the issue of texture. Dena told us that okra is in the cotton family - which makes sense. The inside of the pods have the slimy threads and seeds. Let's see - I mentioned 'slime' four times. Did I tell you okra is slimey?


This dish was the small sized gumbo. Don't want to know how large a large is. Another tablemate (Mary?) was from Louisiana and said that gumbo has to pass the 'plop' test. If its runny and pours off the spoon, it ain't gumbo. Lucille's passed the test with a thick, peppery, chunky gumbo. I've always opted for jambalaya over gumbo, but admit that this was delicious.


Since I was sharing I ordered a combo platter with a half chicken, pulled pork, beef brisket, corn, and mashed sweet potatoes. The chicken was smoke barbecued and very moist. I loved my grilled ear of corn. Grilling is definitely the best way to do corn. The beef brisket was good, but nothing special. The same can be said of the pulled pork. The big disappointment was the sweet potatoes. They were so pureed that it was like eating baby food. You want some chunkiness in any mashed potato so that you feel like you are really eating potatoes and not fakey potatoes. Yuk.

I said I am a sweets person and so usually I do opt for a dessert. But the dessert menu was boring. It had typical fare like chocolate cake, apple pie, bread pudding, etc. Nothing struck my fancy. I had hoped for Red Velvet cake. Oh well. We all passed on dessert.

I think I'll stick closer to home to my regular BBQ haunts. Lucille's was good, not outstanding. What it had going for it were a large menu and large helpings. What it lacked was quality in some items and a long wait!
This week I went to the Fancy Food Show in San Francisco. Filling both the huge north and south halls of the Moscone Center are thousands of food manufacturers, producers, wholesalers, etc. All of them are hawking the latest in foods - be it trendy or just a new take on a classic.

Here are the five trends that the National Association of the Specialty Food Trade (NASFT) saw for 2011. Then I'll tell you what I found.

Chocolate for Breakfast: Tea, Belgian waffles, granola and hot chocolate on a stick.
Foods for Healing: Ancient healing teas, Blackwater with 77 minerals, aloe and cucumber drinks, plus micro-batches of healthful beverages.
New Noodles: Yam, kelp, farro and spelt.
Heat with Flavor: Ghost peppers, yuzu-wasabi sauce and piquillo almond glop.
Creative Chips: Pinto beans, naan, peas, mung beans, kale and wild rice.

Other trends the panel identified are: retro foods, classic cocktails, wine-flavored foods, mini servings and cured meats.

I was only there for five hours (of a three-day event) and was unable to give the show the due diligence it deserved. Next year, a full day at least. Anyway, I was rushed. I tried to make a point to visit any vendor that had contacted me in advance and some certainly peaked my interest. Over the next month or so I will be writing more about some of the NASFT vendors and their products. For now, here's a starter...

Healthy Chocolate, or, as the confectionary specialist liked to call it, Functional Chocolate. There were quite a number of vendors who were adding supplements to the chocolate. Like adding CoQ10 for heart health or resveratrol (from wine grapes) for its antioxidant and life extending properties. I plan to write more about this subject after I get some samples and talk to the companies.

Aloe Water. Last year it seemed to be coconut water and this year it's aloe water. The claims range from the sensible (anti-inflammatory, speeds healing) to the unproven (helps in weight loss). The point is, there were a lot of vendors with it. I must admit that I liked the one I got from alo with mango and mangosteen flavoring.

Exotic Fruits. I know about some exotic fruits due to my half Asian blood. I've had mango, ube and lychees for decades. But this week I tasted a few new things in ethnic ice creams and can only say - bring it on!  Any person who has gone to the Philippines knows the Magnolia ice cream brand. Now there is a Stateside version and along with familiar coconut and mango they also have pandan, jackfruit, lychee and more. Rumba had the South American exotic fruits. I was introduced to locuma, mamey and cherimoya.  If I missed any Indian ice cream producers with cardamom and rose water, let me know.

Charcuterie. This one isn't news for any foodie. Charcuterie refers to prepared meat products, meaning sausages, salamis, rillettes, smoked meats, etc. I must admit that this is one of my favorite parts of the show. Poor Girl Kimberly was going cheese crazy, but for me, I'm sampling as much salumi and proscuitto as possible. I even had a duck prosciutto - gamey but delightful.

And a few other things that immediately struck me...

34° Crispbread sent me samples before the show. I tried them and was amazed at how light and crisp they were, stood up to spreadable cheese, and didn't complete flavorwise. It was no surprise to see them featured at many of the cheese booths for the cheese samplings.

NoOodle, which I hope to write about after I've cooked with it, is a no calorie, no fat, no carb, no gluten noodle made from an Asian yam. Used in Asia for centuries, this noodle soaks up flavors of what it's mixed with.

Savory Choice. Last year I got some of Savory Choice's broth concentrate packets. They come in turkey, chicken, beef and vegetable. A packet makes a cup of broth the concentrate. Well, it took the whole year to really appreciate them so that I was happy to come across them again this year.  Sometimes you want the broth to be already concentrated down and not have to take the time to reduce it yourself.

Tablehopper is a book and a website by Marcia Gagliardi. If you dine in San Francisco you need this reference book. Gagliardi knows the dining scene and has come up with a clever book. After realizing she was always asked where to go, in xxx price range, for xxx occasion, she compiled it into a guide. Looking for a place to take the new in-laws? How about the perfect location to for a blind date? She has all the suggestions.

There's more to tell, but those will be for future posts over the next few weeks. I'll be sampling a few more products and tell you what's worth a try.


Dad knows best. Sometimes you just have to accept it. You might not always agree with him or you might even think he's a little cuckoo, but in the end he's almost always right.

For years my dad has been consuming clay. Every morning he mixes a heaping teaspoon of this grey clay powder into his orange juice or cereal. In the case of the OJ, it turns an awful greeny grey in color and is rather unappetizing looking. He would preach about the health attributes to folks and I had listened, but pretty much tuned him out.

Then last year Dr. Oz mentioned bentonite clay. Yes, I am a Dr. Oz devotee. I love his radio show (don't particularly care for the TV show). I've learned so much about different medical topics, including homeopathy and other topics. This particular time he was talking about five things that should be added to your medicine cabinet and bentonite clay was one of them.


Then we came across Redmond Clay at the Fancy Food Show and they were handing out samples of bentonite clay. "I know this!" I exclaimed. I told the guy about my dad taking it every morning and he said he rarely heard of people ingesting it on a regular basis. Most people just use it for external applications.

I went home and happened to go to the Sacramento Food Coop and decided to ask if they carried bentonite clay. They had three different liquid forms that they sold. I asked about powder and they didn't carry an ingestible powder form.

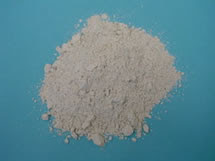
Now I was curious. So I emailed dad. "Where do you get your clay, dad?" I was a bit shocked by his response - a construction supplier. You see, bentonite is also used for a lot of industrial and commercial uses. So my dad was buying big 50 pound bags from a construction company! No wonder it was an ugly grey compared to the nice fine ecru powder from Redmond Clay.

I emailed Redmond Clay and they were nice enough to send both myself and my dad samples. So I've been using it the last few months and will say that you can't even taste it in water.

So why ingest bentonite clay?


There is a ton of info on the internet about bentonite, but here are some basic facts.

- It's naturally found in different locations around the world, including the United States. It was named after Fort Benton, Wyoming, where a large deposit is located.
- Native Americans have been using it for centuries.
- It is not absorbed by the body but instead passes through the body collecting impurities.

Bentonite clay is made up of a high number of tiny platelets, with negative electrical charges on their flat surfaces and positive charges on their edges. When bentonite clay absorbs water and swells up, it is stretched open like a highly porous sponge. Toxins are drawn into these spaces through electrical attraction and bound. Bentonite Clay is effective because it has a negative charge, and most toxins in our body have a positive charge. So it makes Bentonite Clay useful in binding to toxins. Bentonite Clay can absorb any toxic substances imaginable: impurities, harmful bacteria, poisons, pesticides, pathogens, parasites, etc.


Because of the above, bentonite is a cure-all for gastro intestinal issues such as diarrhea, acid reflux, colitis, irritable bowel syndrome, etc. It is often used as a colon cleanse.

How about external uses?

Bentonite also seems to work for many external applications such as aiding in the treatment of burns, rashes, eczema, diaper rash, etc. You just mix it with water and apply it to the skin. You can also apply it to your bath water as porous skin is another avenue for ridding your body of toxins.

Reference Sites:

Redmond Clay
Clay video presentation
Healing Daily
Wikipedia
Colon Zone
Thai Style Ribs
Rating: 4.5/5

If you haven’t figured out already, I love Thai food. So earlier this week you got Thai beef jerky and today you have Thai BBQ ribs.

This is not my recipe and it's really supposed to be done on a grill or in a smoker. I'm adapting it for the crockpot. Basically, I put my ribs in half of the marinade to sit overnight in the frig. I then set them in my crockpot in the morning before I went to work. I set it at low since I would be gone for a good 8.5 hours. When I got home it was more like braised ribs because there was so much liquid. I took out the ribs, and dumped the liquid. I then served the ribs with the other half of the marinade as sauce.

These ribs were falling off the bone. Very tender and moist because they were done in the crockpot. If you want to crisp them up a bit, you can put them on the grill for five minutes and baste them with some more sauce.

The recipe called for 8 serrano peppers, but I just used 6 and found it had a good amount of heat. There is tang from the vinegar, salt from the fish and soy sauce, and sweetness from the honey. It all balances out for a flavor packed sauce. And if you baste it over ribs on the grill, it will be nice and thick and sticky. Yum.


lots of serranos = lots of heat

Thai Barbecue Sauce
adapted from: The Great Ribs Book

By Hugh Carpenter & Teri Sandison


Makes 3 cups

6 cloves garlic, minced
2 tablespoons finely minced ginger
8 serrano peppers or other small hot chiles, minced, including seeds
4 small green onions, green and white parts, minced
1/4 cup minced cilantro sprigs
2 tablespoon lemon grass, minced
1 tablespoon grated or minced lime zest
Juice from 3 limes
1 cup hoisin sauce
1/2 cup wine vinegar
1/4 cup fish sauce
1/4 cup honey
2 tablespoons dark soy sauce
2 tablespoons flavorless cooking oil


To make the sauce, combine all the sauce ingredients and stir well.

Coat the ribs evenly on both sides with half the sauce. Marinate the ribs, refrigerated, for at least 15 minutes. For more flavor, marinate for up to 8 hours. Reserve the remaining sauce to serve as a sauce for the ribs.


Melting Pot on Urbanspoon
Repost from 2007

The Melting Pot (TMP) came to Sacramento a few years ago. It belongs to a chain and all they do is fondue. If you hadn't noticed, fondue has been making quite a comeback recently. I love fondue and have a fondue cookbook with hundreds of variations. In the past, I have had fondue at Friar Tuck's in Grass Valley, at the old Penryn Restaurant (now closed), and at a fondue restaurant in New York city. I was very interested in trying this place out.

TMP is one of the few restaurants these days that pretty much requires a reservation. Because fondue dining is a rather relaxed, lengthy experience, you need to allocate at least two hours. This makes it necessary for the restaurant to watch its scheduling. 
TMP is under/in the parking garage at 15th and H. One of the first things you notice when you walk in is the wine cellar. It is a glass enclosed room with racks and racks of wine. If you are a wine lover, I'm sure you'll love the selection here. The wine menu alone is six pages. The next thing you'll notice are the tables. Each has glass top electric burner for the fondue pots. Each seat has a napkin roll which includes a knife, fork, and two fondue forks of the same color. Each person has different colored forks so you know which is yours. I must say that I was not thrilled with the electric burners. I'm sure they are safer and therefore less liability for the restaurant, but there's something more romantic about a flame under a fondue pot.
Be prepared for a more expensive dinner bill. The waiter will try to entice you to The Big Night Out special they have. It includes cheese fondue, salads, main course fondue, and chocolate fondue for $41 per person. Although we opted to select the same courses on our own, the price still came to about $41 per person, so it's really a reasonable arrangement if you wish to have the full fondue experience. If you choose on your own, there are four cheese fondues, four main course fondues, and at least nine chocolate fondues to choose from.
The cheese fondue is your appetizer course. They mix the fondue in front of you and you are given bread cubes, apple and vegetable pieces to dip. The three of us found ourselves wanting more. In fact, you'll find that the theme of wanting more will continue as we go through the course of the meal.
After the salads comes the main course fondue. You and your companions must select which cooking fondue you wish to use and then you can each individually select your meats for dipping. You can do a broth or an oil fondue for the main course. We opted for the Mojo, which was a Caribbean flavored broth with a bit of citrus in it. For our meat selections, I chose the seafood trio, Alan chose the New Orleans platter, and Lorna chose the shrimp and sirloin platter. You each receive suggested dipping sauces and a platter of veggie pieces to dip as your side items. Since each meat item takes about 2-3 minutes to cook in the liquid of your choice, it draws out the dining experience as you must wait for each piece to cook.
Last is the chocolate fondue for your dessert. There are many kinds to choose from and you can even concoct your own. We chose a mixture of dark and milk chocolate with amaretto mixed in. Your dessert plate includes cubes of brownies and pound cake, a slice of cheesecake, and assorted fruit. Based on our cheese experience we were already complaining to the waiter as she mixed our chocolate that this would not be enough. We were informed that we can always ask for more dipping materials (except cheesecake) at no charge or we could just order another batch of fondue for an additional charge. We ended up asking for more brownie and pound cake cubes.
After we had finished we all agreed on one thing. We were still hungry, or rather, not feeling full and satisfied for the price we had just paid. If I was running the place, I'd have a kitchen able to offer other cooked main dishes as an option. For example, be able to go in and have cheese fondue, salad, a real cooked main course like a chicken breast, rice, and veggies, and then chocolate fondue. A more filling dinner. Will I go back? If I do it will be for a special occasion or to just have cheese or chocolate fondue. But my Pampered Chef quick chocolate fondue tip for you is: chocolate chips and cool whip melted together!
Fondue etiquette suggestions:
· When the cheese fondue is almost done, it forms a brown crust just before burning stage. Loosen this crust and give it to the honored guest.
· No more than six people per pot or there is too much confusion over the forks.
· If you drop your piece of food into the fondue, you have to buy a round of drinks for your clumsiness.
· When you put the bread in your mouth try not to touch the fork with your lips or tongue because the fork does go back in the pot.
· When cooking a hot oil/broth fondue, slide the cooked pieces of meat off the fork and onto your plate. You will seriously burn yourself if you try to eat it off the fork!


Thai beef jerky

Making beef jerky when you don't have a smoker or a dehydrator can be problematic.

My first experience with kitchen-made beef jerky came in college when one of my very good friends made it in her oven. She had an electric oven that she set at a very low temperature. The beef dried out in the oven overnight and we all celebrated her victory by chomping it all down in one sitting.

My dad made great beef jerky, but he used a food dehydrator. Loved the stuff except for the aftereffect his particular recipe had. Let's just say you didn't want to be the room with a person who had recently eaten it.

So jerky had been on my to-do list for some time. I just had to deal with a gas oven and hope for the best. I searched around for a marinade that would interest me.  I wanted spicy but tangy without being barbecue-y or teriyaki. I came across a Thai inspired recipe and decided to give it a try. 


I took the beef and froze it. Then the day before I wanted to make the jerky, I took it out and let it thaw in the frig overnight. It was frozen so solid that in the frig it still stayed mostly frozen. It made it easy to for me to slice. I then marinated it for 24 hours, flipping and redistributing the marinade every few hours.

The next night I laid out the slices on wire racks and put them in a foil lined oven since they would drip. I set it to 200 degrees at first but after an hour I could tell it was too hot. My gas oven was coming on too often to heat up and I knew that wasn't good for a slow dry. I turned it down to 170, the lowest my oven would regulate.

My first batch was in for about four hours and was dry and leathery. I had to go to bed and wasn't about to do another batch overnight. The next morning I tried again at 170 but after an hour and a half I could see it had already dried it out considerably. I had to go to work and decided to turn off the heat and let the dwindling heat do the rest. That turned out to be a great solution. When I got home I found moist jerky that held the marinade flavor well. Perfect.

I recommend this marinade but definitely suggest a more traditional way of drying out your meat - with a smoker or dehydrator.


Thai Beef Jerky Marinade

  • 8 lb Beef or possibly flank steak
  • 1 c. Beef stock
  • 4 Tbsp. lime juice
  • 4 Tbsp. fish sauce
  • 4 tsp Sugar
  • 1/2 c. chopped mint
  • 1/2 c chopped cilantro 
  • 1/2 c. Thinly sliced shallots
  • 4 x Scallions, sliced in half lengthwise and cut into 1/4" lengths
  • 2 jalapeno peppers or hot chilis, seeded & finely minced (depends on heat preference)
  • 4 tsp Pepper
  • 1 tsp Cayenne pepper 
  • 4 tsp Liquid smoke
  • 1/2 c. Soy sauce