Showing posts with label daring bakers. Show all posts

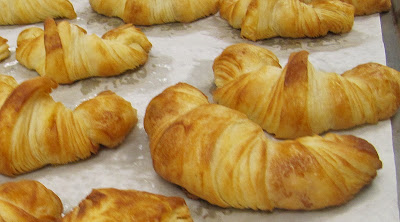
The Daring Bakers go retro this month! Thanks to one of our very talented non-blogging members, Sarah, the Daring Bakers were challenged to make Croissants using a recipe from the Queen of French Cooking, none other than Julia Child!

This challenge was very similar to the one we did for the Danish Braid back in 2008, and very time consuming. This is one thing where I prefer to say, "Been there, done that, don't need to do it again." It's just so much easier to go out and buy them!

Stay tuned for November when I host the challenge!

Jana of Cherry Tea Cakes was our July Daring Bakers’ host and she challenges us to make Fresh Frasiers inspired by recipes written by Elisabeth M. Prueitt and Chad Robertson in the beautiful cookbook Tartine.


After reading through the recipe and then making it, I realized this is what we know here is Sacramento as a fruit basket cake. The only real difference is that the frasier is supposed to be done so that the outside edge of the cake is decorative based on the placing of the fruit. Oh, and it's almost mandatory that it have strawberries.


Erica of Erica’s Edibles was our host for the Daring Baker’s June challenge. Erica challenged us to be truly DARING by making homemade phyllo dough and then to use that homemade dough to make Baklava.

That's right. She wanted us to make phyllo dough from scratch!  Phyllo dough, that thinner-than-paper dough used to make flaky pastries. In order for me to do this, I had to go over to Sacatomato Ann's house to use her Kitchenaid. The dough required considerable kneading with a dough hook (versus about half an hour doing it by hand). I then took it home and spent over an hour rolling out the paper thin sheets.

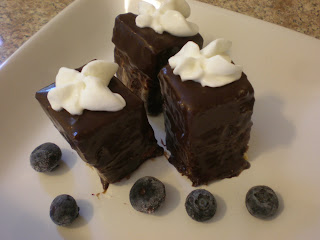
The May 2011 Daring Bakers’ challenge was hosted by Emma of CookCraftGrow and Jenny of Purple House Dirt. They chose to challenge everyone to make a Chocolate Marquise. The inspiration for this recipe comes from a dessert they prepared at a restaurant in Seattle.


Each month when they announce the challenges there can be a bit of time of feeling overwhelmed. This was one of those recipes. It had a lot of components and at first glance seemed complicated. Luckily others are always out there to do the recipe first and give their suggestions to the rest of us. I soon learned that it wasn't so difficult, just time consuming.

I started by making the chocolate base and the spiced nuts on Friday night. I only had a few pecans lying around, so I didn't make a big batch of nuts. The biggest problem there was that I didn't think the final product was spiced enough. Note for next time. I then tackled the chocolate base and was going to stop for the night but then realized the chocolate marquise needed to freeze overnight.  So I quickly whipped that together and poured it into a square pan to freeze.

On Saturday I just needed to whip up the meringue and make the caramel. I piped the meringue onto tin foil and then put it under the broiler to brown. Then it was just a matter of plating it all together.

In the end, a rather easy recipe after all. And good! Definitely a keeper to pull out for a special occasion to impress all your friends.


The recipes that were initially supplied made huge batches. I chose the quarter recipes, which was still enough to serve a dinner party of 6-8 easily. 

Chocolate Marquise

Servings: 6 2"x2" (5cmx5cm) cubes

3 large egg yolks at room temperature
1 large egg
2 tablespoons + 2 teaspoons (40 ml) (40 grams/ 1½ oz) sugar
1 tablespoon + 1 teaspoon (2/3 fluid oz/ 20 ml.) water
Chocolate Base, barely warm (recipe follows)
½ cup (4 fluid oz./ 120 ml.) heavy cream
½ cup Dutch process cocoa powder (for rolling) (Note: We used extra brut, like Hershey's Special Dark. Make sure it's a Dutch processed cocoa, not a natural cocoa powder.)
Torched meringue (recipe follows)
Spiced almonds (recipe follows)
Cacao nibs (optional)
In the bowl of a stand mixer, combine the egg yolks and whole eggs. Whip on high speed until very thick and pale, about 10 - 15 minutes.
When the eggs are getting close to finishing, make a sugar syrup by combining the sugar and water in a small saucepan. Bring the syrup to a boil and then cook to softball stage (235F/115C). If you have a cake tester with a metal loop for a handle, the right stage for the syrup is reached when you can blow a bubble through the loop (as seen in the following pictures). 
With the mixer running on low speed, drizzle the sugar syrup into the fluffy eggs, trying to hit that magic spot between the mixing bowl and the whisk.
When all of the syrup has been added (do it fairly quickly), turn the mixer back on high and whip until the bowl is cool to the touch. This will take at least 10 minutes.
 In a separate mixing bowl, whip the heavy cream to soft peaks. Set aside.
When the egg mixture has cooled, add the chocolate base to the egg mixture and whisk to combine. Try to get it as consistent as possible without losing all of the air you've whipped into the eggs. We used the stand mixer for this, and it took about 1 minute.
Fold 1/3 of the reserved whipped cream into the chocolate mixture to loosen it, and then fold in the remaining whipped cream.
Pour into the prepared pans and cover with plastic wrap (directly touching the mixture so it doesn't allow in any air).
Freeze until very firm, at least 2 - 4 hours (preferably 6 – 8 hours).
When you're ready to plate, remove the marquise from the freezer at least 15 minutes before serving. While it's still hard, remove it from the pan by pulling on the parchment 'handles' or by flipping it over onto another piece of parchment.
Cut it into cubes and roll the cubes in cocoa powder. These will start to melt almost immediately, so don't do this step until all of your other plating components (meringue, caramel, spiced nuts, cocoa nibs) are ready. The cubes need to sit in the fridge to slowly thaw so plating components can be done during that time. They don’t need to be ready before the cubes are rolled in the cocoa powder.

Chocolate Base 

Servings: n/a - this is an ingredient for the chocolate marquise, not meant to be used separately

3 oz (85 grams/ 6 tablespoons) bittersweet chocolate (about 70% cocoa)
1/3 cup + 2 teaspoons (90 ml/3 fluid oz.) heavy cream
1/8 teaspoon salt
1/16 teaspoon cayenne
1 tablespoon (15 ml/ 1/2 fluid oz.) tequila
1 tablespoon (15 ml/ 1/2 fluid oz.) light corn syrup
1/4 teaspoon vanilla
1 tablespoon/(less than 1/4 ounce) cocoa powder (we used extra brut, like Hershey's Special Dark, but any Dutch-processed cocoa would be fine. Do not substitute natural cocoa powder.)
dash freshly ground black pepper
1/4 oz unsalted butter (1/2 tablespoon/8 grams), softened
  1. Place the chocolate in a small mixing bowl.
  2. In a double-boiler, warm the cream until it is hot to the touch (but is not boiling). Remove from the heat and pour over the chocolate.
  3. Allow it to sit for a minute or two before stirring. Stir until the chocolate is melted completely and is smooth throughout.
  4. Add the remaining ingredients and stir to combine.
  5. Set aside until cooled to room temperature. Do not refrigerate, as the base needs to be soft when added to the marquise mixture. If you make it the day before, you may need to warm it slightly. Whisk it until it is smooth again before using it in the marquise recipe.

Torched Meringue

Servings: Makes about 1 cup of meringue.
3 large egg whites
1/2 cup less 1 tablespoon (105 ml) (3½ oz or 100 gms) sugar
Splash of apple cider vinegar
1/8 teaspoon vanilla
Combine the egg whites, sugar and vinegar in the bowl of a stand mixer. Using your (clean, washed) hand, reach in the bowl and stir the three together, making sure the sugar is moistened evenly by the egg whites and they make a homogeneous liquid.
Over a saucepan of simmering water, warm the egg white mixture. Use one hand to stir the mixture continuously, feeling for grains of sugar in the egg whites. As the liquid heats up, the sugar will slowly dissolve and the egg whites will thicken. This step is complete when you don't feel any more sugar crystals in the liquid and it is uniformly warm, nearly hot.
 Remove the mixing bowl from the saucepan and return it to the stand mixer with the whisk attachment. Whisk until you reach soft peaks. In the last 10 seconds of mixing, add the vanilla to the meringue and mix thoroughly.
 When you're ready to plate the dessert, spoon the meringue onto a plate (or use a piping bag) and use a blowtorch to broil.


Caramel
Servings: Makes about 1/4 cup of caramel
1/4 cup (60 ml/2 fluid oz) (2 oz/55 gm) sugar
2 tablespoons (1 fluid oz./ 30 ml.) water
1/4 cup (2 fluid oz./ 60 ml.) heavy cream
1/4 teaspoon salt
In a heavy-bottomed saucepan, combine the sugar and water on medium-high heat. Boil until the water completely evaporates and the sugar caramelizes to a dark mahogany color.
Working quickly, add the cream to the darkened caramel. It will bubble and pop vigorously, so add only as much cream as you can without overflowing the pot.
 Return the pot to the stove on low heat and whisk gently to break up any hardened sugar. Add any remaining cream and continue stirring. Gradually, the hard sugar will dissolve and the caramel sauce will continue to darken. When the caramel has darkened to the point you want it, remove it from the heat. Add the salt and tequila and stir to combine. Set aside until ready to serve.


Spiced Nuts Directions:
  1. Preheat the oven to 350F. Line a sheet pan with parchment paper or foil.
  2. In a small bowl, combine the sugar, cinnamon, cayenne, and salt.
  3. In a larger mixing bowl whisk the egg white until it's frothy and thick.
  4. Add the spice mix to the egg white and whisk to combine completely.
  5. Add the nuts to the egg white mixture and toss with a spoon.
  6. Spoon the coated nuts onto the parchment paper-lined baking sheet.
  7. Bake the nuts for 30 minutes, or until they turn light brown. Allow the nuts to cool completely and they will get very crunchy. Set aside until ready to serve.

Plating

Plate with the torched meringue and drizzled caramel sauce, and toss spiced almonds and cocoa nibs around for garnish. You want to handle the cubes as little as possible because they get messy quickly and are difficult to move. However, you want to wait to serve them until they've softened completely. The soft pillows of chocolate are what make this dessert so unusual and when combined with the other elements, you'll get creamy and crunchy textures with cool, spicy, salty, bitter, and sweet sensations on your palate. 
Filled Meringue Coffee Cake

The March 2011 Daring Baker’s Challenge was hosted by Ria of Ria’s Collection and Jamie of Life’s a Feast. Ria and Jamie challenged The Daring Bakers to bake a yeasted Meringue Coffee Cake, a gorgeous brioche-like dough rolled jellyroll style around a whipped meringue and various fillings, shaped into a wreath and baked. "The cake is light and fluffy, barely sweet, the meringue miraculously melts into the dough as it bakes leaving behind just a hint of sweetness and adding to the perfect moistness of the cake."

One thing that is nice about the Daring Bakers is that there is a forum where people post their finished products for others to see and get advice. By mid-month a good many of the bakers have theirs done and it is good to scroll through to see what people chose to fill their versions with. Some really follow the instructions, so go way off on their own, but all help to give you ideas of the possibilities out there. 

Daring Bakers: Coconut Cream Panna Cotta

  
The February 2011 Daring Bakers’ challenge was hosted by Mallory from A Sofa in the Kitchen. She chose to challenge everyone to make Panna Cotta from a Giada De Laurentiis recipe and Nestle Florentine Cookies. This post focuses on the panna cotta. My other post focuses on the florentines.

I had already made my first panna cotta last year (see here) and so that part of this month's challenge was not new for me. But because I have to host a Mai Pham, Vietnamese style dinner next month, I chose to make a coconut cream panna cotta to see if it would work. It turned out fabulous, much better than I expected.  What took it over the top was because I used a blackberry honey that I bought last summer at the farmers market. Giada's recipe uses mostly honey to sweeten the panna cotta, versus the recipe I used last year that used only sugar. Both recipes are good in their own rights. 

One of my criteria for a good panna cotta is that it has a beautiful jiggle to it. This recipe did. For an example, see the video at the bottom of my Grange review here

This recipe is the Giada one adapted to use coconut cream. You will find coconut cream in Asian markets. It is much thicker than coconut milk, having the high fat content that you want for panna cotta.

Coconut Cream Panna Cotta 

1 cup whole milk
1 tablespoon (one packet) unflavored powdered gelatin
1 cup  whipping cream
2 cups coconut cream
1/3 cup honey
1 tablespoon granulated sugar
pinch of salt
  1. Pour the milk into a bowl or pot and sprinkle gelatin evenly and thinly over the milk (make sure the bowl/pot is cold by placing the bowl/pot in the refrigerator for a few minutes before you start making the Panna Cotta). Let stand for 5 minutes to soften the gelatin.
  2. Pour the milk into the saucepan/pot and place over medium heat on the stove. Heat this mixture until it is hot, but not boiling, about five minutes. (I whisk it a few times at this stage).
  3. Next, add the cream, honey, sugar, and pinch of salt. Making sure the mixture doesn't boil, continue to heat and stir occasionally until the sugar and honey have dissolved 5-7 minutes.
  4. Remove from heat, allow it to sit for a few minutes to cool slightly. Then pour into the glass or ramekin.
  5. Refrigerate at least 6 hours or overnight. Serve from ramekins or turn out on plates, To turn out, run a knife around the edge of the panna cotta. Place a hot rag around the ramekin for a few seconds and then flip the ramekin onto a plate to release the panna cotta. Add garnishes and serve.


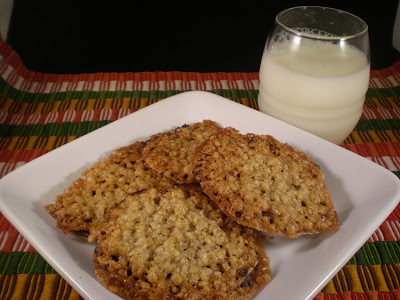
The February 2011 Daring Bakers’ challenge was hosted by Mallory from A Sofa in the Kitchen. She chose to challenge everyone to make Panna Cotta from a Giada De Laurentiis recipe and Nestle Florentine Cookies. This post focuses on the Florentines. My other post focuses on the panna cotta.

Florentines originated in Florence, Italy. My first exposure to them was the ones you find at Trader Joe's. Most recipes call for minced nuts in the caramelized sugar mixture, but this one calls for quick oats. Both taste the same since it is the caramelized sugar that is the real flavor.

This couldn't be an easier cookie to make. The most 'difficult' part would be to watch the oven to make sure you get them just the right color/doneness. I actually ended up switching the trays on the racks halfway through because the bottom rack was going so much faster. This worked well for me.

I would suggest being careful when spreading the chocolate if you want to make sandwiches. Since the cookies are so lacy/holey, the chocolate leaks through. You just want a thin layer.

Florentine Cookies

2/3 cup unsalted butter

2 cups quick oats
1 cup granulated sugar
2/3 cup  plain (all purpose) flour
1/4 cup dark corn syrup
1/4 cup  whole milk
1 tsp vanilla extract
pinch of salt
1½ cups dark or milk chocolate

Preheat oven to 375 degrees. Line baking sheets with parchment paper.
Melt the butter in a pan or microwave. Remove from heat. Add all ingredients but chocolate and mix thoroughly. Drop dough by teaspoons onto parchment. Slightly flatten them with the spoon. Bake 6-8 minutes until golden brown. Remove from oven and let cool on pan.
Melt chocolate in microwave or on top of a double boiler.
Spread chocolate on the bottom of one cookie and sandwich together to the bottom of another cookie. Or you can just drizzle chocolate along the tops of the individual cookies. Let cool for chocolate to harden. Enjoy!
Daring Bakers: Biscuit Joconde Imprime

The January 2011 Daring Bakers’ challenge was hosted by Astheroshe of the blog accro. She chose to challenge everyone to make a Biscuit Joconde Imprime to wrap around an Entremets dessert.

That means - a sponge cake where a pattern is imprinted in it and is used to create the surrounding shell of a filled dessert. The main part of the challenge was the decorated sponge, then we could fill it with whatever we wanted. I would highly recommend that you check out the DB link below for a couple of weeks. You'll see pictures of other people's before they take it down.

This was one of the best Daring Bakers' challenges yet. I learned a great, decorative technique that was not very difficult. I would certainly do this again for some special occasion. I used it as a dessert for a birthday dinner I made for a friend and I think it turned out rather well. 

pattern on parchment before sponge added
Since my friend works with flowers and plants, I decided to go with a floral theme. I only had a few gel colors left and so grabbed a royal blue and a green. I had seen others' examples and knew that I should mix the color dark for it to show well. You pipe your design onto parchment paper and freeze it for 30 minutes. Meanwhile you make the sponge and heat the oven. After the time is up, you spread the sponge batter over the pattern and then bake. The resulting sponge is flexible enough to be put into a mold. 

I made a chocolate dacquoise for the bottom and a no-bake cheesecake type filling. In the middle I placed some frozen blackberries. I flavored the cheesecake mixture with lemon curd and lemon zest. 


Patterned Joconde-Decor Paste
(I only used a half recipe, and even then, had plenty left over.)

YIELD: Two ½ size sheet pans or a 13” x 18” (33 x 46 cm) jelly roll pan

Ingredients
14 tablespoons/ 210ml/ 7oz/ 200g unsalted butter, softened
1½ cups plus1½ tablespoons/ 385ml/ 7oz/ 200g Confectioners' (icing) sugar
7 large egg whites - about 7 oz / 200g
1¾ cup/ 420ml/ 7¾ oz/ 220g cake flour
Food coloring gel, paste or liquid
COCOA Décor Paste Variation: Reduce cake flour to 6 oz / 170g. Add 2 oz/ 60 g cocoa powder. Sift the flour and cocoa powder together before adding to creamed mixture.

Directions:
  1. Cream butter and sugar until light and fluffy (use stand mixer with blade, hand held mixer, or by hand)
  2. Gradually add egg whites. Beat continuously.
  3. Fold in sifted flour.
  4. Tint batter with coloring to desired color, if not making cocoa variation.
Joconde Sponge

YIELD: Two ½ size sheet pans or a 13” x 18” (33 x 46 cm) jelly roll pan
Ingredients:
¾ cup/ 180 ml/ 3oz/ 85g almond flour/meal - *You can also use hazelnut flour, just omit the butter
½ cup plus 2 tablespoons/ 150 ml/ 2⅔ oz/ 75g confectioners' (icing) sugar
¼ cup/ 60 ml/ 1 oz/ 25g cake flour *See note below
3 large eggs - about 5⅓ oz/ 150g
3 large egg whites - about 3 oz/ 90g
2½ teaspoons/ 12½ ml/ ⅓ oz/ 10g white granulated sugar or superfine (caster) sugar
2 tablespoons/ 30 ml/ 1oz / 30g unsalted butter, melted
*Note: How to make cake flour: http://www.joythebaker.com/blog/2009/09/how-to-make-cake-flour/
Directions:
  1. In a clean mixing bowl whip the egg whites and white granulated sugar to firm, glossy peeks. Reserve in a separate clean bowl to use later.
  2. Sift almond flour, confectioner’s sugar, cake flour. (This can be done into your dirty egg white bowl)
  3. On medium speed, add the eggs a little at a time. Mix well after each addition. Mix until smooth and light. (If using a stand mixer use blade attachment. If hand held a whisk attachment is fine, or by hand. )
  4. Fold in one third reserved whipped egg whites to almond mixture to lighten the batter. Fold in remaining whipped egg whites. Do not over mix.
  5. Fold in melted butter.
finished decorated sponge, trimmed

Preparing the Joconde- How to make the pattern:
(Note: The directions here explain making a striped pattern. I chose to pipe a freehand pattern using a pastry bag.) 
  1. Spread a thin even layer of décor paste approximately 1/4 inch (5 millimeter) thick onto silicone baking mat with a spatula, or flat knife. Place mat on an upside down baking sheet. The upside down sheet makes spreading easier with no lip from the pan.
  2. Pattern the décor paste – Here is where you can be creative. Make horizontal /vertical lines (you can use a knife, spatula, cake/pastry comb). Squiggles with your fingers, zig zags, wood grains. Be creative whatever you have at home to make a design can be used. OR use a piping bag. Pipe letters, or polka dots, or a piped design. If you do not have a piping bag. Fill a ziplock bag and snip off corner for a homemade version of one. 
  3. Freeze for at least 15 minutes.
  4. After you remove from the freezer, immediate spread sponge batter over the pattern evenly.
  5. Bake at 475ºF /250ºC until the joconde bounces back when slightly pressed, approx. 15 minutes. You can bake it as is on the upside down pan. Yes, it is a very quick bake, so watch carefully.
  6. Cool. Do not leave too long, or you will have difficulty removing it from mat.
  7. Flip cooled cake on to a powdered sugared parchment paper. Remove silpat. Cake should be right side up, and pattern showing! (The powdered sugar helps the cake from sticking when cutting.)
Chocolate Dacquoise- this is a crisp meringue so use it as a base You could also use any cake you have as a base.
35 g confectioner's sugar
3 g cake flour
4 g cocoa powder
42 grams almond flour
50 grams egg whites
9 grams white sugar
Sift together first three ingredient's.
Mix in almond flour
Whip egg whites and sugar to medium peaks.
Fold the dry into meringue.
Draw a circle on parchment paper smaller than your mold. turn over. Pipe dacquoise in concentric circles inside drawn circle. It is smaller smaller than your mold so when you pour the bavarian over it, it will encase it completely. Pipe to 1/2 inch thickness. Bake at 320 f def convection until dry and crisp. Reserve.

Final assembly:
  1. Line a springform pan with plastic wrap.
  2. Place the dacquoise bottom into the pan.
  3. Cut and shape the patterned joconde around the sides of the pan with the pattern facing outward.
  4. Fill the entremet with whatever fillings you choose.


The 2010 November Daring Bakers’ challenge was hosted by Simona of briciole. She chose to challenge Daring Bakers’ to make pasta frolla for a crostata. She used her own experience as a source, as well as information from Pellegrino Artusi’s Science in the Kitchen and the Art of Eating Well.

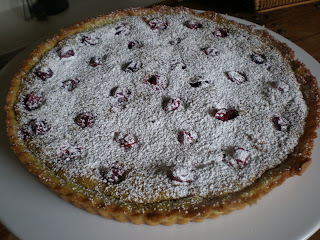
We were given the options of how we filled the crust. I decided to go with a pistachio frangipane and cranberries. The green and red are perfect for the holiday season. The only change I would make would be to add a lot more cranberries or fruit. This would be really good with apricots or tart apples as well.

I first got interested in frangipane because there is often a pistachio frangipane tart with raspberries served at the Tower Cafe. Frangipane can be made with other nuts as well, like almonds or hazelnuts.

Crust (Pasta Frolla)

Ingredients:
  • 1/2 c. minus 1 tablespoon [105 ml, 100 g, 3 ½ oz] superfine sugar (see Note) or a scant 3/4 cup [180ml, 90g, 3 oz] of powdered sugar
  • 1 and 3/4 cup [420 ml, 235 g, 8 1/4 oz.] unbleached all-purpose flour
  • a pinch of salt
  • 1 stick [8 tablespoons / 4 oz. / 115 g] cold unsalted butter, cut into small pieces
  • grated zest of half a lemon
  • 1 large egg and 1 large egg yolk, lightly beaten in a small bowl
Note: Superfine sugar is often also referred to as ultrafine, baker’s sugar or caster sugar. It’s available in most supermarkets. If you cannot find “superfine” sugar, you can make your own by putting some regular granulated sugar in a food processor or blender and letting it run until the sugar is finely ground.

  1. Put sugar, flour, salt, and lemon zest in the food processor and pulse a few times to mix.
  2. Add butter and pulse a few times, until the mixture has the consistency of coarse meal.
  3. Empty food processor's bowl onto your work surface.
  4. Make a well in the center of the mounded flour and butter mixture and pour the beaten eggs into it (reserve about a teaspoon of the egg mixture for glazing purposes later on – place in the refrigerator, covered, until ready to use).
  5. Add the lemon zest to your flour/butter/egg mixture.
  6. Use a fork to incorporate the liquid into the solid ingredients, and then use your fingertips.
  7. Knead lightly just until the dough comes together into a ball.
  8. Shape the dough into a flat disk and wrap in plastic wrap. Place the dough in the refrigerator and chill for at least two hours. You can refrigerate the dough overnight.


Pistachio Frangipane (double the recipe for this size tart)


1/2 cup plus 2 tablespoons shelled natural unsalted pistachios (about 3 ounces)
1/4 cup plus 1 tablespoon sugar
2 teaspoons grated orange peel
1/8 teaspoon baking powder
3 tablespoons unsalted butter, room temperature
1 large egg

Process 1/2 cup pistachios, 1/4 cup sugar, orange peel, and baking powder in processor until nuts are finely ground, scraping down sides occasionally. Add butter and egg; process until blended.


Assembly

  1. Heat the oven to 350ºF. 
  2. Take the pasta frolla out of the fridge, unwrap it and cut away ¼ of the dough. Reserve this dough to make a lattice top for the crostata if you like. Refrigerate this dough while you work on the tart base. (I just made a small jam tart for myself.)
  3. To help roll the crostata dough, keep the dough on top of the plastic wrap that you had it wrapped in. This can help rolling the dough and can also help when transferring the dough to your pan. You can also use parchment paper for this. However, you can also roll the dough directly on a work surface if you prefer.
  4. Lightly dust the top of the dough and your work surface (if you’re rolling directly on a work surface) with flour. Keep some flour handy to dust the dough as you go along.
  5. If the dough is very firm, start by pressing the dough with the rolling pin from the middle to each end, moving the rolling pin by a pin's width each time; turn the dough 180 degrees and repeat; when it softens, start rolling.
  6. Roll the dough into a circle about 1/8th inch (3 mm) thick.
  7. If you used the plastic wrap or parchment paper as rolling surface, flip dough over the pan, centering it, and delicately press it all around so the corners are well covered. Peel away the plastic wrap.
  8. Trim the excess dough hanging over the edges of the pan. Press the remaining dough around the border into the sides of the pan making sure the border is an even thickness all the way around.
  9. Prick the bottom of the dough with a fork in several places. 
  10. Place in the refrigerator for 30 minutes to rechill.
  11. After it has chilled, remove the crust and fill it with the frangipane. Top it with fruit of choice. Pistachio works well with tart fruits like apricots, tart apples, and cranberries.
  12. Bake in the oven for 40 minutes. You want to be able to pull a toothpick out clean.
  13. When done, remove the tart from the oven and let cool. If you have used a tart pan with a removable bottom, then release the tart base from the fluted tart ring. Make sure the tart is completely cool before slicing and serving. Top with a bit of whipped cream or creme fraiche.


Pistachio

I don't need to bake gluten-free, I choose to. To see why, read my blog post: Baking Gluten-fee Even Though I Don't Have To.


The October 2010 Daring Bakers challenge was hosted by Lori of Butter Me Up. Lori chose to challenge DBers to make doughnuts. She used several sources for her recipes including Alton Brown, Nancy Silverton, Kate Neumann and Epicurious.

I decided against any of her recipes because I was having a hankering for apple cider doughnuts like those up at Apple Hill. I went with a friend on Saturday to get my apple cider and some apples as well as to enjoy the ones sold at Rainbow Orchards.

Unfortunately mine are not as good as theirs. Maybe because I chose to go gluten-free. It could also have been due to old baking powder. I need to buy a fresh can and this recipe does call for two teaspoons of it. My doughnuts tasted fine. They were just really dense and definitely should be eaten fresh from the fryer. Like any good doughnuts, they lose their appeal the longer they sit out. I had toyed with the idea of using a recipe that did require yeast, but since Rainbow's don't have yeast I figured I would give the first attempt a go with just a regular cake recipe. Look in the future for me to try a yeast version - probably with pumpkin.

This was the first time I had made doughnuts and they weren't difficult at all. I guess I've always shied away from them because of the deep frying. I don't have a deep fryer and so just had to use a pot and guess at keeping my temperature correct.


Apple Cider Doughnuts

Original recipe altered from Food Network. If you make them normal, follow the black instructions. Gluten-free alterations are in red. 

2 apples
2 1/2 cups apple cider
3 1/2 cups all-purpose flour, plus more for dusting (or gluten-free blend + 2 t xanthan gum)
4 teaspoons baking powder
1/4 teaspoon baking soda
3 1/2 teaspoons ground cinnamon
1 teaspoon salt
1/4 teaspoon freshly grated nutmeg
1 2/3 cups granulated sugar
3 tablespoons vegetable shortening
1 large egg plus 1 egg yolk
1/4 cup buttermilk
1 teaspoon vanilla extract
1/4 cup confectioners' sugar
Vegetable oil, for frying

Core and coarsely chop the apples (do not peel). Combine with 1 1/2 cups cider in a medium saucepan over medium heat; cover and cook until softened, about 8 minutes. Uncover and continue cooking until the apples are tender and the cider is almost completely reduced, about 5 minutes. Puree with an immersion blender or in a food processor until smooth. Measure the sauce; you should have 1 cup. (Boil to reduce further, if necessary.) Let cool slightly.

Whisk the flour (or GF flour mixture), baking powder, baking soda, 1 1/2 teaspoons cinnamon, salt and nutmeg in a medium bowl.

Beat 2/3 cup granulated sugar and the shortening in another bowl with a mixer on medium speed until sandy. Beat in the egg and yolk, then gradually mix in the applesauce, scraping the bowl. Beat in half of the flour mixture, then the buttermilk and vanilla, and then the remaining flour mixture. Mix to make a sticky dough; do not overmix.

Scrape the dough onto a lightly floured sheet of parchment paper and pat into a 7-by-11-inch rectangle, about 1/2 inch thick. Cover with plastic wrap and refrigerate for at least 2 hours or overnight.

Meanwhile, make the glaze: Simmer the remaining 1 cup cider in a small saucepan over medium heat until reduced to 1/4 cup. Whisk in the confectioners' sugar until smooth and glossy, then set aside. Mix the remaining 1 cup granulated sugar and 2 teaspoons cinnamon in a shallow bowl; set aside for the topping.


Heat 2 inches of vegetable oil in a large heavy-bottomed pot over medium-high heat until a deep-fry thermometer registers 350 degrees. Line a baking sheet with paper towels. Cut the chilled dough into 12 rounds, using a floured 2 1/2- or 3-inch biscuit cutter, then cut out the middles with a 1-inch cutter (or use a doughnut cutter). Slip 2 or 3 doughnuts at a time into the hot oil and fry until golden brown, 1 to 2 minutes per side, adjusting the heat as needed. Transfer to the paper towels to drain.

Dip one side of each doughnut into the cider glaze, letting the excess drip off; dip just the glazed side in the cinnamon-sugar or roll all over in cinnamon-sugar, if desired. Serve warm.


GF Note: For those unfamiliar with my blog, I do not have any dietary reason that I need to eat gluten-free. I choose to bake gluten-free within my home because I have an interest in all the other types of grains and flours that have been used by cultures for centuries. Why is America so wheat focused? I figure I can get gluten filled products everywhere else outside my home. 


The September 2010 Daring Bakers’ challenge was hosted by Mandy of “What the Fruitcake?!” Mandy challenged everyone to make Decorated Sugar Cookies based on recipes from Peggy Porschen and The Joy of Baking.


I made these gluten-free as I continue to try to bake that way more. I was a little worried that the cookies might come out too crumbly to stand up to the decorating, but there was no problem.

This was my first time really decorating to this extent with royal icing. I think my only problem was that I didn't get it thin enough to 'flood' properly to get a nice smooth finish - they appear a little lumpy. But overall I was pleased with the results. I'm not an icing fan, so after I got the cookies above decorated I did the rest with much less icing, with the cookie showing through a lot more.

Basic Sugar Cookies: (note that italicized comments are from Mandy)


½ cup + 6 Tbsp Unsalted Butter, at room temperature
3 cups + 3 Tbsp All Purpose / Plain Flour or Gluten-free blend
3/4 t xanthan gum (only needed for GF version)
1 cup Caster Sugar / Superfine Sugar
1 Large Egg, lightly beaten
1 tsp Vanilla Extract / Or seeds from 1 vanilla bean

Directions
• Cream together the butter, sugar and any flavourings you’re using. Beat until just becoming
creamy in texture.
Tip: Don’t over mix otherwise you’ll incorporate too much air and the cookies will spread during
baking, losing their shape.

• Beat in the egg until well combined, make sure to scrape down the sides of the bowl.
Add the sifted flour and mix on low until a non sticky dough forms.
Tip: I don’t have a stand mixer so I find it easier to switch to dough hooks at this stage to avoid
flour flying everywhere.

• Knead into a ball and divide into 2 or 3 pieces.
• Roll out each portion between parchment paper to a thickness of about 5mm/1/5 inch (0.2 inch)
• Refrigerate for a minimum of 30mins.
Tip: Recipes commonly just wrap the whole ball of dough in clingwrap and then refrigerate it for an
hour or overnight, but by rolling the dough between parchment, this shortens the chilling time and
then it’s also been rolled out while still soft making it easier and quicker.

• Once chilled, peel off parchment and place dough on a lightly floured surface.
• Cut out shapes with cookie cutters or a sharp knife.
• Arrange shapes on parchment lined baking sheets and refrigerate for another 30mins to an hour.
Tip: It’s very important you chill them again otherwise they’ll spread while baking.
• Re-roll scraps and follow the above process until all scraps are used up.
• Preheat oven to 180°C (160°C Fan Assisted) / 350°F / Gas Mark 4.
• Bake until golden around the edges, about 8-15mins depending on the size of the cookies.
Tip: Bake same sized cookies together otherwise mixing smaller with larger cookies could result in
some cookies being baked before others are done.

Tip: Rotate baking sheets half way through baking if your oven bakes unevenly.
• Leave to cool on cooling racks.
• Once completely cooled, decorate as desired.
Tip: If wrapped in tinfoil/cling wrap or kept in airtight containers in a cool place, un-decorated
cookies can last up to a month.


Royal Icing:
2½ - 3 cups Icing / Confectioner’s / Powdered Sugar, unsifted
2 Large Egg Whites
2 tsp Lemon Juice
1 tsp Almond Extract, optional

Directions
• Beat egg whites with lemon juice until combined.
Tip: It’s important that the bowls/spoons/spatulas and beaters you use are thoroughly cleaned and
grease free.

• Sift the icing sugar to remove lumps and add it to the egg whites.
Tip: I’ve listed 2 amounts of icing sugar, the lesser amount is good for a flooding consistency, and the larger amount is for outlining, but you can add even more for a much thicker consistency good for writing. If you add too much icing sugar or would like to make a thinner consistency, add very small amounts of water, a few drops at a time, until you reach the consistency you need.
• Beat on low until combined and smooth.
• Use immediately or keep in an airtight container.
Tip: Royal Icing starts to harden as soon as it’s in contact with air so make sure to cover containers with plastic wrap while not in use.

The August 2010 Daring Bakers’ challenge was hosted by Elissa of 17 and Baking. For the first time, The Daring Bakers partnered with Sugar High Fridays for a co-event and Elissa was the gracious hostess of both. Using the theme of beurre noisette, or browned butter, Elissa chose to challenge Daring Bakers to make a pound cake to be used in either a Baked Alaska or in Ice Cream Petit Fours. The sources for Elissa’s challenge were Gourmet magazine and David Lebovitz’s “The Perfect Scoop”.

I had really wanted to do the Baked Alaska but time just wouldn't permit. I had to settle for the petit fours.

My first disappointment was in the required brown butter pound cake. I found it dry and unappetizing. Because I've made plenty of ice cream before and I had the time issues, I just ended up buying some ice cream and using that. Lastly, I just have a miserable time when it comes to dipping things in chocolate and them coming out attractive.

This all being said, I will not be sharing the recipes. Plenty of other bloggers will.

The July 2010 Daring Bakers’ challenge was hosted by Sunita of Sunita’s World – life and food. Sunita challenged everyone to make an ice-cream filled Swiss roll that’s then used to make a bombe with hot fudge. Her recipe is based on an ice cream cake recipe from Taste of Home.

As soon as I saw this challenge I knew that I'd use it for my BFF's birthday. The challenge was when to fit in the making of the components. Luckily I had almost all the ingredients in stock, I only needed to buy bananas and cream. Also, the individual parts were all simple recipes. I just needed to consider things like freezing times between each step.


I really liked the cake element with the chocolate genoise cake. Simple, light, soft and fluffy. On reflection, I think I should have rolled it along the long side instead of along the short side. This would have resulted in more smaller slices which would make a prettier design on the outside of the bowl.

I don't care for chocolate ice cream and so I made a banana one for the bottom layer. I also had some left over vanilla from the big canning weekend and so I used that in addition to making a small batch of vanilla.


I got rave reviews from everyone at the party. One 12 year old said it was 'the best cake EVER!' The host of the party begged to keep the leftovers (about 1/4 of the total). I had no problem with that since I wasn't interested in transporting a melting cake back home on a 15 minute drive.

I would make this again for the right occasion. It's easy, just be sure to allot enough time for the freezings.


I'm not including the ice cream recipes below. You can make whatever you like or just buy some from the store.

Swiss Rolls

6 medium sized eggs
1 C caster sugar
8 oz powdered sugar for rolling
6 T all purpose (plain) flour
5 T natural unsweetened cocoa powder, sifted together
2 T boiling water
a little oil for brushing the pans

For the filling-

2C whipping cream
1 vanilla pod, cut into small pieces of about 1/2 cm (or 1 tsp vanilla extract)
5 T sugar

Pre heat the oven at 400 deg F approximately. Brush the baking pans ( 11 inches by 9 inches ) with a little oil and line with greaseproof baking paper. If you have just one pan, bake one cake and then let the pan cool completely before using it for the next cake.
In a large mixing bowl, add the eggs and sugar and beat till very thick; when the beaters are lifted, it should leave a trail on the surface for at least 10 seconds.
Add the flour mixture, in three batches and fold in gently with a spatula. Fold in the water.
Divide the mixture among the two baking pans and spread it out evenly, into the corners of the pans.
Place a pan in the center of the preheated oven and bake for about 10-12 minutes or till the center is springy to the touch.
Spread a kitchen towel on the counter and sprinkle a little caster sugar over it. (I prefer using another piece of parchment paper.)
Turn the cake on to the towel and peel away the baking paper. Trim any crisp edges.
Starting from one of the shorter sides, start to make a roll with the towel going inside. Cool the wrapped roll on a rack, seam side down.
Repeat the same for the next cake as well.
Grind together the vanilla pieces and sugar in a food processor till nicely mixed together. If you are using vanilla extract, just grind the sugar on its own and then add the sugar and extract to the cream.
In a large bowl, add the cream and vanilla-sugar mixture and beat till very thick.
Divide the cream mixture between the completely cooled cakes.
Open the rolls and spread the cream mixture, making sure it does not go right to the edges (a border of 1/2 an inch should be fine).
Roll the cakes up again, this time without the towel. Wrap in plastic wrap and chill in the fridge till needed, seam side down.

Fudge Sauce for center layer

1 C sugar
3 T natural unsweetened cocoa powder
2 T cornstarch
1 1/2 C water
1 T butter
1 t vanilla extract

In a small saucepan, whisk together the sugar, cocoa powder, cornflour and water.
Place the pan over heat, and stir constantly, till it begins to thicken and is smooth (for about 2 minutes).
Remove from heat and mix in the butter and vanilla. Keep aside to cool .

Assembly

Cut the Swiss rolls into 20 equal slices.
Cover the bottom and sides of the bowl in which you are going to set the dessert with cling film/plastic wrap.
Arrange two slices at the bottom of the pan, with their seam sides facing each other. Arrange the Swiss roll slices up the bowl, with the seam sides facing away from the bottom, to cover the sides of the bowl. Cover the bowl with plastic wrap and freeze till the slices are firm (at least 30 minutes).
Soften the vanilla ice cream. Take the bowl out of the freezer, remove the cling film cover and add the ice cream on top of the cake slices. Spread it out to cover the bottom and sides of the bowl. Cover the bowl with plastic wrap and freeze till firm ( at least 1 hour).
Add the fudge sauce over the vanilla ice cream, cover and freeze till firm.
Soften the chocolate ice cream and spread it over the fudge sauce. Cover with plastic wrap and freeze for at least 4-5 hours till completely set.
Remove the plastic cover, and place the serving plate on top of the bowl. Turn it upside down and remove the bowl and the plastic lining. If the bowl does not come away easily, wipe the outsides of the bowl with a kitchen towel dampened with hot water. The bowl will come away easily.

The June 2010 Daring Bakers’ challenge was hosted by Dawn of Doable and Delicious. Dawn challenged the Daring Bakers’ to make Chocolate Pavlovas and Chocolate Mascarpone Mousse. The challenge recipe is based on a recipe from the book Chocolate Epiphany by Francois Payard.

My problem with this challenge was that they wanted it in chocolate. Thing is, I'm really kinda picky when it comes to chocolate. I love it, but only certain ways. For instance, I love chocolate candy and cake, but don't like it as ice cream, pudding, or mousse (this last I'll eat if I have to LOL). So I did mine without the chocolate.

Pavlovas are named after a Russian ballerina named Anna Pavlova. They are essentially meringue topped with cream and fruit. There is controversy between Australia and New Zealand as to where it was created, but research seems to indicate New Zealand (which my Kiwi friend is very proud of).

There are two styles of pavlovas. This challenge was presented as individual serving size. The pavlovas were therefore very crispy. The traditional style is to make it as a giant, cake sized meringue. Apparently in that version the outside shell is nice and crispy but the inside is marshmallowy soft. This sounds very interesting to me and so I will probably try that version next weekend for July 4th.


Meringue is simply egg whites and sugar beaten to very stiff. I took this mixture and used a decorator bag and tip to squeeze out the circle shells. I tried to create a bit of a lip on them to hold the toppings.

The challenge had a mascarpone mousse and a mascarpone cream. Talk about fattening! I made both and had a couple of issues. The mascarpone mousse came out perfectly except that there was no sweetness to it and so it was kind of drab. Perhaps if I had done the chocolate version it would have had the sweetness. Next time I would add a bit of sugar. But keep in mind that when combined with all the other elements (meringue, cream, fruit) there was plenty of sweetness.

The cream starts with a creme anglaise. My problem here is that I guess I overcooked it because the cream curdled. So I just forced it through a fine sieve over and over to cream it out again before I added the mascarpone.

At our party I decided to add some of our lemon curd as well. So the layers went: meringue shell, lemon curd, mascarpone mousse, fruit (plum/nectarine), and mascarpone cream on top. Everyone loved it, although Paul thought there were too many elements. I can't wait to try the other version.


Meringue shells

3 large egg whites
½ cup plus 1 tbsp (110 grams) white granulated sugar

Place a rack in the center of the oven and preheat to 200º F (95º C) degrees. Line two baking sheets with silpat or parchment and set aside.
Put the egg whites in a bowl and whip until soft peaks form. Increase speed to high and gradually add granulated sugar about 1 tbsp at a time until stiff peaks form. (The whites should be firm but moist.)
Fill pastry bag and pipe meringue onto parchment in whatever shape desired.
Bake in oven for 2-3 hours until the shells are crispy.
Store in an air-tight container for up to three days.

Mascarpone Mousse (for the top of the Pavlova base):

1 ½ cups (355 mls) heavy cream (cream with a milk fat content of between 36 and 40 percent)
grated zest of 1 average sized lemon
1 2/3 cups (390 mls) mascarpone
pinch of nutmeg
2 tbsp (30 mls) Grand Marnier (or orange juice)

1. Put ½ cup (120 mls) of the heavy cream and the lemon zest in a saucepan over medium high heat. Transfer the mixture to a bowl and let sit at room temperature until cool.
2. Place the mascarpone, the remaining cup of cream and nutmeg in a bowl. Whip on low for a minute until the mascarpone is loose. Add the Grand Marnier and whip on medium speed until it holds soft peaks. (DO NOT OVERBEAT AS THE MASCARPONE WILL BREAK.)

Crème Anglaise (a component of the Mascarpone Cream below):

1 cup (235 mls) whole milk
1 cup (235 mls) heavy cream
1 vanilla bean, split or 1 tsp pure vanilla extract
6 large egg yolks
6 tbsp (75 grams) sugar

1. In a bowl, whisk together the egg yolks and sugar until the mixture turns pale yellow.
2. Combine the milk, cream and vanilla in a saucepan over medium high heat, bringing the mixture to a boil. Take off the heat.
3. Pour about ½ cup of the hot liquid into the yolk mixture, whisking constantly to keep from making scrambled eggs. Pour the yolk mixture into the pan with the remaining cream mixture and put the heat back on medium. Stir constantly with a wooden spoon until the mixture thickens enough to lightly coat the back of a wooden spoon. DO NOT OVERCOOK.
4. Remove the mixture from the heat and strain it through a fine mesh sieve into a bowl.

Mascarpone Cream (for drizzling):

1 recipe crème anglaise
½ cup (120 mls) mascarpone
2 tbsp (30 mls) Sambucca (optional)
½ cup (120 mls) heavy cream

1. Prepare the crème anglaise. Slowly whisk in the mascarpone and the Sambucca and let the mixture cool. Put the cream in a bowl and beat with electric mixer until very soft peaks are formed. Fold the cream into the mascarpone mixture.

Part two of my April Daring Bakers' Challenge was a sweet steamed pudding. This was an optional project I took on after having made my savory steak pudding and being rather unimpressed.

I found a chocolate pudding recipe online and doctored it up a bit with spices. The flavor came out fabulous, but as far as a steamed pudding versus a baked cake, I'll take the baked one. You can see that my pudding broke apart a bit and it was very crumbly, although moist. I attribute this to my using gluten-free flour instead of regular flour.

Serve this with a chocolate sauce, or some whipped or ice cream.


Spiced Steamed Chocolate Pudding


2 oz chocolate
1 tablespoon butter
8 oz plain or gluten-free flour
1 1/2 teaspoons baking powder
Pinch of salt
1/2 teaspoon of cinnamon blend
1/8 teaspoon ground cayenne pepper
1 egg
4 oz sugar
120ml milk with 1 teaspoon vanilla extract added

1. Lightly grease a 1.5 pint pudding basin.
2. Melt chocolate and butter together.
3. Sift flour, cinnamon, cayenne, baking powder and salt together.
4. Beat egg; add sugar gradually and continue beating till mixture is creamy. Add melted chocolate and mix thoroughly.
5. Stir dry ingredients alternately with milk mixture, beating until smooth after each addition.
6. Fill the greased pudding basin 2/3 full. Cover tightly with a roomy tin foil or greaseproof paper lid. Secure lid with string.
7. Place inside a large pot and pour water in until the pudding is half immersed in water. Bring to a boil and then simmer for 1 1/2 hours.
8. Serve hot with custard, whipped or ice cream.

The April 2010 Daring Bakers’ challenge was hosted by Esther of The Lilac Kitchen. She challenged everyone to make a traditional British pudding using, if possible, a very traditional British ingredient: suet.

I was thrilled to see this as the challenge because I have wanted to make a steamed pudding for some time. It's been on my to-do list for about a year. My problem is not having a big enough pot to be able to put a bowl with the pudding in inside. So I borrowed one from Ann at Sacatomato. (Hint, hint for future gift!)

Why steam these puddings and pies instead of bake? An enlightenment hit me when I thought more about it. In the earlier centuries only large manors and castles had ovens. The small townfolk just had hearths and had to cook everything in pots or on spits. Steaming is a method of making a 'baked' good without an oven. Now you can have a 'cake' without having to bake it.


Suet is the really hard fat that is found around the kidney area of a cow. You might have come across pieces of suet in your raw steaks too. It's the harder, crumblier fat unlike the softer, slippery fat found throughout. You can get it from the butcher or buy it in some places after it has been processed.

I wanted to do the full experience of this challenge so I called Taylor's Market and ordered it. When I went to pick it up they gave it to me for free. That was a nice surprise and actually understandable since it is the fatty trimmings that would have gone in the garbage anyway. Thanks, Taylors.


So the first step was to take it home and render it. After you trim away as much connective tissue as possible, you then mince the fat or grate it on a grater. It's so hard and crumbly that I just minced it up with a knife and threw it in a pot. You melt the fat over very low heat. You have to be careful because fat is very hot. Many directions tell you to strain the liquid fat through a cheesecloth to remove all the other tissues. That's the fried bits you see in the pot. I just used a skimmer and lifted out the tissue bits and was left with the melted fat.


After it had cooled a bit I poured it into a tupperware and stuck it in the frig to harden. You want it to reharden into a block so that you can grate it again for the actual recipe.

The challenge required you to make a steamed pudding, use suet if possible, and you could choose whether you wanted sweet or savory. I wanted to do sweet initially, but then thought I ought to try the savory because that would equate to dinner. I found a steak & kidney pie recipe except that I made it with steak only. I had steak and kidney pie as a child because my dad is British and I never was a fan of the kidneys.


The first part of the recipe is to make the crust. It consists of flour, suet, salt, pepper, and water. The suet had to be grated to get it into very small bits to toss in the flour. You add enough water to get it into a nice dough ball for rolling and then roll it out big enough to fit into a ceramic or glass bowl. Then add the meat mixture, some broth, and top with a lid of crust.


I topped the lid with parchment paper, doubled aluminum foil, and then tied it tightly with string.


I filled the borrowed stockpot with about four inches of water and then used a small stainless steel bowl to help lift my pudding bowl. The pudding bowl sat above the water then. Lid on top and turn it on. The pudding had to steam for four hours. Here is the finished product...


I found that there was way too much crust and ended up throwing half of it away. I wished that there had been more juice/gravy as well. If I were to do it again, I'd add more broth. And, actually, I might opt for Guiness and Worchestershire sauce as seen in another recipe. I found the whole innards - beef, onions, gravy - to be rather boring. Another change I'd make would probably be to just bake it in pie form instead of going through the hassle of steaming. The dough was nice and moist, but I guess I prefer the flakiness of pie crust instead.

So I didn't care for this challenge in terms of a savory pudding. But it made me curious enough to try a sweet version as well. So see my post in a day or so about my chocolate steamed pudding that I also made.